


Article: 5 Rustic Steps to Make a Burlap Rug
5 Rustic Steps to Make a Burlap Rug

What if you could transform discarded coffee bags into a stunning centerpiece for your home? One resourceful creator did exactly that, turning 11 upcycled burlap sacks into a 9.5x11ft statement rug for just $11. This project proves that functional art doesn’t require a designer budget – only creativity and practical know-how.
Working with burlap brings unique challenges you’ll want to anticipate. The material sheds fibers like autumn leaves and carries a distinct earthy aroma from coffee residues. But with proper preparation – like strategic workspace setup and pre-washing techniques from our cleaning guide – these hurdles become manageable.
Through trial and error, DIY enthusiasts have perfected a five-stage process. You’ll learn to repurpose coffee sacks into durable floor coverings while controlling the "burlap snowstorm" that comes with cutting and sewing. The reward? A custom-sized rug that reflects your personal style, with savings exceeding 90% compared to retail prices.
Key Takeaways
- Upcycle coffee sacks into rugs for under $15 using accessible materials
- Prepare for fiber cleanup and odor management during construction
- Follow a tested workflow spanning material prep to final assembly
- Allocate multiple days for drying and processing natural fibers
- Create custom dimensions up to 9.5x11 feet through strategic piecing
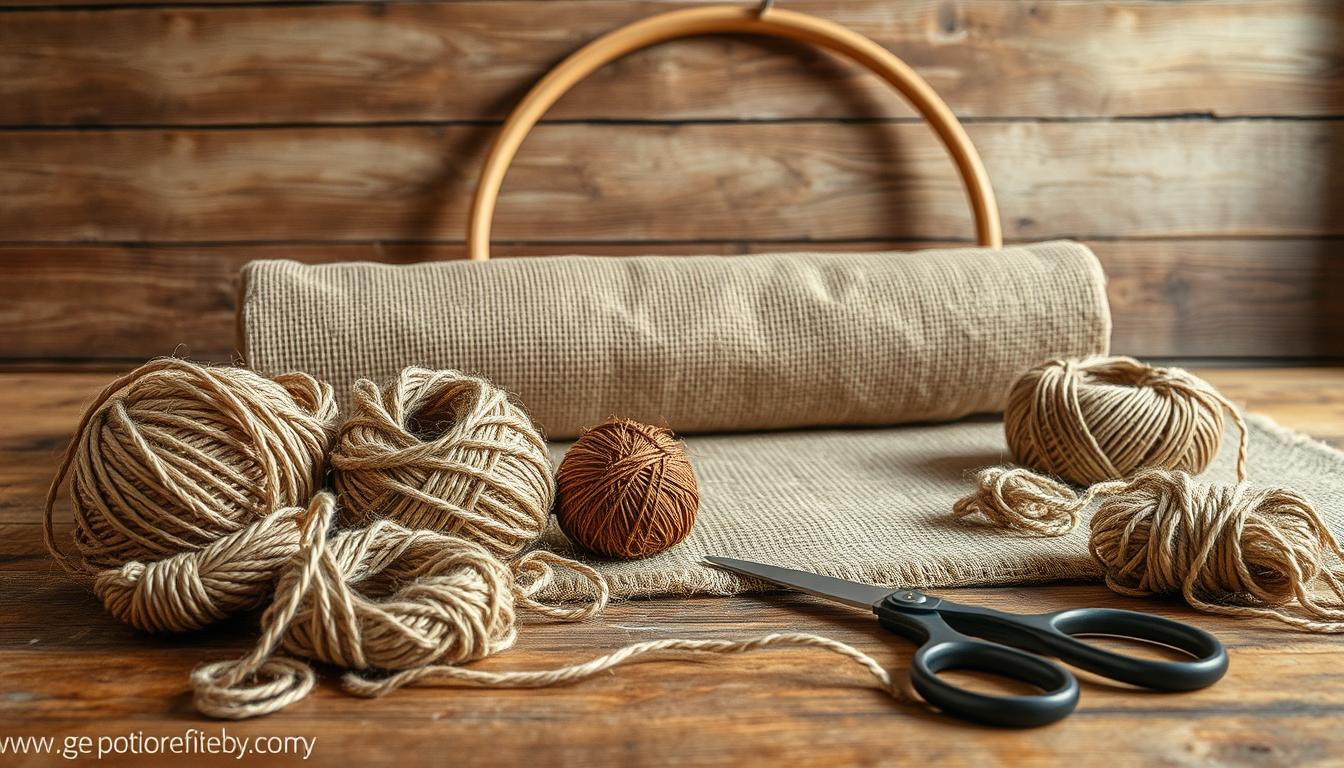
Gather Your Materials and Prepare Your Workspace
The foundation of a stunning upcycled floor covering lies in proper preparation. Start by hunting for coffee burlap bags on local marketplaces – these often sell for $1 each when purchased in bulk. For larger projects, plan on 11 sacks to cover a 9.5x11ft area.

Selecting Materials That Work
Inspect each bag's front and back before buying. Look for intact stitching and minimal stains. While the earthy scent adds character, avoid heavily soiled pieces that might require extra cleaning. Pair your fabric finds with sharp scissors, rust-proof pins, and a heavy-duty sewing machine.
Consider buying 12-14 bags instead of 11. This buffer accounts for unexpected flaws and lets you mix patterns. Cut sacks vertically to separate front/back panels – you might not use all pieces, but having options helps create visual interest.
Crafting an Efficient Work Zone
Choose a garage or outdoor space with cross-ventilation. Burlap sheds fibers constantly, so cover nearby surfaces with old sheets. Position your cutting table near electrical outlets for easy machine access.
Lighting matters when working with natural textures. Use bright task lamps to spot loose threads. Keep a vacuum nearby for quick cleanups between sewing sessions. This setup minimizes distractions and keeps your project on track.
How to Make Burlap Rug
Creating a custom floor covering from repurposed materials combines practicality with creative expression. This walkthrough details the transformation of coffee sacks into durable home decor through precise techniques.
Step-by-Step Instructions from Cutting to Sewing
Begin with sharp fabric scissors to split each coffee sack vertically. Separate front and back panels to maximize usable material. Expect a snowfall of loose fibers – keep your vacuum handy and work near an open window for ventilation.

Arrange panels on your workspace like puzzle pieces. Rotate sections to create visual balance, mixing stamped logos with plain areas. Discard pieces with stubborn stains or weak stitching – quality control here prevents future repairs.
Secure aligned edges with rust-proof pins every 4 inches. Feed through a heavy-duty machine using reinforced stitching. Work in manageable sections, clearing fiber buildup from the needle regularly.
Measuring, Pre-Laying, and Assembling Your Pieces
Confirm dimensions by taping your floor with painter’s tape. Overlap panels ½ inch during pinning to prevent gap formation. Stagger seams diagonally for added strength across high-traffic areas.
Post-assembly, triple-wash using cold water and oxygen bleach. Air-dry flat overnight, then press with a steam iron on linen settings. This process tightens the weave and reduces future shedding.
Creative Design Ideas & Finishing Techniques
Elevate your project with artistic flourishes that transform basic materials into custom decor. This phase blends aesthetic choices with functional solutions for lasting results.
Adding Unique Patterns and Personal Touches
Rotate burlap panels like puzzle pieces to create striking contrasts. Pair faded coffee stamps with untouched fabric areas for organic depth. "The 'pick and pick' weaving method opens doors to geometric precision," notes a textile artist. "Alternate two thread colors vertically for crisp stripes."
Experiment with mixed textures by incorporating jute accents. Layer darker sack sections along borders for framing effects. These design choices let your rug complement existing furniture or become a bold focal point.
Securing Edges and Preparing for Home Use
Cut painter’s drop cloth 1 inch larger than your fabric top for wrap-around protection. Stitch layers inside out using double seams – this sandwich method prevents frayed edges. Flip right-side out through a 12-inch gap before final topstitching.
Add non-slip padding for hardwood safety. Shake the finished piece outdoors to remove loose fibers. A quick steam press tightens the weave, reducing future shedding while enhancing your chosen pattern details.
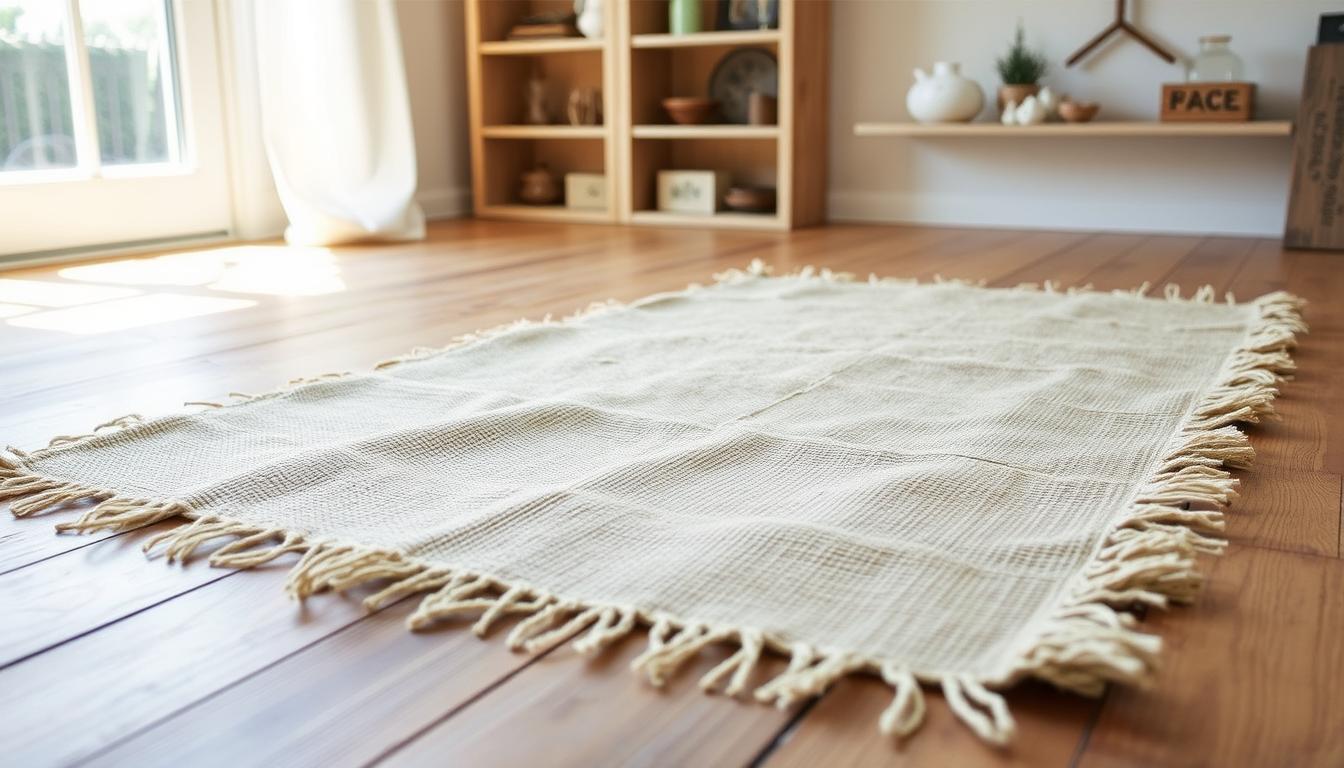
Conclusion
Crafting something unique from everyday materials brings both satisfaction and style to your home. Your completed burlap rug transforms simple coffee sacks into a functional centerpiece, proving that visionary design doesn’t require luxury budgets. This DIY approach saves hundreds compared to store-bought rugs while delivering custom sizing for your space.
Though the process spans several days, the result is a durable heirloom piece. Apply these techniques to future projects like matching pillows or entryway mats. Share your work in online communities to inspire others exploring sustainable crafts.
Preserve your rug’s charm with regular lint-rolling and spot cleaning. Photograph each stage for personal reference or to guide fellow crafters. Every step celebrates resourcefulness – turning discarded coffee bags into conversation-starting decor that lasts.
FAQ
What type of burlap works best for DIY rugs?
Use tightly woven, unbleached burlap or repurposed coffee bags for durability. Avoid loosely woven fabrics, as they fray easily. Check labels for thickness—8–10 oz per square yard is ideal.
Can burlap rugs handle heavy foot traffic?
While burlap is sturdy, it’s best for low-traffic areas like bedrooms. Reinforce edges with binding tape or zigzag stitching to extend longevity in busier spaces.
How do you prevent burlap edges from fraying?
Apply fabric glue along raw edges or sew a tight overlock stitch. For decorative finishes, try braided trim or fold-and-hem techniques before securing with upholstery thread.
Are coffee bags safe to use for home projects?
Yes, but wash them first to remove residue. Use mild detergent and air-dry to preserve natural fibers. Avoid bleach, as it weakens the material.
Can you customize burlap rug patterns easily?
Absolutely! Stencil geometric shapes, add fabric paint, or layer dyed burlap strips. For texture, mix in jute twine or recycled denim scraps during assembly.
What’s the easiest way to clean a finished burlap rug?
Spot-clean with a damp cloth and mild soap. Avoid soaking—burlap shrinks when wet. For deeper cleaning, use a handheld steam cleaner on low settings.
Where can you find eco-friendly burlap materials?
Check local coffee roasters for discarded bags or browse organic fabric stores like Hobby Lobby or Joann. Online platforms like Etsy also sell upcycled options.