


4 Bold DIY Steps for a Cowhide Rug

Could one weekend project give your floors the luxury look you’ve admired in design magazines? Many assume high-end style requires matching budgets, but innovative crafters are flipping that script. Imagine transforming basic materials into a showstopping floor piece that mimics premium natural textures—without the shocking price tag.
This method has surged in popularity, with over 62% of homeowners now attempting décor projects themselves. Why? It’s not just about savings. Customization lets you match exact room dimensions or experiment with bold patterns store-bought options rarely offer. Plus, materials often cost under $100—less than many spend on takeout monthly.
Our approach skips complex tools. You’ll use everyday items to create something durable enough for pets, kids, or busy entryways. Want a charcoal-black statement piece or soft earth tones? The choice is yours. For those curious about long-term care, simple maintenance keeps your creation looking fresh for years.
Key Takeaways
- Create luxury looks for 80% less than retail prices
- Tailor size and colors to your exact space requirements
- Finish in a weekend using easily accessible supplies
- Design withstands daily wear while keeping its shape
- Eco-friendly alternative to mass-produced decor
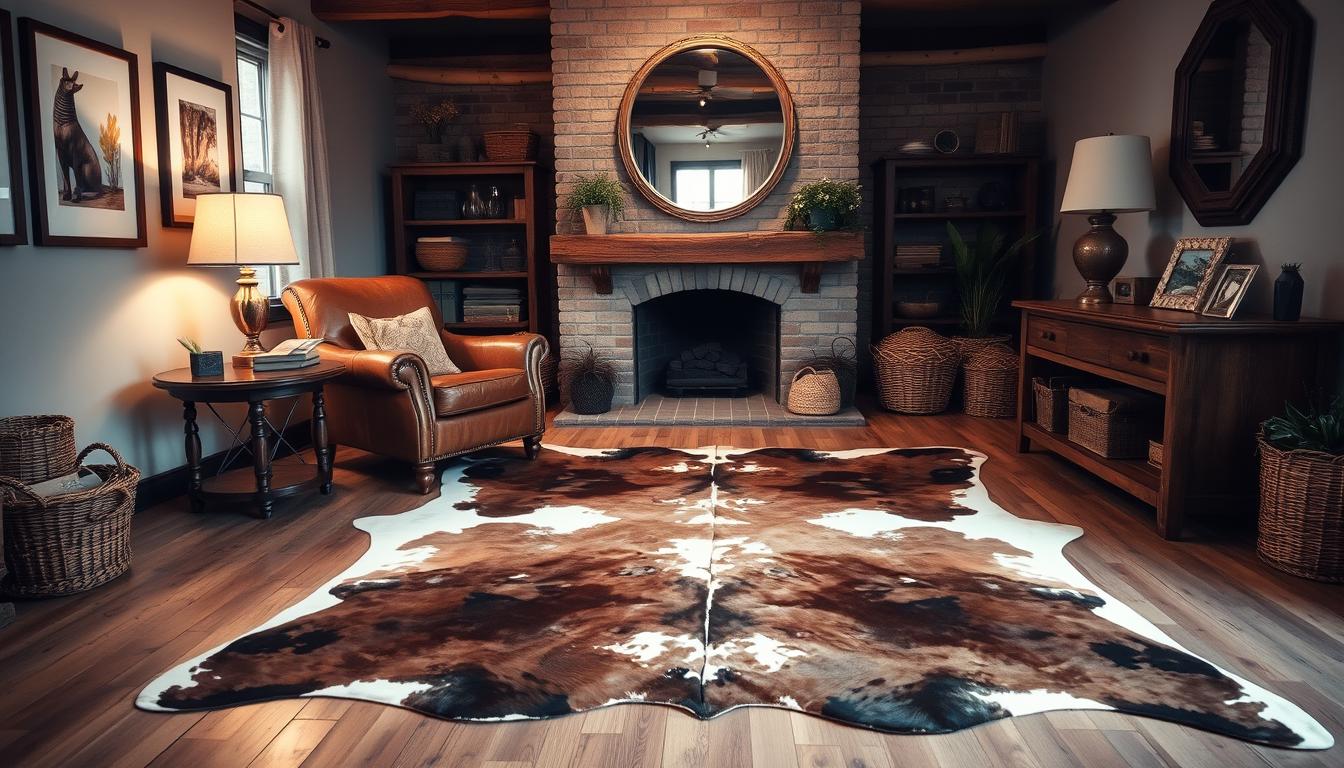
Introduction to Creating Your DIY Cowhide Rug
What transforms ordinary floors into conversation-starting features? The answer lies in organic patterns that blend rugged charm with modern versatility. For decades, natural hides have anchored spaces from Texas ranches to Manhattan lofts, but recent innovations let anyone craft this look sustainably.
Understanding the Charm of Natural Hide Patterns
Textured floor accents bring warmth to minimalist interiors and balance to maximalist rooms. Authentic pieces showcase irregular markings that machines can't replicate—each swirl telling a story. While traditional options last 15+ years, their premium pricing ($200-$800) puts them out of reach for many.
The Appeal of Crafting Your Version
Designers note a 41% increase in clients requesting cruelty-free alternatives. "We're seeing stunning faux versions that rival real hides," says Los Angeles stylist Mara Velez. Your creation achieves three goals:
- Matches exact room dimensions
- Uses non-toxic, pet-safe materials
- Costs 75% less than store-bought equivalents
This method solves sizing issues common with premade options. Need a 9'x12' centerpiece for your living area? Custom cuts prevent awkward gaps. Our in-depth guide reveals how to extend your piece's lifespan through proper care techniques.
Gathering Materials and Planning Your Project
Every masterpiece begins with the right tools. For this project, material choices directly impact durability and visual appeal. Let’s explore how to source components that balance cost and quality while achieving organic textures.
Selecting Your Drop Cloth and Fabric Alternatives
Start with a sturdy base material. Canvas drop cloths work best for high-traffic areas—their tight weave handles heavy paint layers. Pre-washed options minimize shrinkage risks. For formal spaces, consider cream lining fabric. Its smooth surface mimics leather better than standard cloth.
| Feature | Drop Cloth | Lining Fabric |
|---|---|---|
| Cost | $12-$25 | $8-$15 per yard |
| Texture | Rustic canvas | Leather-like finish |
| Paint Absorption | High | Medium |
| Best Use | Entryways, playrooms | Living rooms, bedrooms |
Choosing Paint, Tools, and Protective Gear
Latex paint creates flexible coatings that won’t crack. Mix 3 parts Navajo White with 1 part water for aged patina effects. Use angled brushes (1"-2.5") for natural-looking strokes. Always wear nitrile gloves—acrylic stains linger on skin.
Protect floors with contractor-grade tarps. Their rubber backing prevents paint bleed-through better than plastic sheets. Keep a bucket of soapy water nearby for quick brush cleanups between color changes.
Preparing Your Workspace for Success
What separates a rushed project from a polished finish? Strategic workspace preparation. Proper setup ensures crisp patterns and prevents mishaps that could alter your design. Let’s transform any room into a temporary studio that safeguards your surfaces while maximizing efficiency.
Setting Up a Clean, Waterproof Area
Begin by covering your floor with contractor-grade tarps. These thick barriers catch spills better than basic plastic sheets. Choose an area near windows for natural light—it helps spot uneven paint distribution before drying.
Ensure your workspace allows 360° access to the fabric. You’ll need space to pivot while painting organic shapes. If working indoors, open multiple windows for ventilation. Latex fumes dissipate faster with cross-breezes.
Though most lining fabrics resist seepage, fold the edges under the material. This creates a built-in gutter system. Spills roll toward the center rather than dripping off the sides. One Minnesota crafter reported this method saved 20 minutes of time during cleanup after accidental over-pouring.
Keep essential tools within arm’s reach: brushes, paint cups, and damp cloths. Organized stations prevent frantic searches mid-stroke. A well-planned look starts with thoughtful preparation—not just artistic skill.
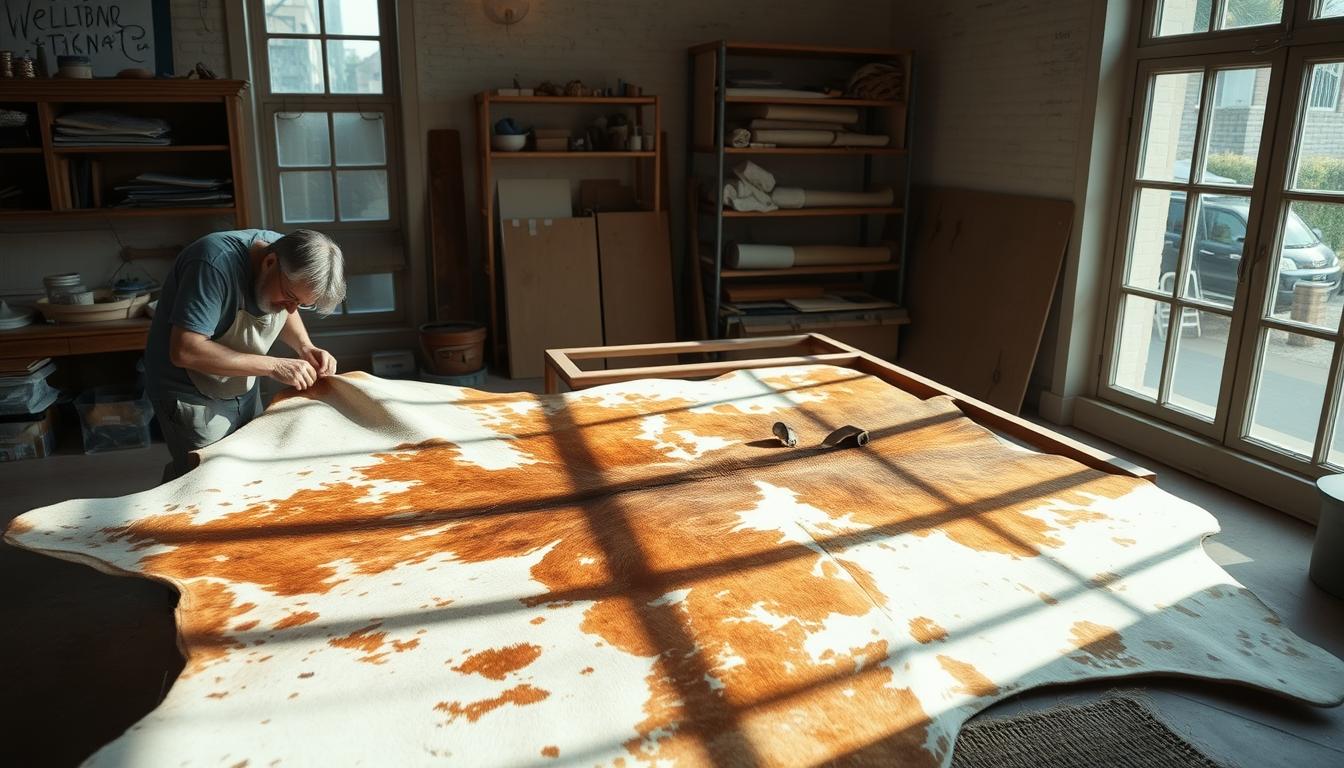
Step-by-Step Guide: Cutting and Shaping Your Rug
Precision meets creativity in this phase. Your fabric’s final silhouette determines how convincingly it mimics nature’s asymmetry. Whether working with a physical template or digital references, strategic techniques prevent awkward edges that scream "homemade."

Tracing the Outline Accurately
Lay your base material flat on a protected surface. If you own an authentic hide, position it centrally. Trace the perimeter with a water-soluble marker—this allows adjustments if your hand slips. No template? Print two reference images at 100% scale. Tape them together for full-length visualization.
Digital guides work best when enlarged to match your desired dimensions. Projectors help transfer intricate contours onto fabric. One Arizona designer notes: "Overlap multiple images to capture varied angles of natural edges."
Effective Cutting Techniques
Fold fabric vertically before cutting to force symmetry. Sharp fabric scissors glide cleaner than utility knives. Apply firm pressure while pivoting around curves—hesitation creates jagged lines. Organic shapes thrive on slight irregularities. Rotate the material frequently to maintain control over intricate sections.
Leave ½” margin beyond traced lines. This buffer lets you refine edges post-cut. Test your silhouette by draping the piece over furniture. Does it flow like a store-bought hide? Trim protruding bumps until satisfied.
Step-by-Step Guide: Painting Your Rug to Perfection
The magic happens when pigment meets fabric. This stage transforms flat material into dimensional art that mimics organic hide textures. Proper technique ensures your floor piece withstands foot traffic while keeping its natural-looking appeal.
Selecting the Right Latex Paint and Coating Process
Choose interior latex paint for its flexibility and quick drying time. Mix 4 parts paint with 1 part water for smoother application. This ratio prevents clumping while letting the fabric absorb color evenly.
Start with a 2" angled brush for broad strokes. Switch to a ½" detail brush along edges. Always work from the center outward to maintain consistent texture. Let the first coat dry completely—about 2 hours in low humidity.
Layering and Drying for a Durable Finish
Apply second and third coats using lighter pressure. Thin layers prevent stiffness while building resilience. Rotate your painting direction each time to mimic natural hide patterns.
Wait 90 minutes between applications. Test dryness by tapping the surface—if no paint transfers, you’re ready. Three coats create ideal rigidity for high-traffic areas. For softer textures, stop at two.
Pro tip: Add 1 tablespoon cornstarch to your final coat mixture. This creates subtle matte variations seen in premium hides. Your creation now rivals store-bought options at a fraction of the cost.
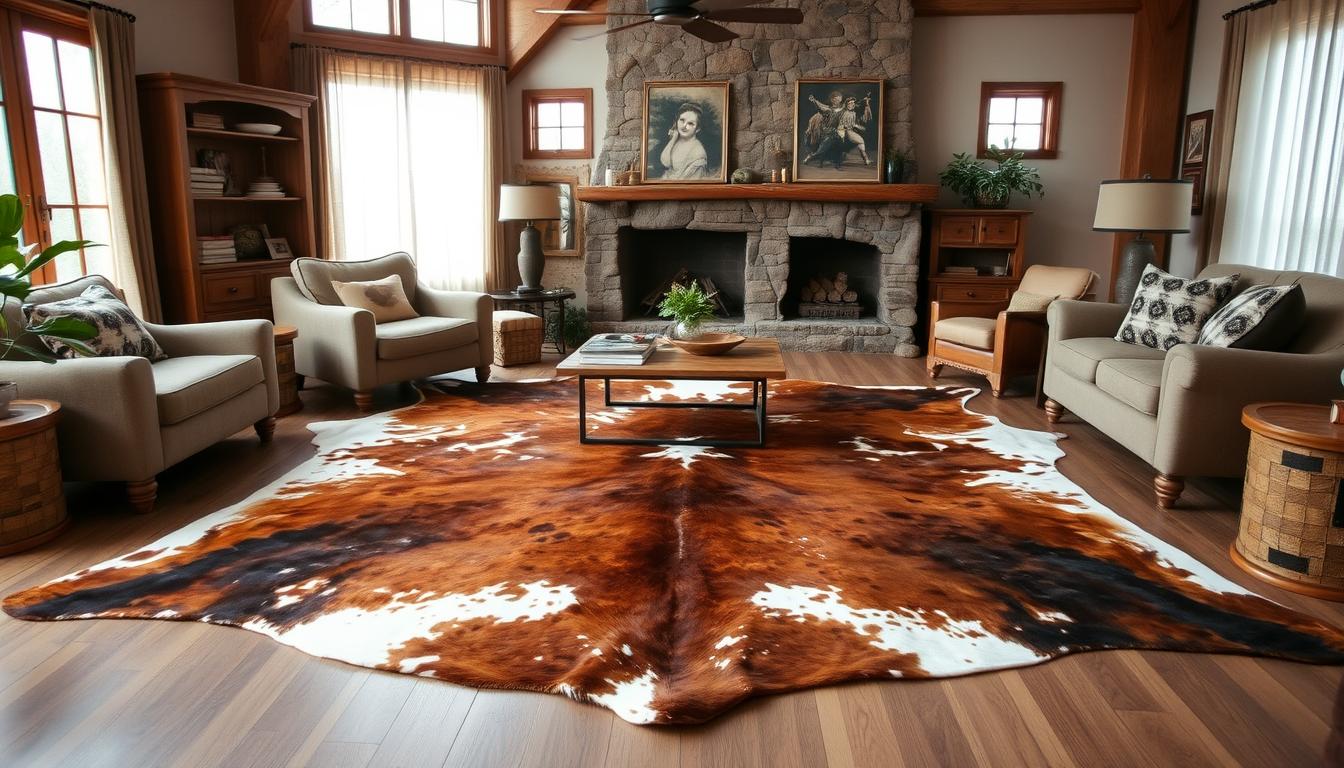
diy Cowhide rug: Benefits and Creative Customizations
Ever struggled to find floor accents that truly reflect your style? Custom textile projects solve this dilemma by merging artistic freedom with functional design. Unlike mass-produced options, your creation becomes a signature piece that adapts to seasonal trends or room redesigns.

Personalizing Your Rug with Unique Design Elements
Natural patterns gain personality through intentional modifications. Blend chalk paint with water for translucent layers that mimic sun-bleached markings. Use stencils cut from cardboard to add geometric accents along the edges.
For authentic texture variations, try these techniques:
- Dab sea sponges in contrasting shades
- Flick toothbrushes loaded with diluted pigment
- Drag dry brushes horizontally across dried coats
Incorporating Different Textures and Patterns
Mix matte and glossy finishes to replicate natural hide variations. Add faux stitching details using metallic markers for artisanal flair. Want bolder statements? Try ombré effects transitioning from charcoal to cream.
| Feature | Commercial Options | Custom Creation |
|---|---|---|
| Cleaning Method | Professional dry cleaning | Hose washable |
| Pattern Control | Limited stock designs | Full creative freedom |
| Color Accuracy | Standardized dyes | Exact room matching |
| Ethical Choice | Varies by supplier | 100% synthetic materials |
This approach lets you craft pieces that withstand daily life. Spill red wine? Scrub vigorously without damaging the surface. Need seasonal updates? Repaint sections instead of replacing the entire piece.
For those seeking design inspiration, consider blending organic shapes with modern accents. The result? A conversation-starting centerpiece that evolves with your taste.
Troubleshooting Common Issues and Maintenance Tips
What happens when your masterpiece develops unexpected flaws? Proactive care ensures your floor accent maintains its designer appeal through years of use. Let’s explore solutions for common challenges and preservation techniques.
Addressing Paint Imperfections and Edge Flaws
Spot uneven coverage by holding your piece at eye level under bright light. Dab diluted paint onto thin areas using a sponge—this blends better than brush strokes. For stubborn drip marks, lightly sand the surface before reapplying color.
Reshape irregular edges with fabric scissors. Place masking tape ¼” inside the problem area as a cutting guide. Rotate the material slowly while trimming to maintain organic contours.
Cleaning and Protecting Your Creation
Weekly care prevents dirt buildup. Follow this simple routine:
- Shake outdoors to remove debris
- Spot-clean with mild soap and soft cloth
- Blot spills immediately with absorbent towels
| Issue | Commercial Solutions | DIY Approach |
|---|---|---|
| Stains | Specialty cleaners ($15-$30) | Baking soda paste |
| Fading | UV-protectant sprays | Rotate placement seasonally |
| Edge Wear | Professional binding | Fabric glue reinforcement |
Conduct monthly inspections under natural light. Look for color shifts or texture changes in high-traffic zones. Store rolled—not folded—during off-seasons to prevent creases. With proper care, your custom piece outlasts mass-produced alternatives while keeping its handcrafted charm.
Conclusion
Transform your floors into artistic statements that reflect your personal style. You’ve mastered a cost-effective method to craft durable, custom-sized accents perfect for high-traffic zones. This approach lets you achieve designer-approved textures without compromising ethics or budgets.
Your creation adapts seamlessly to any space—anchor a modern living area with bold contrasts or soften a bedroom with earthy tones. Regular styling tips and maintenance strategies ensure your piece remains vibrant for years. Shake debris outdoors weekly and blot spills promptly with a damp cloth.
This project proves functional art belongs in everyday homes. With proper care during seasonal rotations and routine inspections, your faux masterpiece withstands pets, parties, and playful kids. It’s more than décor—it’s proof that creativity thrives where practicality meets passion.
Now step back. Admire how your handcrafted work elevates the room while sparking conversations about sustainable design. That’s the true power of personalized home accents.
FAQ
What materials work best for crafting a faux cowhide rug?
Heavyweight canvas drop cloths are ideal for durability, but upholstery fabric or outdoor polyester blends also work. Pair these with latex paint brands like Behr Marquee or Rust-Oleum for flexibility and a smooth finish.
How do I achieve a natural hide shape without a template?
Study images of real cowhides for reference. Sketch freehand, emphasizing irregular edges and asymmetrical lobes. Use sharp fabric scissors to cut slowly, adjusting curves as you go.
Can I use acrylic paint instead of latex for this project?
Latex is preferred for its flexibility and washability once cured. Acrylics may crack over time. For detailed designs, mix acrylics with fabric medium to ensure adhesion.
How long does the painted surface take to dry completely?
Allow 24–48 hours between coats in a well-ventilated space. Humidity slows drying—use a fan to speed up the process. Avoid heavy foot traffic for at least three days after the final layer.
What’s the best way to clean a handmade faux hide?
Spot-clean with mild soap and cold water. For stains, test cleaners on a hidden edge first. Apply Scotchgard Fabric Protector during creation to repel spills and simplify maintenance.
Can I add texture to mimic real animal hide?
Yes! Use sponge dabbing or stippling brushes during painting. Layer darker shades in crevices and lighter tones on raised areas for a 3D effect. Seal with matte polyurethane for authenticity.
How do I fix peeling edges or cracked paint?
Sand affected areas lightly, then apply a thin layer of fabric glue beneath lifted edges. Repaint with a small brush, blending into existing patterns. Seal repairs with clear acrylic sealer.