


Article: 5 Simple DIY Steps for a Polyester Rug
5 Simple DIY Steps for a Polyester Rug
Imagine transforming basic materials into a stunning centerpiece that rivals high-end store options. Why spend hundreds on mass-produced floor coverings when custom designs let you control every detail? This guide reveals accessible methods to create durable, eye-catching pieces tailored to your space.

You'll master techniques like the cotton piping method and modular square approach without specialized tools. Learn to calculate fabric needs accurately and select patterns that complement your room's color scheme. Even beginners can achieve polished results by following clear, step-by-step instructions.
Discover how to troubleshoot common issues like uneven edges or loose threads. Proper care methods ensure your creation maintains its vibrancy through years of use. Let’s explore how simple materials become functional art that reflects your personal style.
Key Takeaways
- Choose from multiple construction techniques based on skill level
- Calculate material quantities for any room size
- Customize colors and patterns to match existing decor
- Fix common issues during the creation process
- Apply long-term maintenance strategies
Project Overview and Inspiration
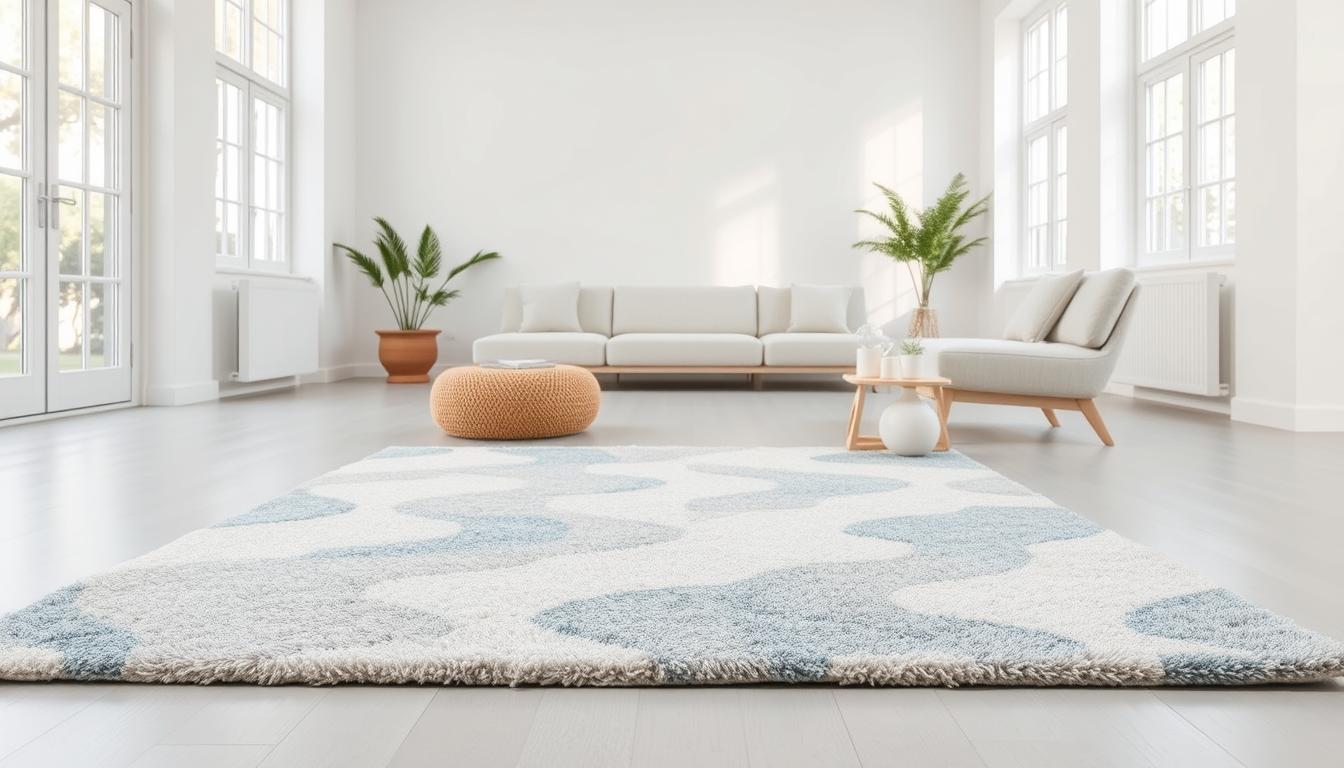
Transforming blank spaces into inviting areas starts with the right floor accent. One craft enthusiast crafted a 5×8 masterpiece using basic supplies when retail options fell short. "It became a cozy cloud underfoot," they shared, describing the plush result that cost a fraction of designer alternatives.
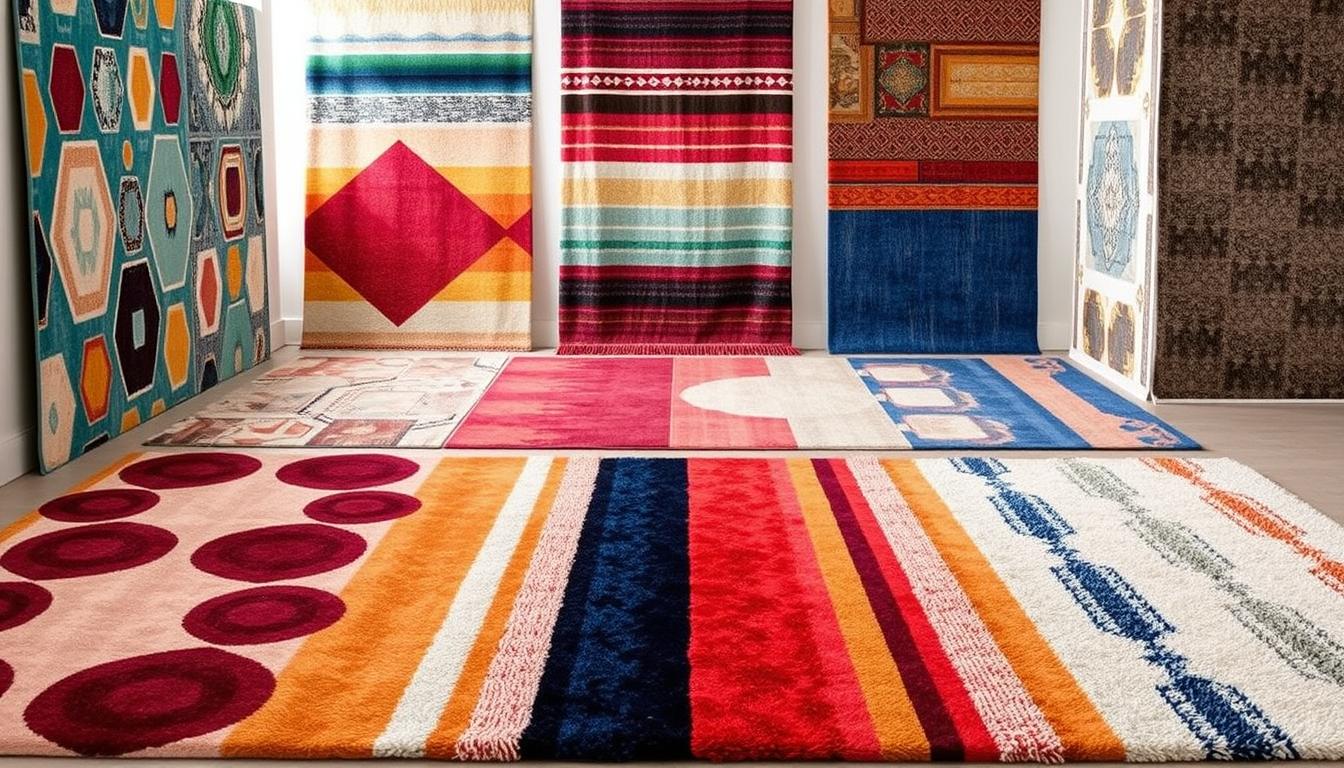
This approach lets you dictate every detail – dimensions, hues, and patterns align perfectly with your space. Whether aiming for bold geometrics or subtle neutrals, your vision becomes tangible. Explore textile projects that adapt to bathrooms, kitchens, or living zones without compromising aesthetics.
Financial savings shine here. High-quality store-bought pieces often carry premium price tags, while handmade versions maintain durability at lower costs. One creator noted their custom piece outlasted pricier counterparts through years of foot traffic.
Time investment yields lasting rewards. Though initial assembly requires focus, the process suits various skill levels. Patience trumps expertise, making it ideal for weekend warriors seeking satisfying hands-on work.
Versatility extends beyond size adjustments. Apply identical methods to craft runners, circular accents, or layered textures for multi-room coordination. Switch materials seasonally or experiment with pile heights for dynamic visual effects.
This creative journey blends practicality with self-expression. Your finished work becomes both functional asset and conversation starter – proof that personalized home solutions exist beyond mass-market limitations.
Understanding the DIY Polyester Rug Concept
Creating custom floor accents begins with mastering simple textile techniques. This approach uses cotton cording instead of traditional knots, letting you build plush surfaces without specialized tools. Unlike store-bought options, you control every aspect - from fabric density to color combinations.
The method works by attaching fabric strips to a grid backing through looping patterns. Each piece gets secured with basic tension rather than complex knots. This makes corrections easy if you notice uneven spacing or want to adjust textures mid-project.
| Technique | Traditional Methods | New Approach |
|---|---|---|
| Tools Needed | Hook tools, knotting devices | Scissors, backing material |
| Knotting | Individual knots per strand | Tension-based anchoring |
| Customization | Limited pattern options | Full color/texture control |
Make sure your fabric pieces measure consistently for uniform results. Cut strips slightly longer than needed - you can trim excess later. Cotton remains the top choice for cording due to its grip and durability, but synthetic blends work for high-traffic areas.
Spacing affects both appearance and longevity. Tight clusters create dense surfaces, while wider gaps show more backing material. Test different arrangements on a small sample before committing to large sections. A bit of planning prevents rework and ensures professional outcomes.
This hands-on process lets you tweak designs as you progress. Unlike factory-made products, you can mix textures or adjust patterns mid-creation. Regular maintenance involves vacuuming gently and rotating the piece to distribute wear evenly.
Materials and Tools You'll Need
Assembling the right components transforms your vision into a tactile reality. Multi-use netting forms your foundation, while cotton strands become your artistic medium. Let's break down what works best for various techniques and spaces.

Essential Supplies
- Multi-use netting (1/4" to 1" grid size) creates the structural base
- Cotton piping in preferred 1/2" or 11/16" thicknesses
- Small rubber bands for secure fabric anchoring
- Sharp scissors for precise cuts
Thicker cotton strands reduce material needs for large projects. Measure your space first - a 4x6 piece requires about 3 yards of piping. Craft stores stock various colors, letting you match existing decor effortlessly.
Budget-Friendly Alternatives
Swap rubber bands with durable string for cost savings. One creator shared: "Cotton butcher twine held my pieces tight for two years before needing replacements." Vinyl flooring remnants make excellent waterproof bases for kitchens.
Source materials strategically:
- Home improvement stores for netting remnants
- Online marketplaces for bulk cotton purchases
- Thrift shops for fabric scraps
Water-based polyurethane seals fabric-backed versions effectively. Test adhesives on small sections first to ensure compatibility with your chosen textiles.
Planning Your Rug Dimensions and Design
Measure your space before cutting any materials. Furniture placement and traffic flow determine ideal proportions. For a 5×8 piece, three 8-foot netting sections work best when using 2-foot-wide backing. One creator noted: "Trimming that extra foot early saved hours of adjustments later."
| Size | Netting Pieces | Fabric Needed | Time Required |
|---|---|---|---|
| 5×8 | 3 sections | 24 yards | 12-15 hours |
| 2×5 runner | 1 section | 10 yards | 4-6 hours |
| 2×3 bath mat | 1 section | 6 yards | 2-3 hours |
Add 10% extra material for pattern matching and errors. Bold geometrics require precise alignment, while organic shapes forgive minor mismatches. Test color swatches under your room's lighting before committing.
Smaller pieces let beginners practice techniques risk-free. A 2×3 project completes in one weekend, letting you refine skills before tackling larger areas. Always sketch your design full-scale using chalk or washable markers.
Proper planning prevents these common issues:
- Material shortages mid-project
- Pattern distortion at edges
- Color clashes with existing decor
Adjust proportions for irregular spaces. L-shaped layouts might need two separate backing pieces joined during assembly. Document measurements and keep scraps for future repairs.
Preparing Your Netting or Fabric Base
A solid foundation determines your project's success. Start by clearing a flat surface large enough to accommodate your full design. Unroll your chosen backing material completely to prevent creases that could warp the final piece.
Use sharp scissors for netting or a craft knife with a T-square for vinyl. One creator emphasized: "Straight edges matter more than speed – measure twice, cut once." For multi-section projects, ensure edges align perfectly by trimming irregularities before assembly.
Check materials thoroughly:
- Inspect for holes or weak spots in netting
- Test vinyl flexibility by bending corners
- Verify fabric colorfastness with a damp cloth
Light-colored materials need special attention. Spray-paint dark vinyl backing white to prevent shadowing through thin fabric. Let it dry completely before proceeding – rushed prep leads to visible flaws later.
Mark alignment guides every 12 inches using washable marker. These reference points maintain pattern consistency during assembly. Proper base preparation ensures your creation lies flat and withstands daily use, as detailed in this comprehensive textile guide.
Cutting Tips for Accurate Rug Pieces
Achieving professional results begins with meticulous cutting practices. Sharp scissors and organized workflow transform raw materials into uniform components ready for assembly. Proper preparation at this stage prevents uneven textures and material waste.

Mastering Material Measurements
Cut cotton piping into 4-inch segments for balanced coverage and texture. Allow a 1/8-inch variation between pieces to maintain handmade charm while ensuring structural consistency. Shorter lengths create flatter surfaces – ideal for high-traffic areas needing low profiles.
| Length | Surface Height | Material Use |
|---|---|---|
| 2 inches | 1/4" | 25 yards |
| 4 inches | 1/2" | 18 yards |
| 6 inches | 3/4" | 22 yards |
Group-cut multiple layers to save time without sacrificing accuracy. One creator shared: "Stacking five fabric strips tripled my cutting speed while keeping edges aligned." Sort pieces by color as you work to streamline pattern creation later.
Maintain blade sharpness – dull tools fray edges and create uneven lengths. Test cuts on scrap material first to refine your technique. Consistent pressure ensures clean slices through cotton fibers, preventing loose threads that compromise durability.
For geometric designs, use a rotary cutter and self-healing mat. These tools help achieve precise angles when cutting square or triangular shapes. Always account for fold allowances when planning patterned layouts.
DIY Polyester Rug: Step-by-Step Weaving Process
Transform your workspace into a textile workshop as you bring your floor covering to life. This phase combines precision with creativity, where each loop determines texture and longevity. Follow these methods to ensure uniform results while maintaining artistic flexibility.
Threading Techniques for Full Coverage
Start by inserting cotton strips through alternate grid openings on your backing material. Use a zigzag pattern to prevent gaps – this creates interlocking layers that resist shifting. One crafter noted: "Crossing three vertical rows horizontally gave my piece perfect density without bulk."
| Knot Tightness | Durability | Surface Texture |
|---|---|---|
| Loose | Moderate | Soft, relaxed |
| Medium | High | Plush, even |
| Firm | Maximum | Dense, structured |
Securing and Shaping Methods
Gather threaded cotton upward before wrapping rubber bands at the base. Leave 1/4 inch between the knot and backing for fluffing space. Twist strands clockwise while securing to enhance pom-pom formation. Test different band positions to control tuft height.
Rotate your work every six inches to check consistency. Adjust tension if sections appear uneven – tighter knots suit entryways, while looser ones work for bedroom accents. Trim excess material after securing multiple rows to maintain clean lines.
Proper technique ensures your creation withstands daily use while keeping its visual appeal. Allow completed sections to rest overnight before final trimming. This lets fibers settle naturally for professional-grade results.
Assembling and Securing Rug Sections
Bringing separate components into a unified whole requires precise alignment and secure methods. Start by laying adjacent sections edge-to-edge on a flat surface. Match grid openings exactly – even a 1/4-inch mismatch creates visible seams.
Weave connecting fabric strips through both backing materials using a crisscross pattern. One creator shared: "Alternating directions every three rows locked my pieces together better than single-direction weaving." Secure each junction with double-loop rubber bands for tension that holds through years of use.
| Connection Method | Durability | Adjustment Ease |
|---|---|---|
| Single rubber bands | Moderate | High |
| Double-loop bands | Maximum | Medium |
| Cotton twine | High | Low |
Fluff joined areas gently after securing. Use a combing motion to blend fibers across seams, creating uniform texture. Check alignment from multiple angles – what looks straight overhead might appear crooked at eye level.
Make final size adjustments during this phase. Trim excess backing material with sharp scissors, leaving 1/2 inch for edge finishing. Proper assembly ensures your project maintains its shape through cleaning and daily foot traffic.
Adding Texture with Cotton Piping and Alternatives
Texture transforms a simple design into a tactile masterpiece through strategic material choices. Cotton piping thickness directly impacts your floor covering's density and visual impact. 1/2-inch and 11/16-inch options create plush surfaces quickly, while thinner 1/6-inch varieties need doubled strands for substantial feel.
Layer different sizes within the same grid to craft dimensional patterns. A creator shared: "Mixing 1/4-inch and 3/4-inch strands gave my piece organic waves that hide footprints beautifully." Thicker piping reduces material needs by 30% compared to slender alternatives, making large projects more manageable.
Alternative texturing methods expand creative possibilities. Fabric strips introduce woven contrasts when paired with cotton loops. Yarn clusters work well for bohemian-inspired borders or geometric accents. Space elements closer for dense pile or spread them for airy, lightweight results.
Your arrangement method determines final durability. Tightly packed layers withstand heavy use in entryways, while spaced-out designs suit low-traffic bedrooms. Always test combinations on small swatches to perfect your pattern before scaling up.
FAQ
Can I use cotton fabric instead of polyester for this project?
Yes! Cotton works well, but it may wear faster in high-traffic areas. For durability, blend it with sturdier materials like burlap or recycled denim. Always prewash fabrics to prevent shrinkage.
How do I keep rug sections from unraveling during assembly?
Secure edges with a zigzag stitch or fabric glue before weaving. For netting bases, wrap rubber bands tightly around joined edges. Trim loose threads as you go to maintain a clean finish.
What’s the best way to determine the right size for my space?
Measure your floor area and leave 12-18 inches of exposed flooring around the edges. Use painter’s tape to mock up dimensions visually. Consider furniture placement—larger rooms can handle bold patterns, while small spaces benefit from simpler designs.
Can I create a non-slip backing without buying specialty materials?
Absolutely. Attach adhesive shelf liner to the underside, or sew silicone dots using clear caulk. For washable rugs, iron-on vinyl sheets provide grip while protecting floors.
How do I add texture without cotton piping?
Braid fabric strips, use thick yarn, or repurpose old knit sweaters. Layering different fabric weights creates visual depth. Try looping techniques with a latch hook for a plush surface.
What’s the fastest method to cut fabric pieces accurately?
Use a rotary cutter with a quilting ruler on a self-healing mat. For curves, trace cardboard templates. Mark measurements with chalk instead of pens to avoid visible lines.
Can I wash a handmade rug in a washing machine?
Only if you’ve used colorfast fabrics and secured all layers. Place it in a mesh laundry bag, use cold water, and air-dry flat. For delicate pieces, spot-clean with mild detergent.