


Article: 5 Easy Steps to Craft a Natural Sisal Rug
5 Easy Steps to Craft a Natural Sisal Rug
What if you could create a stunning, eco-friendly floor covering that rivals high-end designs? Imagine transforming your living space with a durable, natural fiber masterpiece tailored to your room’s exact dimensions. This guide reveals a surprisingly simple method to craft custom floor decor that blends affordability with artisanal charm.

Natural fiber rugs, like those made from sisal, offer unmatched durability and sustainability. Derived from the Agave sisalana plant, this material regenerates faster than hardwood trees and requires 60% less energy to produce than synthetic alternatives. With a durability score of 9.2/10, your handmade creation will withstand years of foot traffic while filtering indoor air pollutants.
You’ll discover how to plan your project, select tools, and master weaving techniques that ensure professional results. The process works for any space—from cozy bedrooms to high-traffic living areas. Best of all, you’ll save significantly compared to store-bought options while achieving a perfect fit for your unique decor.
Why choose natural fiber rugs? Beyond their rustic appeal, they’re biodegradable and made from rapidly renewable resources. One acre of agave plants produces enough material to cover 50 average-sized living rooms—proof that style and sustainability can coexist.
Key Takeaways
- Create custom-sized floor decor using renewable sisal fibers
- Follow beginner-friendly techniques for professional results
- Choose materials that withstand 300% more abrasion than synthetic blends
- Reduce environmental impact with biodegradable crafting
- Design rugs that purify air while enhancing room aesthetics
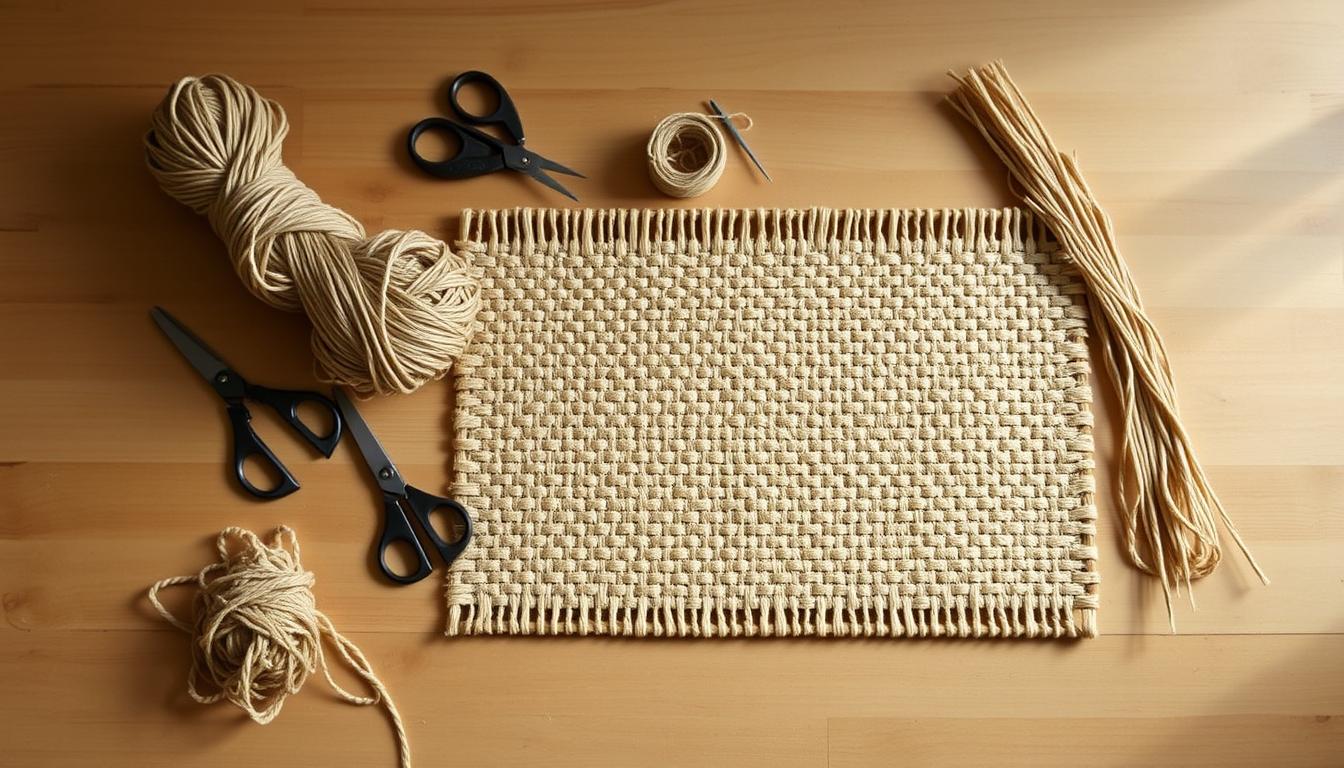
Materials and Tools for Your Sisal Rug DIY
Crafting begins with the right components. Natural fibers demand specific supplies to balance durability with comfort. Let’s explore what transforms raw materials into functional art.

Core Components for Construction
Start with two rolls of 3/16" sisal rope from hardware retailers. This thickness offers flexibility while maintaining structural integrity. Pair it with a 15mm crochet hook—large enough for swift weaving but precise for clean edges.
Protect your hands with gardening gloves or athletic tape. One creator notes, "Working without protection left my palms raw after an hour." The rope’s natural texture requires defense against friction during extended sessions.
Stabilizers and Safety Features
Choose adhesives based on your rug’s purpose. Hot glue suits occasional-use pieces, while Liquid Nails withstands daily wear. For high-traffic areas like entryways, E6000 provides industrial-grade bonding without visible residue.
Backing materials prevent slips and add polish. Repurpose old cotton sheets for lightweight designs or invest in rubber drawer liners for grip. These layers help anchor your creation while protecting floors from scratches.
Total project costs often stay under $20—a fraction of retail prices. With strategic material choices, you’ll craft pieces that blend practicality with earthy charm. Every selection impacts longevity, so prioritize quality over shortcuts.
How to Make Sisal Rug: Step-by-Step Process
Transform raw materials into functional decor through precise techniques. The process combines traditional craftsmanship with modern adaptability, letting you control every detail. Follow these methods to ensure your creation maintains structural integrity while reflecting personal style.

Creating the Foundation: Chain and First Row
Start with a slip knot on your crochet hook. Form a chain matching your desired width—24 inches works for most entryways. One maker notes, "Maintaining even tension feels like balancing yarn on a tightrope." Insert the hook into the second chain from the end, wrapping material around it twice before pulling through.
Building Rows: Traditional Technique vs. Ridge Effect
Choose your stitching personality. The classic method uses both loops for flat surfaces, while front-loop-only stitching creates raised ridges. This decision impacts both texture and durability.
| Technique | Stitch Method | Texture | Best Use |
|---|---|---|---|
| Traditional | Both loops | Smooth | High-traffic areas |
| Ridge Effect | Front loop only | Textured | Decorative spaces |
Coiling enthusiasts begin at one end of the rope, spiraling outward with adhesive. Each loop placement determines the final shape. Remember to add a chain stitch when turning rows—this simple step prevents edge curling.
The way you handle transitions between rows affects longevity. As fibers expand with use, consistent tension keeps the structure intact. One creative approach involves alternating stitch methods every third row for hybrid durability.
DIY Techniques for Customizing Your Rug Design
Personalization transforms functional pieces into signature decor. Borders and dimensions determine whether your creation blends seamlessly or becomes a distracting element. These methods let you refine proportions while adding artistic flair.
Enhancing Details: Decorative Borders and Slip Stitches
Slip stitches create clean edges that frame your work. This technique simplifies single crochet by pulling new loops through both existing ones in one motion. One craft enthusiast remarks, "Borders turned my coiled rope into something worthy of display."
Work 2-4 rows around all edges for maximum durability. At corners, triple stitches prevent puckering. This approach distributes tension evenly while maintaining geometric precision.
Adjusting Rug Size and Tailoring the Look for Your Space
Modify dimensions easily by adding/removing rows during construction. For rectangular custom dimensions, shorten fringed ends while keeping width consistent. Circular designs require gradual increases in spiral patterns.
Consider traffic flow when planning your piece. High-use zones need tighter stitches, while decorative areas allow looser techniques. The final look should complement furniture layouts without dominating the room.
| Design Factor | Small Space | Large Area |
|---|---|---|
| Border Rows | 2 | 3-4 |
| Stitch Density | Tight | Moderate |
| Pattern Complexity | Simple | Detailed |
Refer to living spaces guides for proportion recommendations. Always test placements with cardboard templates before finalizing sizes. Your customized piece should feel intentional, not accidental.
Tips & Troubleshooting for a Perfect Rug Finish
Final touches transform your project from homemade to professional. Proper techniques ensure durability while preserving the natural charm of your materials.
Managing Fringes and Knotting Techniques
Observe original patterns before adjusting fringe length. Look for alternating curly and straight strands. One creator shares, "The straight strand acts like an anchor—use it to lock others in place."
Form a loop with the straight strand. Thread its end front to back through the loop. Pull both curly strands through before tightening. This method prevents unraveling while maintaining texture.
Overcoming Common Pitfalls
Uneven edges often stem from inconsistent tension. Address loose sections immediately—don’t wait until completion. Curling fringe adds character but can be flattened with light steaming if preferred.
| Issue | Solution | Time Needed |
|---|---|---|
| Loose knots | Re-tie using anchor strand method | 15 min/section |
| Frayed ends | Apply clear fabric glue | 5 min/strand |
| Edge curling | Weight down during drying | 2-4 hours |
Allocate 2-3 hours for detailed finishing work. The way you secure loose ends impacts longevity. Each part of this process helps create a polished look that withstands daily use.
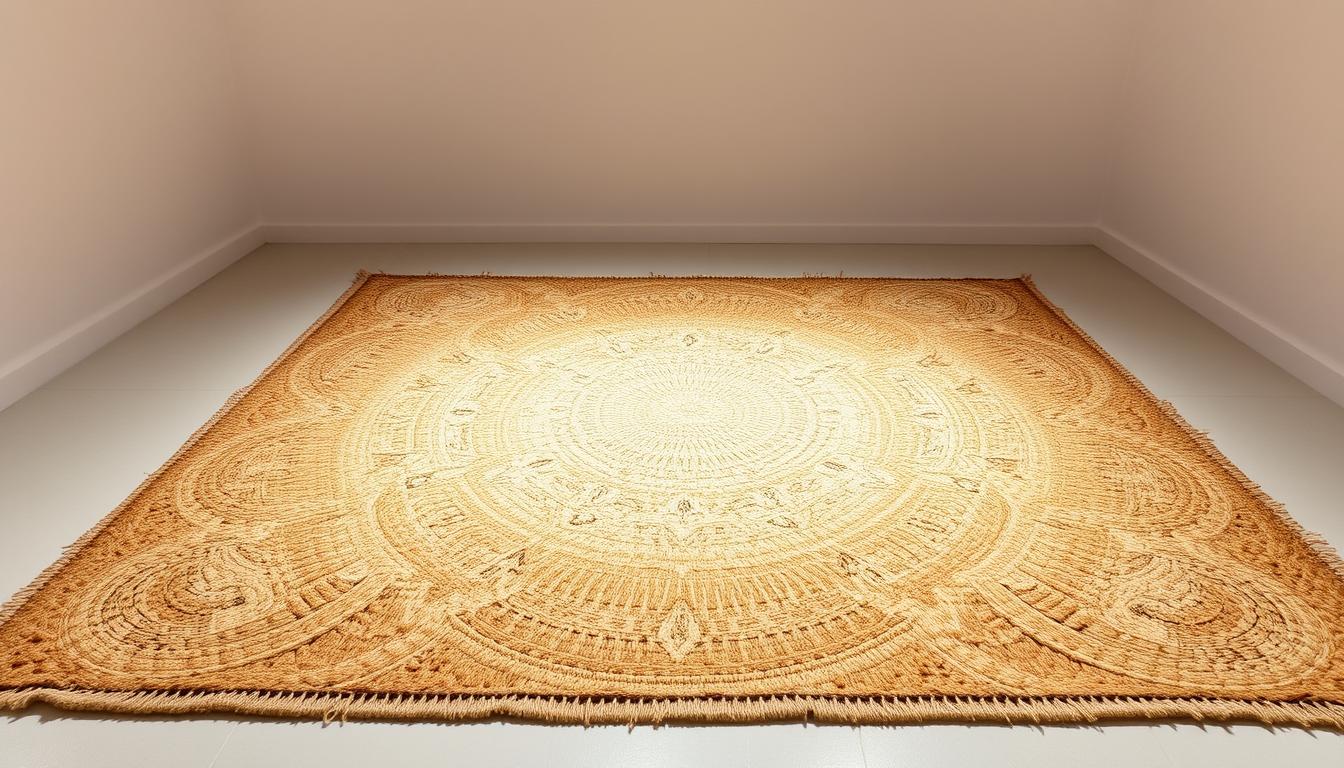
Conclusion
Your journey into sustainable home decor reaches its peak with a finished piece that marries function and artistry. This post has guided you through every part of crafting durable, custom rugs that elevate rooms while respecting budgets. The time spent mastering these methods yields floor coverings tailored to your space’s exact size needs—a luxury store-bought options rarely provide.
These handcrafted rugs do more than frame your doorway. They represent eco-conscious choices, blending natural textures with modern practicality. Whether creating one statement piece or multiple diy designs, you’ve unlocked skills that adapt to any room’s layout.
Consider this project’s ripple effects. The techniques learned here could spark a creative side venture or inspire friends to rethink synthetic alternatives. Each subsequent diy endeavor builds confidence, letting you experiment with patterns and fibers while maintaining that coveted handmade look.
Your finished work isn’t just a rug—it’s proof that sustainable living enhances daily life. Place it proudly by the front door, in cozy bedrooms, or beneath living room coffee tables. Every step taken reinforces the connection between mindful craftsmanship and spaces that truly feel like home.
FAQ
How do I adjust the rug size for a specific room or door area?
Measure your space first, then modify the foundation chain length. For narrow areas like doorways, reduce rows early to ensure the rug fits without overlapping thresholds. Add extra rows for larger rooms to fill empty floor space.
What’s the best way to secure the end of a sisal rope when starting?
Create a slip knot at the rope’s end to anchor your first loop. Wrap the tail around the initial chain stitch twice, then tighten. This prevents unraveling and maintains tension as you build rows.
Can I add a decorative border without advanced tools?
Yes! Use slip stitches with a contrasting jute twine along the edges. For a bolder look, wrap the border with thicker sisal strands or integrate a braided design using leftover rope pieces.
How do I prevent loops from unraveling over time?
Apply a small dab of fabric glue to knot bases after tightening. For high-traffic zones like entryways, reinforce edges with a double knot technique and trim fringes close to the final stitch.
What’s the ideal knot technique for durability near doorways?
Use a double half-hitch knot at transition points, like where the rug meets a door frame. Pair this with a non-slip backing to minimize shifting and reduce wear from foot traffic.
How long does a medium-sized DIY sisal rug typically take?
A 4x6-foot rug takes 6–8 hours, split across sessions. Speed depends on your knotting consistency and design complexity. Take breaks to avoid hand strain and ensure even tension.