


How to Make a Wool Rug: Step-by-Step Guide for Beginners
Making a wool rug can be a rewarding craft. It's a fun way to create something unique.
Wool rugs add warmth and style to any room. They can be a great project for beginners and seasoned crafters alike. This blog will guide you through the steps to make your own wool rug. You'll learn about the materials you need, the techniques involved, and some tips to make the process easier.
With patience and creativity, you can craft a beautiful rug. Whether you want to decorate your home or give a handmade gift, making a wool rug is a satisfying project. Let's get started on this crafty journey!

Credit: m.youtube.com
Introduction To Wool Rug Making
Making a wool rug can be a rewarding experience. Wool is a natural fiber that offers warmth and durability. Creating a handmade rug allows you to craft something unique and personal. This guide will introduce you to the basics of wool rug making.
Why Choose Wool
Wool is a preferred material for rug making. It is soft and resilient. Wool fibers are naturally stain-resistant. This makes cleaning easier. Wool is also a renewable resource, making it an eco-friendly choice. It provides excellent insulation, keeping your home warm.
Benefits Of Handmade Rugs
Handmade rugs offer several advantages over machine-made ones. They are unique and crafted with care. Each rug tells its own story. Handmade rugs are often more durable. They can last for generations. The craftsmanship involved adds to their value. Making your own rug can be a satisfying and creative process.
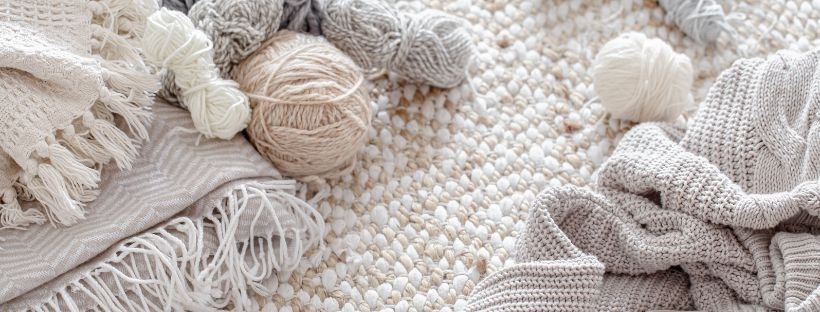
Gathering Materials
Creating a wool rug is a rewarding task. It starts with gathering the right materials. This step is crucial. The quality of your materials will greatly affect the final product. Let's explore the types of wool and the tools you will need.
Types Of Wool
There are different types of wool to consider. Merino wool is soft and fine. It is excellent for detailed patterns. Shetland wool is durable and has a medium texture. It is perfect for rugs that will see heavy use. Alpaca wool is luxurious and silky. It adds a touch of elegance to your rug. Choose the type of wool that fits your rug's purpose.
Tools Needed
Having the right tools is essential. You will need a loom. It keeps your wool strands organized. A pair of sharp scissors is also necessary. They help in cutting the wool accurately. A wool needle is another important tool. It is used for weaving the strands together. Lastly, you will need a comb. It helps in aligning the wool strands. These tools will make your rug-making process smooth and efficient.
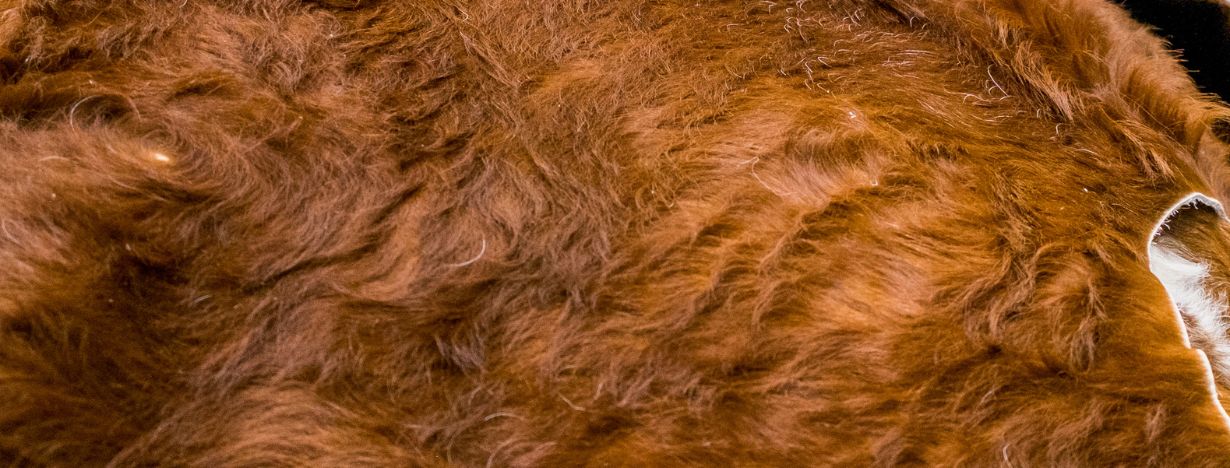
Preparing The Wool
Preparing the wool is a crucial step in making a wool rug. The quality of your finished rug depends on how well you handle this process. It involves cleaning and carding the wool to ensure it's ready for weaving.
Cleaning The Wool
Start by washing the raw wool. Fill a large basin with lukewarm water. Add a mild detergent to the water. Submerge the wool gently. Avoid agitating it too much. Let it soak for about 30 minutes.
Drain the water carefully. Refill the basin with clean water. Rinse the wool thoroughly. Repeat until the water runs clear. Spread the wool on a clean surface. Let it air dry completely. Ensure it is free of dirt and grease.
Carding Process
Once the wool is clean and dry, it's time to card it. Carding aligns the wool fibers. This makes spinning easier. Use hand carders or a drum carder. Place a small amount of wool on the carder. Brush it through the teeth of the carder.
Repeat this process several times. The wool should become fluffy and smooth. Ensure all knots and tangles are removed. Carded wool is now ready for spinning. This step is essential for a high-quality rug.
Spinning The Wool
Spinning wool is a crucial step in making a wool rug. This process transforms raw wool fibers into yarn. The yarn will be used to weave your beautiful rug. Let's dive into the techniques and tools you need.
Spinning Techniques
There are several spinning techniques you can use. Each technique has its benefits. Here are a few popular methods:
- Drop Spindle
- Supported Spindle
- Spinning Wheel
The drop spindle is simple and portable. It is great for beginners. The supported spindle needs more practice but offers better control. The spinning wheel is faster and more efficient.
Using A Spinning Wheel
The spinning wheel is a popular choice for many. It can produce consistent yarn quickly. Here is how to use a spinning wheel:
- Prepare your wool by carding it. This aligns the fibers.
- Attach a leader yarn to the bobbin. This helps to start spinning.
- Feed the wool into the spinning wheel. Use your hands to draft the fibers.
- Spin the wheel. This will twist the fibers into yarn.
- Keep a steady rhythm. Ensure the yarn is even and smooth.
- Wind the spun yarn onto the bobbin. Repeat until you have enough yarn.
Here is a quick comparison of the three methods:
|
Method |
Difficulty |
Speed |
Portability |
|
Drop Spindle |
Easy |
Slow |
High |
|
Supported Spindle |
Medium |
Moderate |
Medium |
|
Spinning Wheel |
Hard |
Fast |
Low |
Choose the method that suits your needs. Practice makes perfect. Happy spinning!
Dyeing The Wool
Creating a wool rug starts with selecting the perfect wool. Once you have the wool, the next crucial step is dyeing the wool. This process allows you to add vibrant colors, making your rug unique and attractive. Let's explore the methods to dye wool and set the dye effectively.
Natural Dyeing Methods
Natural dyes are a great option for eco-friendly and chemical-free rug making. These dyes are made from plants, fruits, and other natural sources. Here are some popular natural dyeing methods:
- Vegetable dyes: Use ingredients like onion skins, beetroot, and spinach to achieve different colors.
- Fruit dyes: Use berries, such as blueberries or blackberries, for rich, deep colors.
- Herb dyes: Use herbs like turmeric and sage for bright and pastel shades.
Each natural dye source will provide unique shades. Experiment with different combinations to find your perfect color.
Setting The Dye
After dyeing the wool, setting the dye is important to ensure the color stays vibrant and doesn't fade. Follow these steps:
- Rinse: Rinse the dyed wool in cool water to remove any excess dye.
- Mordant: Use a mordant, such as alum or vinegar, to fix the dye. This will help the color bond with the wool fibers.
- Heat: Heat the wool in a dye bath. Keep the temperature low to avoid damaging the wool. Let it simmer for about an hour.
- Rinse Again: Rinse the wool again in cool water. Ensure the water runs clear, indicating the dye has set.
Setting the dye properly is essential. It ensures the colors remain vibrant and the wool rug lasts for years.
Designing Your Rug
Creating a wool rug is a rewarding and satisfying experience. It's a chance to express your creativity and make something unique. The first step in this process is designing your rug. This involves choosing a pattern and drawing a template. Both steps are crucial to ensure your rug turns out as you envisioned.
Choosing A Pattern
Selecting the right pattern for your wool rug is essential. Think about where you will place the rug and the existing decor in the room. You may opt for a simple geometric design or a more intricate pattern.
- Geometric Patterns: These are easy to create and work well in modern spaces.
- Floral Designs: Ideal for adding a touch of nature to your home.
- Abstract Art: Perfect for a bold and unique look.
Consider the size of your rug. Larger patterns suit bigger rugs, while smaller, detailed patterns are better for smaller rugs. Also, choose colors that complement your space. Neutral tones are versatile, while bright colors can make a bold statement.
Drawing A Template
Once you have chosen your pattern, the next step is to draw a template. This helps you visualize the final product and ensures accuracy during the rug-making process.
- Gather Your Materials: You will need a large piece of paper, a pencil, and a ruler.
- Outline the Rug Shape: Draw the outline of your rug to the desired dimensions.
- Sketch the Pattern: Carefully draw your chosen pattern within the outline. Use the ruler for straight lines and a compass for curves.
- Refine the Details: Go over your sketch and refine any details. Ensure the pattern is symmetrical and well-proportioned.
Take your time with this step. A well-drawn template will make the rug-making process much smoother. If you are not confident in your drawing skills, you can use stencils or print patterns from the internet as a guide.
Weaving The Rug
Weaving a wool rug is both an art and a skill. It requires patience and attention to detail. Once you have your materials ready, the next step is setting up your loom and starting the weaving process. Let's break it down into manageable steps.
Setting Up The Loom
The loom is the backbone of your rug. Setting up the loom correctly is crucial. First, measure the warp threads to the desired length of your rug. Attach these threads firmly to the loom, ensuring they are evenly spaced.
Use a warp beam to keep the threads tight. This will help you achieve a consistent weave. Double-check the tension; it should be tight but not overly strained. Adjust as needed to ensure all threads are parallel.
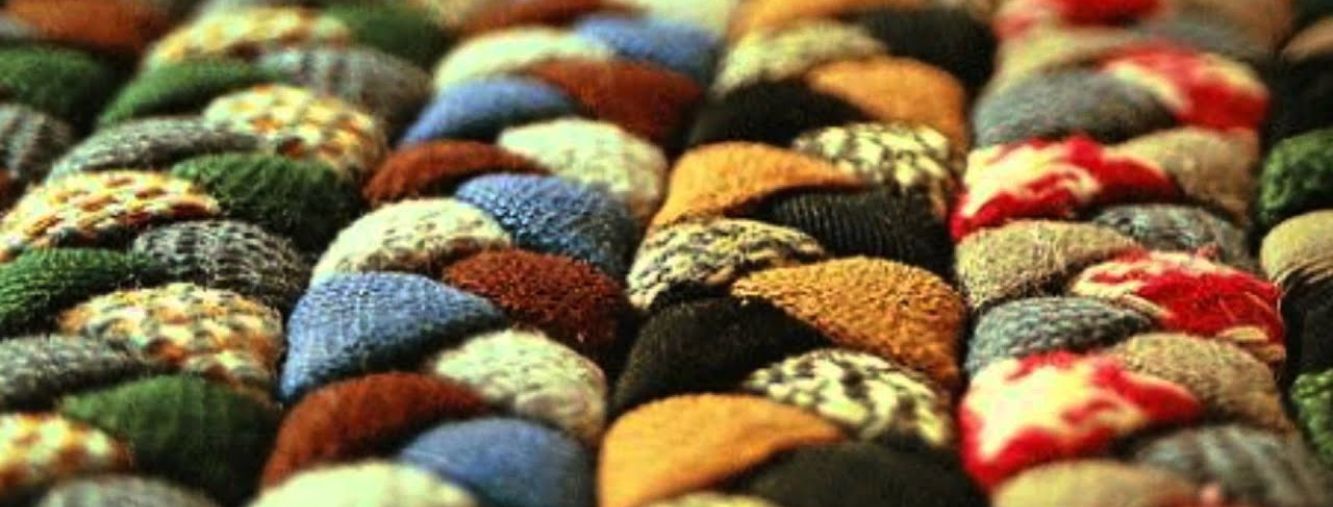
Weaving Techniques
Different techniques can add variety to your rug. The most common method is the plain weave. This involves passing the weft thread over and under alternating warp threads. Repeat this process, row by row, maintaining even tension.
For more intricate designs, try the tapestry weave. This technique allows you to create patterns and images. Use a wooden shuttle to pass the weft thread through the warp. The shuttle helps to keep the thread smooth and prevents tangling.
Another technique is the pile weave. This method is used for creating soft, plush rugs. Insert short lengths of wool into the warp threads and tie them to secure. Trim the ends to create an even surface.
Here’s a quick comparison of the techniques:
|
Technique |
Characteristics |
|
Plain Weave |
Simple, strong, and durable |
|
Tapestry Weave |
Allows for patterns and images |
|
Pile Weave |
Creates a plush, soft surface |
Choose the technique that best fits your design and skill level. Take your time and enjoy the process. Each rug you weave is unique and holds a piece of your creativity.
Finishing Touches
After weaving your wool rug, it's time for the finishing touches. These steps will make your rug look professional. It’s crucial to trim the edges and secure loose threads. This ensures the rug lasts long and looks great. Let's dive into these final steps.
Trimming The Edges
First, lay your rug flat on a clean surface. Use sharp scissors to trim the edges. Aim for a straight and even line. This gives your rug a neat appearance. Be careful not to cut too much. A steady hand will do the trick. Remove any uneven or frayed edges.
Securing Loose Threads
Next, check for loose threads. These can unravel over time. Use a needle and matching thread to secure them. Tie small knots at the ends of loose threads. This prevents further unraveling. Snip off any excess thread after securing. This step keeps your rug intact and durable.
Caring For Your Wool Rug
Keep your wool rug looking its best with gentle vacuuming. Avoid direct sunlight to prevent fading. Regularly rotate the rug to ensure even wear.
Caring for your wool rug ensures its longevity and beauty. Wool rugs are durable and can last for years with proper care. Regular maintenance keeps them looking fresh and vibrant. Follow these tips to keep your rug in top condition.
Cleaning Tips
Vacuum your wool rug weekly. This removes dust and dirt. Use a vacuum with gentle suction. High suction can damage the fibers. Rotate your rug every few months. This prevents uneven wear. If there are spills, blot them immediately.
Use a clean, dry cloth. Avoid rubbing the spill. This can push it deeper into the fibers. For deeper cleaning, use a mild detergent. Mix it with warm water. Test the solution on a small, hidden area first. Gently scrub with a soft brush. Rinse with clean water. Blot dry with a towel. Ensure the rug dries completely. Damp rugs can develop mildew.
Storage Advice
Store your wool rug properly. Roll the rug, do not fold it. Folding can cause creases. Wrap the rug in a breathable fabric. Avoid plastic as it traps moisture. Store the rug in a cool, dry place. Avoid areas with direct sunlight. This can fade the colors.
Check the rug periodically for pests. Wool can attract moths. Use cedar blocks or lavender sachets. These natural repellents keep pests away. Make sure the storage area is clean. Dust and vacuum the space regularly.
Creating a wool rug can be a fun project. You gain a beautiful, handmade piece. Plus, it adds warmth to your home. With these steps, you can craft your own unique rug. Enjoy the process and take your time. Practice makes perfect, so don't rush.
Your effort will be worth it. Soon, you'll have a cozy rug to cherish.
Frequently Asked Questions
What Materials Are Needed To Make A Wool Rug?
You need wool yarn, rug backing, a latch hook, and scissors.
How Long Does It Take To Make A Wool Rug?
It depends on the size. A small rug may take several days.
Can Beginners Make Wool Rugs?
Yes, beginners can make wool rugs. Start with simple designs.
How Do You Clean A Wool Rug?
Vacuum regularly. Use a mild detergent and cold water for stains.
What Are The Benefits Of A Wool Rug?
Wool rugs are durable, warm, and eco-friendly. They also resist dirt and stains.