


5 Fun Facts About Braided Rag Rugs
Could your great-grandmother’s recycling habits hold the secret to stylish home decor? For centuries, crafters have turned forgotten fabric scraps into durable floor art that outlasts trends. These coiled creations aren’t just practical – they’re threads connecting past resourcefulness to modern eco-conscious living.

Originally born from necessity, this craft transforms worn-out clothing and linens into vibrant household staples. Families once relied on these textiles to warm drafty floors, passing down techniques through generations. Today, they offer a creative outlet that blends sustainability with self-expression.
Modern makers discover hidden benefits beyond aesthetics. The rhythmic braiding process becomes meditation, while cleaning techniques ensure longevity in busy homes. From farmhouse kitchens to bohemian lounges, these pieces adapt to any space while telling stories through color and pattern.
Key Takeaways
- Centuries-old craft merges sustainability with functional decor
- Repurposes fabric waste into personalized home accents
- Simple construction requires minimal tools for beginners
- Withstands heavy use in entryways and playrooms
- Offers therapeutic benefits through repetitive creation
- Easily maintained with proper care methods
An Introduction to Braided Rag Rugs
Every coiled strand in these textile creations carries generations of ingenuity. What began as thrifty solutions for worn-out clothes evolved into cherished household staples. Their enduring charm lies in transforming necessity into artistry – one fabric scrap at a time.
Exploring the History and Appeal
Colonial households pioneered this craft, repurposing every thread from faded dresses to threadbare linens. During harsh winters, families turned fabric strips into functional floor coverings that doubled as insulation. The Great Depression and WWII eras saw renewed popularity, with makers using cotton feed sacks and military surplus materials.
Today’s resurgence stems from sustainable living trends. Modern crafters blend old sheets with t-shirt yarn, creating pieces that whisper family stories through color patterns. As one 1940s homemaker’s journal notes: “Our braided floor mats held memories in every twist – baby swaddling cloths became kitchen accents, work shirts transformed into hearthside warmth.”
Fun Facts and DIY Inspiration
The rhythmic braiding process offers unexpected stress relief. Many crafters report entering a flow state while working, similar to meditation practices. These pieces adapt effortlessly to design schemes – pair denim strips with farmhouse decor or silk remnants for bohemian flair.
With proper care, heirloom-quality rugs withstand decades of foot traffic. Rotate them seasonally and spot-clean spills promptly. For beginners, start with old bedsheets cut into 2-inch strips – their soft drape simplifies initial braiding attempts while reducing fabric waste.
Understanding what is a braided rag rug
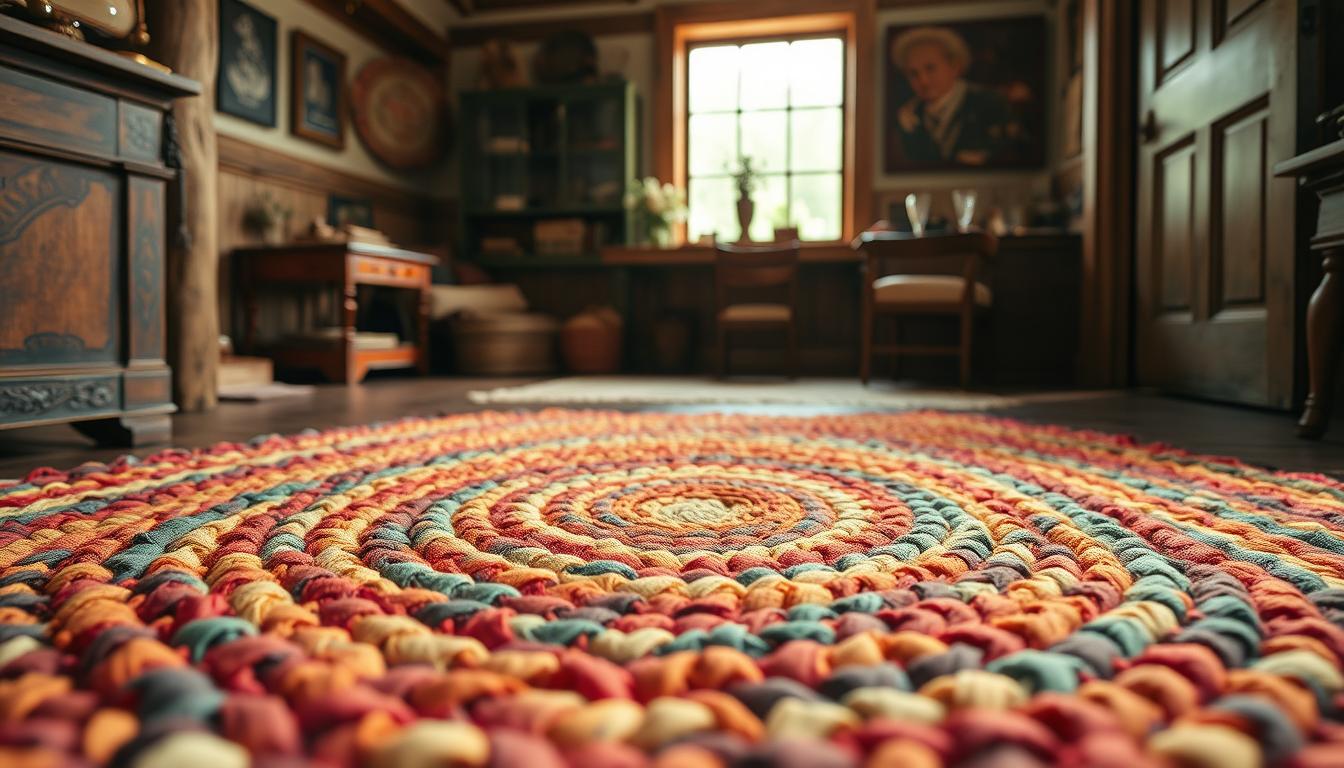
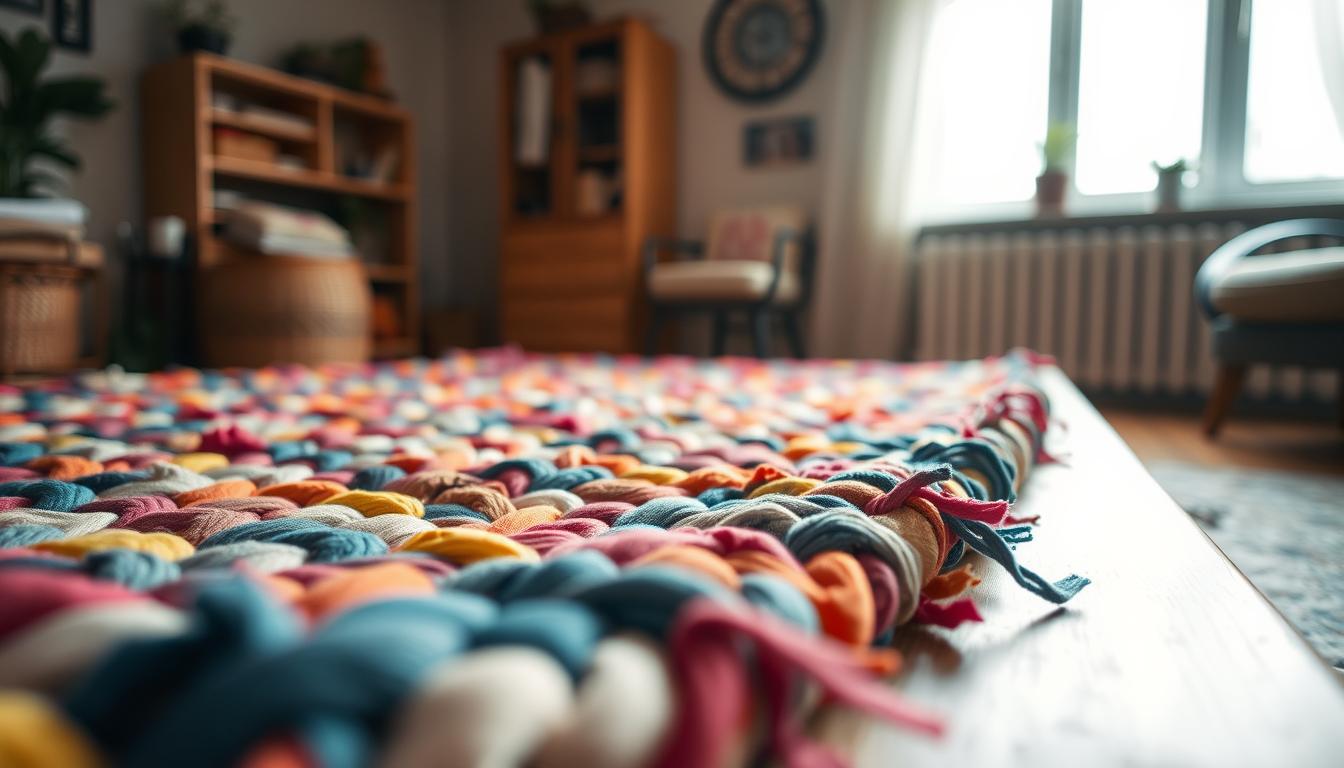
At the core lies an interlocking system of folded fabric strips transformed through precise handwork. Three or four material strands intertwine in classic over-under patterns, forming flexible ropes ready for shaping. This method hides frayed edges while creating surprisingly sturdy connections.

Makers coil the continuous braid from the center outward, building spiral or oval forms through careful stitching. Maintaining even pressure during this stage prevents buckling – a common challenge for newcomers. The best pieces balance tight weaving with slight flexibility, allowing the finished product to lie flat under furniture or foot traffic.
Key features set these creations apart:
- Dense surfaces formed through systematic overlapping
- Custom color schemes achieved by arranging material sequences
- Self-repairing design – loose strands can be rewoven
Seasoned crafters recommend cotton or wool blends for their grip and durability. Synthetic materials may slip during braiding, while delicate fabrics wear quickly. For visual harmony, alternate dark and light strips every few inches or create ombré effects with gradient-dyed cloth.
Understanding these structural principles helps troubleshoot issues like uneven edges or gaps. If your work starts curling, check for inconsistent strand thickness. Tighten loose sections by adjusting your pulling force, and always leave extra length when joining new fabric pieces.
Gathering Materials and Preparing Fabric Strips
Your material choices set the stage for success. Cotton t-shirts offer forgiving stretch for first-time crafters, while old sheets bring structured durability. One 1930s pattern book advises: "Select cloth of equal weight – mismatched thickness causes uneven wear."
Choosing Your Fabric: T-Shirts, Sheets, and More
Ten recycled shirts create a 2-foot accent piece. For larger projects, two queen-sized sheets yield a 3-foot base. Mix cotton blends for consistent tension – synthetic materials often slip during braiding. Pre-wash everything to prevent shrinkage surprises.
Color planning unlocks design potential. Arrange strips in rainbow sequences or let randomness guide your palette. A Vermont textile artist notes: "My favorite pieces combine childhood pajamas with retired tablecloths – each strip whispers memories."
Cutting Techniques and Strip Preparation Tips
Rotary cutters slice through t-shirt material cleanly, preserving edges. For sheets, scissors work better – cut an initial 2-inch strip, then tear along the grain. This method creates frayed borders that grip during braiding.
Maintain uniform width for smooth results. Narrower strips (1-2 inches) suit detailed patterns, while 3-inch pieces build chunky textures. Store prepared materials in coils to prevent tangling. Remember: proper fabric prep saves hours during the braiding process.
Step-by-Step Process: Braiding Your Rug
Transform fabric remnants into functional art through methodical handwork. This tactile process combines precision with creative flexibility, letting you shape household treasures one twist at a time.

Starting the Braid: Setting Up Your Strands
Secure three fabric strips with tight knots or machine stitching. Hold them like reins – left, middle, right. Cross the left strand over the center, then bring the right under the new middle. Repeat this over-under rhythm until muscle memory takes over.
| Method | Advantages | Best For |
|---|---|---|
| Coil As You Go | Immediate shape adjustments | Organic designs |
| Braid First | Consistent tension control | Geometric patterns |
Adding New Strips and Maintaining Tension
When strands shorten, overlap ends using the hole technique. Pierce existing strips with small slits, thread fresh material through both openings, and pull snug. Keep pressure firm but flexible – imagine guiding a bicycle chain rather than yanking rope.
Coiling and Sewing: Finishing the Braid
Wrap completed braids in spiral formations, stitching every 2-3 inches with heavy-duty thread. For oval shapes, alternate tight and loose curves. Taper final ends into points before securing them underneath with hidden stitches.
Seasoned crafters recommend rotating your work frequently. Check for flatness by laying pieces on tabletops – gaps indicate uneven pulling. Adjust tension as needed, remembering these creations improve with practice rather than perfection.
Expert Tips and Tricks for a Flawless Finished Rug
Mastering tension transforms homemade projects into heirloom pieces. Professional results come from strategic techniques passed through generations of textile artists. These methods prevent common frustrations while elevating your work's durability and appearance.
Keeping Consistent Tension Throughout Braiding
Anchor your work using household items for even pressure. Try these proven methods:
- Clip the starting point to heavy books with safety pins
- Drape developing braids over chair backs for natural resistance
- Secure strips under your knees while seated
Seasoned crafters recommend checking tension every 12 inches. Run your hand along the braid – it should feel like a firm pencil, not a loose rope. Adjust pressure if sections feel spongy or rigid.
Avoiding Common Mistakes and Troubleshooting
Prevent lumps by spacing joins at least 18 inches apart. When adding new strips:
- Overlap ends by 3 inches
- Fold raw edges inward
- Stitch through both layers twice
If your creation starts curling, lay it flat and redistribute tightness. Use curved needles to adjust previous rows. Always mark the front side with colored thread – this simple trick prevents orientation errors during lengthy projects.
Test flatness weekly by rotating your rug on hard surfaces. Minor adjustments early prevent permanent warping. Remember: perfect tension comes with practice, not pressure.
Conclusion
Crafting a floor masterpiece from fabric scraps rewards patience with lasting beauty. Your eight-hour investment yields decades of service – these coiled creations grow softer underfoot while maintaining their structure. A 175-foot braid becomes a 29-inch centerpiece through careful coiling, proving math and artistry work hand-in-hand.
Newly finished pieces transform rooms instantly, their colors whispering stories of old sheets and cherished garments. Unlike factory-made goods, each irregularity celebrates human touch. With use, edges develop a welcoming patina that mass-produced items can’t replicate.
The skills honed here – managing strands, joining ends, maintaining tension – become gateways to quilting or basket weaving. For those inspired to make your own, remember: every twist honors sustainable traditions while creating future heirlooms.
Your final piece isn’t just decor. It’s a testament to slowing down, repurposing resources, and crafting legacies one braid at a time.
FAQ
Can you use old bed sheets for this project?
Yes! Cotton sheets work well due to their durability. Tear or cut them into 2–3-inch-wide strips. Mixing patterns or colors creates unique designs when braided.
How do you join fabric strips seamlessly?
Overlap ends by 1–2 inches and sew them with a needle or machine. Use a safety pin to thread the new strip through the existing braid hole for smooth transitions.
What’s the best way to maintain tension while braiding?
Hold strands firmly but avoid pulling too tight. Consistent pressure ensures even coils. Adjust as you work—looser tension helps rugs lie flat, while tighter braids add structure.
How do you prevent frayed edges on fabric strips?
Use tightly woven cotton or linen. For fray-prone materials, fold raw edges inward or apply a zigzag stitch along the length before braiding.
Can you wash a finished rug made from fabric strips?
Hand-wash gently in cold water or spot-clean. Machine washing may loosen coils. Air-dry flat to preserve shape and prevent stretching.
How do you customize the size of your project?
Longer strips create larger rugs. For round shapes, coil the braid tightly. For ovals, stretch one side slightly as you sew. Measure frequently to ensure uniformity.
