


Article: 5 Creative Steps to Make a Braided Rag Rug
5 Creative Steps to Make a Braided Rag Rug
What if your old t-shirts and worn-out sheets could become the centerpiece of your living room? Imagine transforming forgotten fabric scraps into a vibrant, cozy rug that tells a story with every braid. This isn’t just another DIY project—it’s a chance to redefine what “waste” means while creating something truly unique.

You don’t need fancy materials or advanced skills to start. A simple collection of 10-15 cotton tees or 2-4 bedsheets becomes the foundation for rugs ranging from accent pieces to room-defining statements. The process blends practicality with creativity—saving textiles from landfills while designing decor that reflects your personal style.
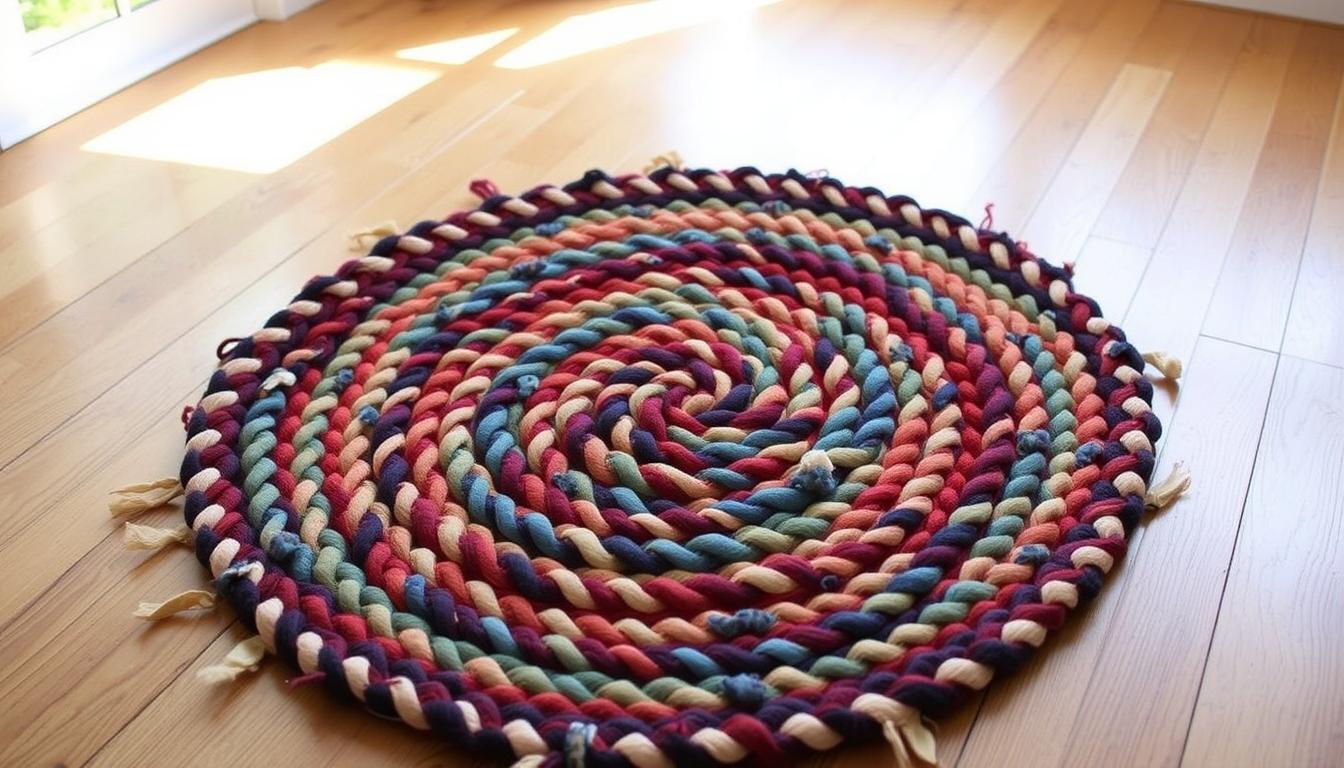
Traditional three-strand braiding offers a perfect starting point, while four-strand patterns create intricate designs for adventurous crafters. Time investment varies, but even beginners can complete smaller projects over a weekend. Color combinations become your playground, letting you match existing decor or craft bold contrasts that energize a space.
Key Takeaways
- Repurpose old textiles like t-shirts or sheets into durable, eye-catching home accents
- Choose between basic three-strand or complex four-strand braiding techniques
- Complete smaller rugs in 8+ hours—ideal for weekend projects
- Reduce household waste through creative fabric reuse
- Customize color schemes to complement any room’s aesthetic
- Requires only basic tools: scissors, needle, and sturdy thread
Getting Started with Braided Rag Rugs
Unlock the potential of discarded textiles through creative braiding. This craft turns forgotten fabrics into durable floor accents while reducing household waste. Your choice of technique depends on material type and desired texture—options range from quick-start methods to intricate designs.
Mastering Braid Structures
Three-strip patterns form the foundation of most projects. Stretchy fabrics like jersey work best with coil-as-you-go methods, letting you shape the rug while braiding. For stiffer cotton or linen, braid-first approaches yield better results—create long plaits first, then coil and stitch them.
| Technique | Best For | Key Feature |
|---|---|---|
| Coil-as-you-go | T-shirts, stretchy fabrics | Builds shape simultaneously |
| Braid-first | Cotton sheets, stiff materials | Allows precise coiling |
| Plaiting | Flat-edged designs | Creates woven texture |
| Four-strip | Dense, durable rugs | Continuous center-out pattern |
Eco-Conscious Crafting Advantages
Every repurposed scrap keeps textiles from landfills. The rhythmic process offers stress relief, blending practicality with mindfulness. Strategic color combinations—like pairing neutrals with bold accents—create visual harmony in your finished piece.
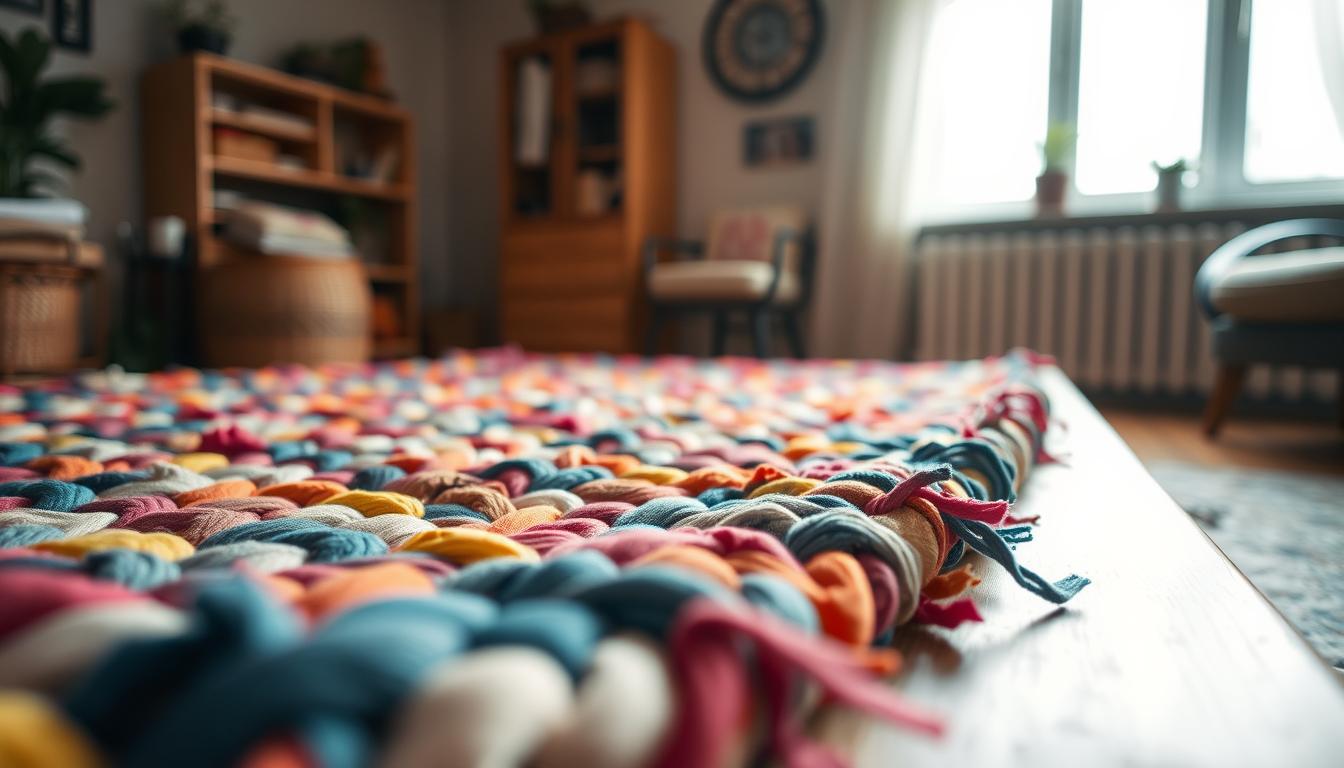
Four-strip braiding adds density for high-traffic areas. Experiment with fabric widths to alter texture—thinner strips produce tighter weaves. Remember: irregular edges from torn materials often add rustic charm to the final design.
Essential Materials and Preparation
Your fabric transformation journey begins with smart material choices. Selecting compatible textiles and preparing them correctly ensures smooth braiding and lasting results.

Gathering Supplies: Fabric, Scissors, Needles, and More
Start with sharp fabric scissors or a rotary cutter—essential for clean cuts. A tapestry needle handles threading through braids, while warp string secures coils. Stick to materials of similar weight; mixing denim with lightweight cotton creates uneven tension.
Consider these key items:
- Rotary cutter + mat for efficient strip cutting
- Ruler to maintain consistent strip widths
- Safety pins for marking starting points
Preparing Your Fabric: Cutting or Tearing into Strips
Cut or tear fabrics into 1-3 inch strips based on desired thickness. Jersey materials work best torn by hand for rustic edges. Use scissors for precise cuts on cotton sheets—snip one edge and tear lengthwise for faster processing.
Wider strips (2.5-3 inches) create chunky braids ideal for high-traffic areas. Thinner 1-inch options produce tighter weaves for detailed patterns. Roll prepared strips into balls to prevent tangling during braiding sessions.
How to Make Braided Rag Rug: Step-by-Step Walkthrough
Discover the rhythm of textile artistry by establishing strong braiding fundamentals. Your project's success hinges on initial setup choices and technique selection. Three core approaches offer distinct advantages depending on fabric type and desired outcome.

Anchor Points and Initial Setup
Secure three fabric strips using a square knot or tight stitch—this becomes your foundation. For four-strip designs, cross materials diagonally before stitching. A shorter starting braid (3-4 inches) works best for circular shapes, while 6-inch beginnings suit oval layouts.
Mark the top side with a safety pin to maintain orientation. Consistent tension starts here—pull strips firmly but avoid stretching. Rotate your work frequently to check for evenness as you begin the over-under pattern.
Shaping Techniques Compared
Coil-as-you-go lets you build form dynamically. After creating a 2-inch starter braid, curve strands back on themselves. Use a tapestry needle to thread the inner strip through existing loops every 3-4 stitches.
Braid-first methodology separates construction phases. Create 10+ feet of plait before coiling. This approach allows precise spiral adjustments during assembly. Secure each coil revolution with warp thread, hiding stitches beneath surface strands.
Four-strip patterns demand focused sequencing. Always move the leftmost strand over two adjacent strips, then under the third. Repeat this rhythm while maintaining flat positioning to prevent twisting.
Creative Techniques and Troubleshooting Tips
Elevate your textile artistry through strategic strip management and problem-solving approaches. Master seamless fabric transitions and shape customization while overcoming common braiding challenges.
Seamless Strip Integration
Join new fabric pieces using two reliable methods. The overlap technique wraps fresh material around fading ends, blending colors naturally. For high-traffic areas, the holes method creates bulletproof connections—punch openings in both strip ends and thread them together.
"Gradual color shifts maintain visual rhythm—swap one strand at a time while keeping others consistent"
Cut incoming strips 2-3 inches shorter than outgoing ones to distribute bulk. This prevents lumpy sections that disrupt smooth braiding patterns.
Tension Mastery
Anchor your work against your thigh or table edge while braiding. Consistent pressure prevents loose loops that cause uneven edges. If strands tangle:
- Pause to untwist strips every 6-8 inches
- Store unused materials in separate coils
- Rotate project 180° periodically
For corners, feed three strands through each anchor point. This maintains structural integrity during sharp turns.
Design Customization
Calculate final dimensions using this formula: Center Braid Length = (Desired Length - Width) + 33%. A 19-inch starter plait grows into a 40"x54" oval. Fold raw edges under during final sewing for polished finishes.
| Shape | Starter Braid | Coiling Pattern |
|---|---|---|
| Hexagon | 14" straight | 60° angle folds |
| Wave | 8" curved | S-shaped progression |
| Rectangle | 22" linear | Parallel stacking |
Experiment with mixed-width strips in contrasting colors for dimensional textures. Thinner 1" pieces create delicate accent lines within broader 3" base strands.
Conclusion
Your completed textile masterpiece proves old materials gain new purpose through thoughtful craftsmanship. The average 8-hour creation time becomes meditative rather than tedious, resulting in durable floor art that withstands daily use. Strategic tapered ends and hidden stitches keep edges intact, while varied fabric choices let each piece reflect your aesthetic.
This eco-conscious approach turns forgotten scraps into functional decor. Color coordination options range from subtle neutrals to bold contrasts, adapting to any room’s vibe. Those extra strips? Transform them into matching pillows or chair pads using identical braiding patterns.
Mastered circles and ovals? Experiment with hexagonal shapes or free-form designs that contour to unique spaces. Your skills now extend beyond rugs—apply braiding techniques to wall hangings or table runners. Every project reduces textile waste while developing your signature style.
Keep safety pins handy for marking starts, and remember: slightly uneven edges add rustic charm. Whether using jersey strips or wool blankets, each creation becomes a conversation piece that marries sustainability with artistry.
FAQ
What’s the best way to start braiding fabric strips?
Secure three fabric strands with a safety pin or clip. Cross the right strip over the center, then the left over the new center. Repeat, keeping tension even for a tight, uniform braid.
Can I use different fabric types in one project?
Yes! Mix cotton, denim, or upholstery scraps for texture. Ensure strips are similar width (1–2 inches) to maintain consistency. Pre-wash fabrics to prevent shrinkage or bleeding colors.
How do I join new strips without bulk?
Overlap ends by 1–2 inches and sew diagonally or knot them. Hide joins on the rug’s underside. For a seamless look, taper edges before stitching.
What’s the difference between coiling and braid-first methods?
Coiling involves braiding and sewing simultaneously in a spiral. Braid-first creates long braids first, then coils and stitches them. Coiling offers better control for circular shapes; braid-first suits oval designs.
How do I prevent loose loops or uneven tension?
Adjust tightness as you work. Use a sturdy needle and heavy-duty thread. Anchor braids with pins while sewing. Rotate the rug often to check for consistency.
Can I customize the size for larger spaces?
Absolutely. Extend braid length and coil outward. For rectangular rugs, sew braids parallel. Measure your space first—add 6–12 inches to account for shrinkage during sewing.
What’s the easiest way to add color patterns?
Plan a sequence (e.g., alternating two colors). Introduce new hues by attaching strips mid-braid. For gradients, transition shades gradually over 3–4 rows.
How do I finish edges neatly?
Taper the final braid’s end by trimming strips diagonally. Fold the tip under and hand-stitch securely. Use matching thread or a hidden ladder stitch for a clean look.