


6 Artistic DIY Steps for a Kilim Rug
What if your next creative project could connect you to a 3,000-year-old tradition? Imagine transforming vibrant threads into a functional work of art that carries the whispers of ancient weavers. This isn’t just about decoration – it’s about reviving heritage with your own hands.

Flat-woven textiles from regions like Anatolia and Central Asia have captivated interiors for centuries. Their geometric patterns tell stories, while the absence of pile creates lightweight durability perfect for modern spaces. Unlike machine-made alternatives, each piece becomes a dialogue between past and present.
Our guide simplifies this intricate craft into six achievable stages. You’ll learn how to choose materials that balance authenticity with accessibility, master foundational weaving techniques, and design patterns that reflect your personality. Whether you’re drawn to bold tribal motifs or subtle contemporary accents, the process adapts to your vision.
Key Takeaways
- Originating from multiple cultures, these textiles feature symbolic patterns passed through generations
- Unique construction without pile makes them thinner and more versatile than conventional floor coverings
- Six structured steps transform raw materials into gallery-worthy home accents
- Traditional methods blend seamlessly with modern design preferences
- Customizable color schemes let you match existing décor effortlessly
- Finished pieces serve as both functional items and conversation starters
Understanding Kilim Rugs and Their Unique Design
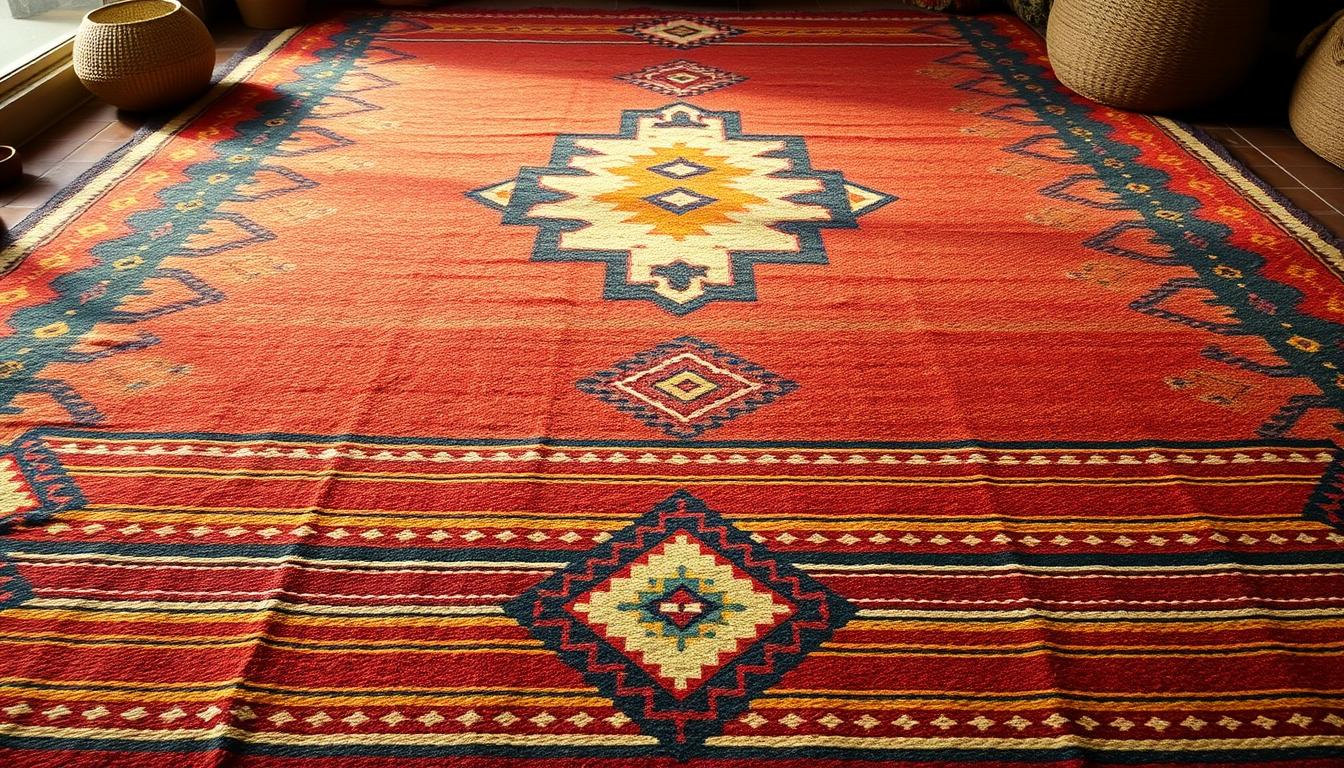
Unravel the legacy of artisans who turned necessity into breathtaking artistry. These vibrant floor coverings began as nomadic solutions for harsh climates, evolving into cultural canvases. Their geometric precision carries hidden meanings - from tribal allegiances to spiritual protection.
History and Cultural Significance
For over eight generations, weavers across Southwest Asia perfected portable textiles serving multiple roles. Caravan travelers used them as saddle padding during day-long journeys. Families hung thick wool versions as insulation against desert nights. Specific motifs identified marriage status or repelled misfortune according to regional beliefs.
Weaving Techniques and Materials
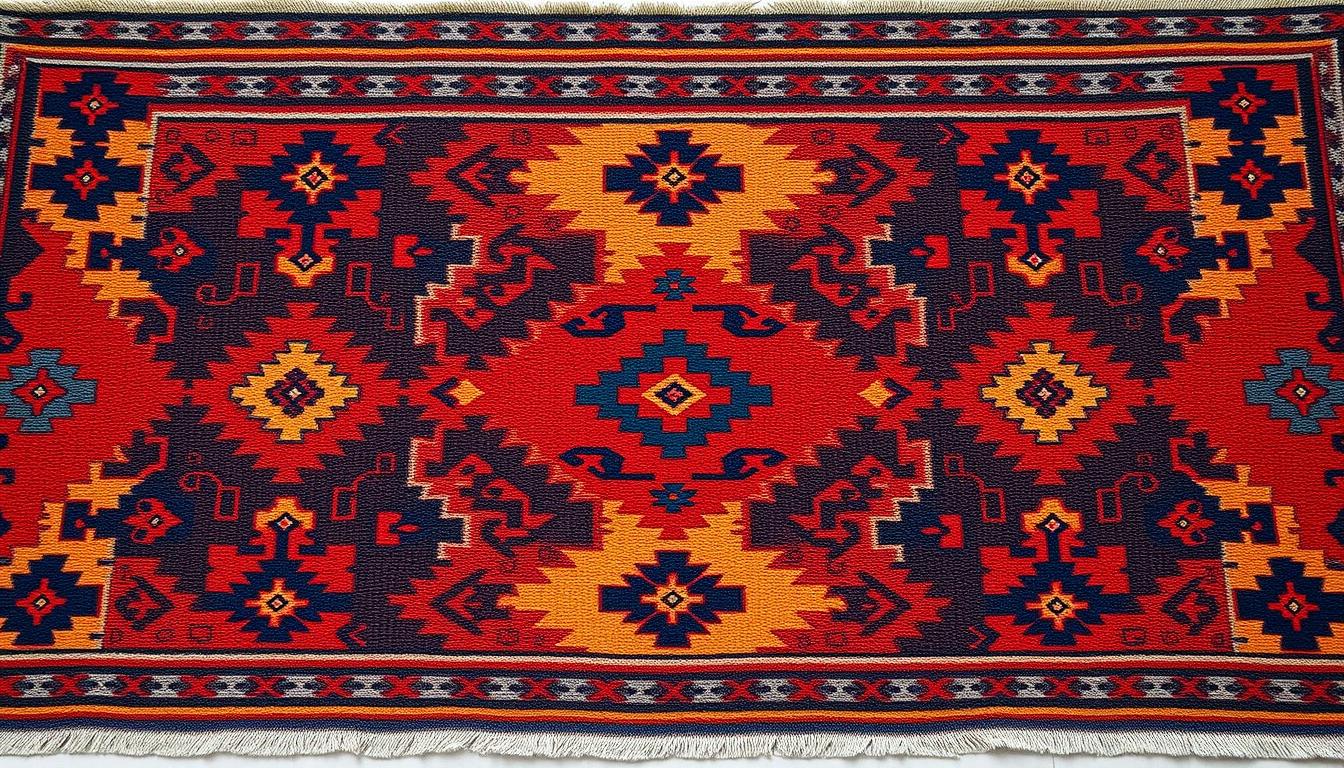
The signature flat surface comes from a specialized tapestry method. Horizontal threads get pulled downward with such force they conceal vertical strands completely. This creates razor-sharp patterns without raised fibers. Natural wool dominates traditional pieces due to its resilience and ability to hold plant-based dyes. Cotton foundations prevent warping, while silk accents add ceremonial luxury.
Every color choice follows ancestral wisdom. Deep reds symbolize prosperity, while indigo blues represent truth. These chromatic codes transform functional items into storytelling heirlooms. Modern creators adapt this symbolism using contemporary palettes without losing historical essence.
Gathering Your Supplies and Tools
Successful textile projects begin with strategic preparation. Quality materials and proper equipment transform creative visions into tangible results. Let's explore what you'll need to craft durable, gallery-worthy pieces.

Essential Materials
Start with natural fibers for authenticity. Cotton makes an excellent warp foundation due to its strength and minimal stretch. For colorful patterns, choose wool yarns that hold dyes well. Always keep extra batting and adhesive on hand for structural support.
Recommended Equipment
A sturdy work frame prevents shifting during intricate pattern work. Basic kits should include measuring tapes and fabric chalk for precise layouts. For advanced creators, power tools like orbital sanders help prepare wooden components efficiently.
| Tool Type | Basic Setup | Advanced Options |
|---|---|---|
| Measuring | Fabric tape measure | Laser level |
| Cutting | Sharp fabric scissors | Rotary cutter |
| Fastening | Manual staple gun | Electric nailer |
Organize supplies in labeled containers near your workspace. Good lighting reduces eye strain during detailed weaving sessions. Keep cleaning tools nearby to maintain your creative area throughout the project.
Setting Up Your Workspace for Success
Your environment directly impacts creative results. Start by choosing a room with enough space to move freely around your project. A 6x6 foot area lets you access all sides of your work without tripping over supplies. Natural light from windows enhances color accuracy, while adjustable lamps prevent eye strain during evening sessions.
Position your surface at ergonomic height – ideally level with your elbows when standing. This reduces shoulder tension during long weaving periods. Use anti-fatigue mats if you prefer working on hard floors. Keep frequently used tools within arm’s reach using wall-mounted organizers or rolling carts.
Systematic storage solves most workflow challenges. Assign labeled bins for different yarn colors and pattern templates. Designate a separate zone for reference materials like sketches or measurement charts. This approach keeps your immediate work area clutter-free while maintaining quick access to essentials.
Air quality matters when working with adhesives or dyes. Open windows or use an air purifier to maintain fresh circulation. Position fans to blow fumes away from your face without disturbing lightweight materials.
Create an inspiration board near your station. Pin fabric swatches, pattern guides, or cultural motifs where you can glance at them mid-project. This visual reference helps maintain design consistency and sparks new ideas as you work.
Finally, place waste baskets strategically. Use separate containers for yarn scraps, paper debris, and reusable materials. A tidy workspace minimizes distractions and lets you focus entirely on your craft.
Creating Your DIY Kilim Rug: The 6 Artistic Steps
Transform raw materials into cultural masterpieces through six methodical stages. This process bridges ancient methods with modern craftsmanship, letting you produce gallery-quality textiles through precise execution.

Step-by-Step Guide Overview
Begin by securing vertical foundation threads under high tension. This base layer determines your project's structural integrity. Next, sketch color placements using chalk markers – traditional geometric shapes work particularly well for beginners.
Interlace horizontal threads using a shuttle, alternating hues to form patterns. When switching shades, leave intentional gaps rather than overlapping strands. These slits become design features celebrating the craft's heritage.
| Stage | Key Action | Tool |
|---|---|---|
| Foundation | Warp setup | Tension rods |
| Pattern Work | Weft insertion | Wooden shuttle |
| Finishing | Edge sealing | Linen thread |
Tips for Precision Execution
Maintain consistent pressure when compressing rows. A seasoned artisan once advised: "Let the comb's weight do the work – three firm taps per inch creates ideal density."
Rotate your work surface periodically to check alignment. If threads bunch, gently adjust tension with a hook tool before continuing. For fringes, twist groups of warp ends clockwise before knotting – this prevents unraveling.
Store unused yarns in sealed containers to prevent dust accumulation. Complete your creation by brushing the surface with a stiff-bristle broom, enhancing the woven texture's visual depth.
Integrating Kilim Rug Aesthetics into Your Home Decor
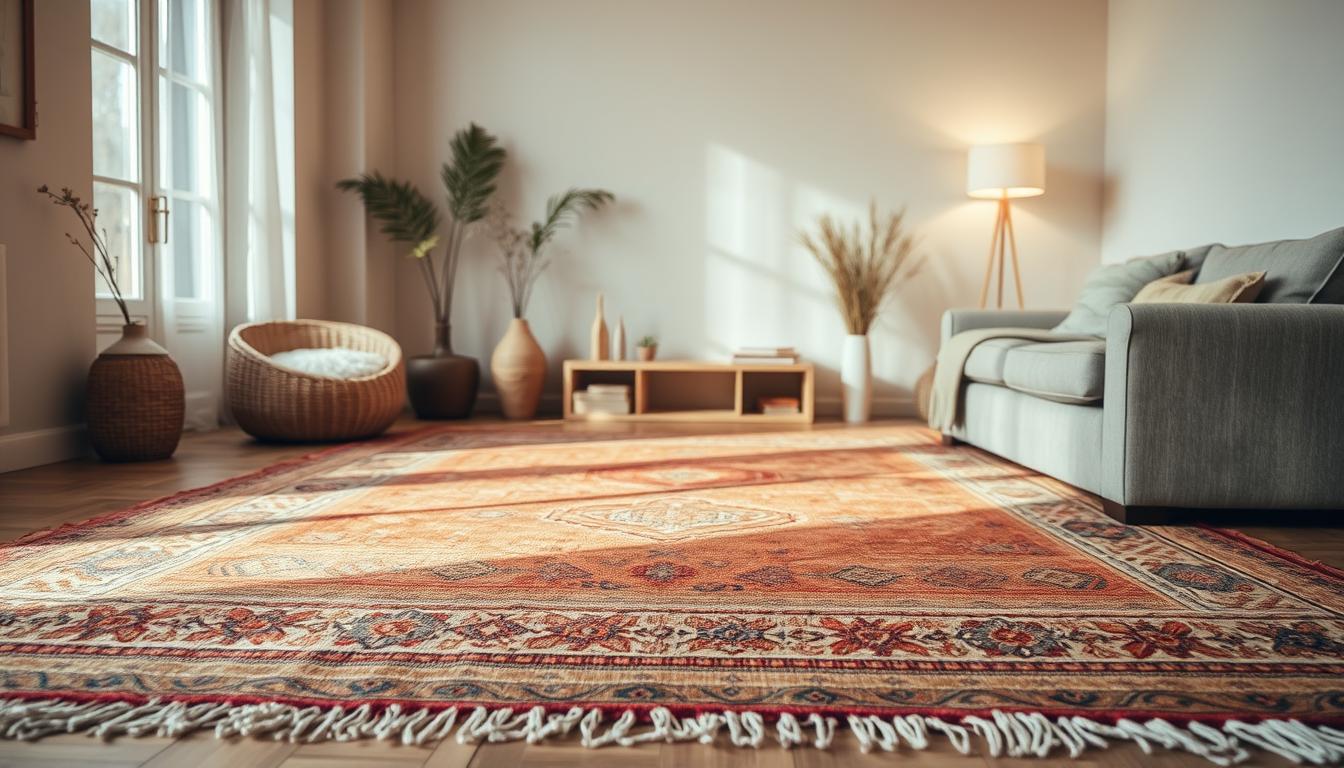
Transform your living spaces with textiles that carry centuries of cultural heritage. These vibrant pieces blend effortlessly with modern furnishings while maintaining their artisanal soul. Their graphic patterns act as visual anchors, pulling together color schemes across your home.
Bridging Eras Through Design
Position bold geometric motifs where they’ll make maximum impact. Layer them under coffee tables to define seating areas, or hang them vertically as striking wall art. The flat surface works perfectly in entryways where thick carpets might buckle under heavy foot traffic.
Try draping smaller pieces over benches near your bed for a global-inspired accent. Their dense weave withstands daily use while adding warmth to hardwood floors. For open-concept spaces, use earth tones to connect kitchen and living areas without matching furniture.
Contemporary interiors benefit from these textiles’ crisp lines. Pair a tribal-patterned piece with minimalist furniture for contrast. In eclectic rooms, let vibrant hues converse with existing décor through shared accent colors.
Pro tip: Rotate seasonal pieces between floors and walls. Summer’s bright oranges can transition to autumn’s deep ochres by simply moving your textile to a new focal point. This versatility extends their usefulness year-round.
Troubleshooting and Maintaining Your Kilim Project
What separates enduring textiles from temporary crafts? Masterful problem-solving paired with thoughtful care. Your creation deserves attention that honors its craftsmanship while addressing practical needs.
Solving Structural Challenges
Uneven tension often shows as ripples along the surface. Adjust your warp threads weekly during weaving using tension rods. For persistent gaps, insert temporary cardboard spacers between rows until patterns stabilize.
Slits between color blocks define authentic flat-weave designs. Leave them open for traditional appeal, or stitch closed if using the piece in high-traffic zones. One master weaver notes: "These gaps aren't flaws – they're signatures of human hands at work."
Preserving Beauty Through Care
Natural fiber maintenance starts with smart cleaning. Use vacuum attachments without rotating brushes to prevent snagging. Blot spills immediately with cornstarch – it absorbs liquids without damaging dyes.
| Issue | Quick Fix | Prevention |
|---|---|---|
| Color transfer | Cold water rinse | Pre-wash yarns |
| Edge fraying | Beeswax coating | Twill tape binding |
| Sun fading | Rotate quarterly | UV-filtering window film |
Store rolled pieces with acid-free paper between layers. Avoid plastic wraps that trap moisture. For deep cleaning, consult specialists familiar with traditional flat-weave preservation methods.
Proper care ensures your textile remains a functional heirloom. The absence of pile simplifies upkeep – dust can’t hide in non-existent fibers. With seasonal rotation and mindful placement, your work will showcase its geometric brilliance for decades.
diy Kilim rug: Creative Customizations and Ideas
Breathe new life into handcrafted textiles by reimagining their purpose beyond floor coverings. Transform vintage finds into functional art using simple woodworking techniques. A scalloped bench with custom-stained legs showcases how traditional patterns gain modern relevance when paired with clean lines.
Start by selecting a sturdy wooden frame as your base. Attach foam padding using adhesive, then wrap it tightly with batting for smooth edges. Secure your textile with a staple gun, pulling diagonally to avoid wrinkles. For ottomans, build a box frame and add nailhead trim to contrast rustic wood with metallic accents.
Consider upholstering headboards for bold bedroom statements. As shown in this creative project, dark-stained wood frames elevate geometric designs while protecting edges. Use cotton backing to prevent fraying during seasonal rotations.
Mix materials strategically – pair vibrant colors with neutral furniture legs or weave remnants into throw pillow covers. These adaptations honor cultural roots while fitting contemporary lifestyles. Your reimagined piece becomes both conversation starter and heirloom.
FAQ
What makes Kilim rugs different from other textiles?
Unlike pile rugs, these flat-woven pieces use no knots. Their geometric patterns and bold colors come from tightly interwoven cotton or wool threads, creating a durable surface ideal for high-traffic areas.
Can I use a wooden frame for weaving?
Yes! A sturdy frame keeps tension consistent. Many crafters repurpose old stretcher bars or build custom ones from untreated pine. Ensure it’s wider than your design to accommodate the full piece.
How do I fix uneven edges during the process?
Adjust thread tension as you work. If gaps appear, gently realign rows with a weaving comb. For minor flaws, incorporate them into the pattern—imperfections often add character to handmade projects.
Which colors hold up best over time?
Natural dyes like indigo or madder age gracefully, while synthetic options offer vibrancy. Pre-wash cotton threads to prevent bleeding. Layer complementary hues for depth, inspired by traditional Anatolian palettes.
Can these textiles withstand heavy furniture?
Place felt pads under chair legs or table bases to distribute weight. Rotate the piece yearly to minimize wear. For high-pressure zones, opt for tighter weaves and reinforced borders.
How do I blend modern decor with vintage motifs?
Pair earthy tones with metallic accents, like brass trays or iron lamps. Use smaller fragments as wall hangings above minimalist beds or sofas. Mix tribal patterns with sleek, monochrome furniture for contrast.