


Article: 5 Timeless Steps to Weave a Kilim Rug
5 Timeless Steps to Weave a Kilim Rug
Imagine holding centuries of tradition in your hands. Flat-woven textiles bursting with color tell stories older than nations, their geometric designs whispering secrets from ancient civilizations. These aren't just floor coverings – they're cultural fingerprints preserved through generations of skilled artisans.

Originating in regions like Turkey and Iran, these versatile pieces transform spaces into galleries. Their reversible nature means every angle reveals new depth. You'll find them adorning walls, enhancing prayer spaces, or adding character to modern interiors.
The process connects you to a lineage of creators who turned simple threads into heirlooms. While mastering this craft demands patience, the fundamentals remain accessible. Traditional techniques focus on rhythmic patterns and symbolic motifs that even beginners can grasp.
This journey through time teaches more than weaving methods. It reveals why these textiles survived empires and trends. You'll discover how bold colors and precise shapes carry meanings deeper than their visual impact.
Key Takeaways
- Kilims represent 4,000+ years of cultural heritage across multiple civilizations
- Flat-woven construction allows for reversible patterns and lightweight durability
- Geometric motifs often carry symbolic meanings specific to regional traditions
- Versatile uses extend beyond floor coverings to wall art and functional decor
- Traditional methods balance complex designs with repetitive, meditative techniques
Understanding Kilim Rugs: History and Cultural Significance
Woven into the fabric of ancient civilizations, these textiles carry stories older than written language. Their flat-woven structure and geometric precision reveal practical ingenuity perfected over generations.
Origins and Traditional Uses
Nomadic tribes across Central Asia first developed kilims as multipurpose tools. Lightweight and durable, they served as tent dividers, saddle blankets, and portable prayer mats. Archaeologists discovered fragments in China's Tarim Basin dating back 1,600 years – proof of their enduring design.
"Each kilim is a cultural passport, stamped with the symbols of its makers' worldview."
Global Influence and Unique Regional Styles
As trade routes expanded, kilim rugs absorbed local influences. Persian weavers incorporated floral motifs, while Balkan artisans favored angular patterns. This table shows key regional differences:
| Region | Pattern Types | Common Colors | Primary Material |
|---|---|---|---|
| Anatolia (Turkey) | Hexagons, diamonds | Crimson, indigo | Goat hair |
| Balkans | Stripes, crosses | Earth tones | Sheep wool |
| Persian Empire | Vines, palmettes | Saffron, emerald | Silk accents |
From Polish kilimy to Kurdish berr, these textiles adapted to local needs while maintaining core weaving principles. Their reversible nature made them ideal for nomadic lifestyles – flip the rug, and you'd find a fresh surface ready for new purposes.
Why Kilim Rugs Remain Timeless Floor Coverings
Timeless design meets modern versatility in textiles that transcend passing trends. These pieces command attention through striking visual language, blending cultural heritage with adaptable functionality. Their secret lies in balancing artistic expression with practical applications suited for today’s homes.

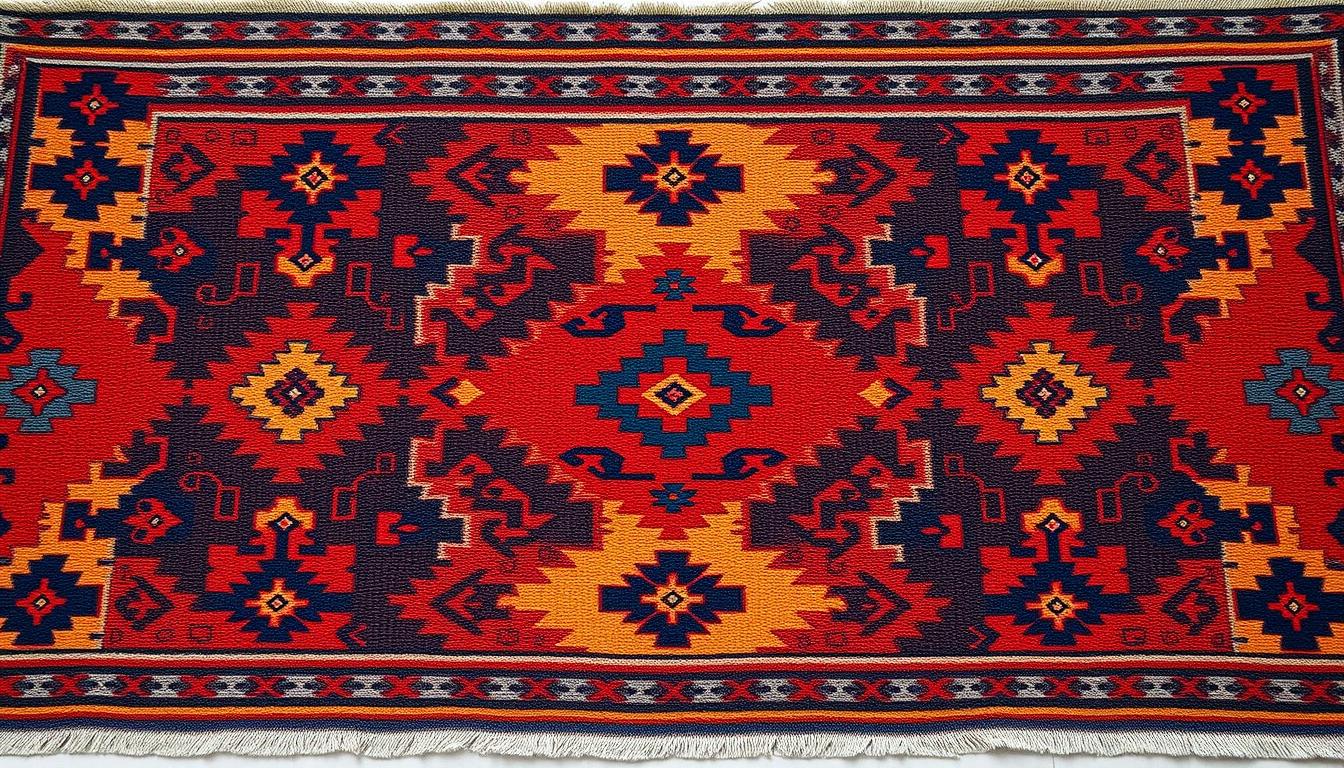
Bold Geometric Patterns and Vibrant Colors
Artisans translate ancient symbolism into geometric designs using natural dyes from plants and minerals. Crimson pomegranate skins, indigo leaves, and saffron petals create hues that deepen with age. Common patterns like diamonds symbolize protection, while hexagons represent harmony.
Every motif acts as a visual language. Stylized animals narrate tribal histories, and stars map celestial beliefs. This coded storytelling transforms kilim rugs into conversation pieces with layered meanings. The color combinations remain vibrant for decades, outlasting synthetic alternatives.
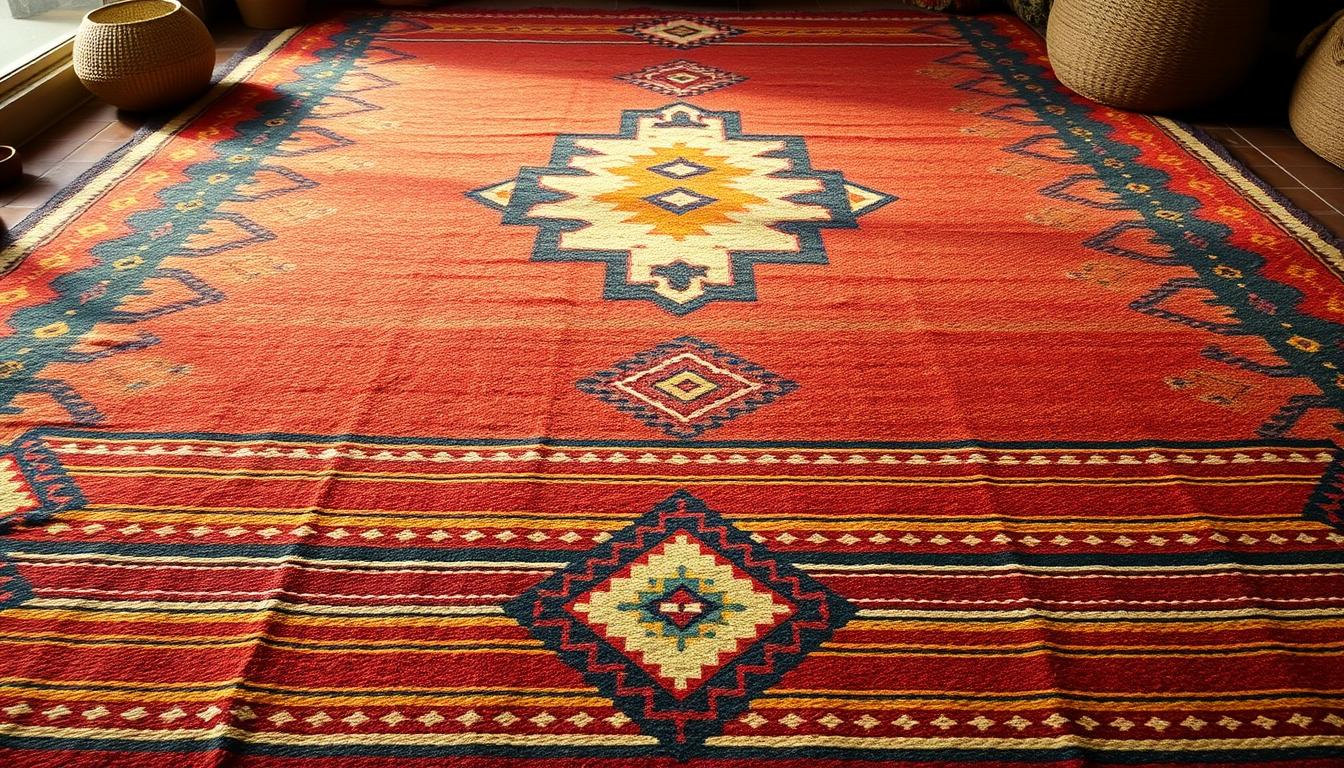
Versatility as Floor Coverings and Wall Hangings
Lightweight flat-weave construction allows multiple uses beyond traditional floor coverings. Hang them as tapestries to amplify vertical spaces or drape them over furniture for instant texture. Their reversible nature offers two design options in one piece.
Modern interiors benefit from their space-enhancing qualities. Unlike bulky carpets, kilims maintain clean sightlines in compact rooms. Discover more surprising facts about these textiles’ adaptability across living spaces. As wall hangings, they absorb sound while adding warmth to minimalist decor.
how to make Kilim rug: The Essential Guide
Crafting textiles with lasting impact begins with mastering foundational methods. The flat-weave technique transforms simple threads into durable art through precise interlocking patterns. This approach creates surfaces ideal for high-traffic areas while maintaining visual complexity.
Overview of the Flat-Weave Technique
Artisans interlace horizontal weft threads through vertical warps with calculated tension. Unlike pile-based textiles, this method leaves no raised fibers. The result? A smooth surface revealing identical patterns on both sides.
| Feature | Flat-Weave | Knotted Pile |
|---|---|---|
| Construction | Interlocked threads | Individual knots |
| Surface | Smooth, no pile | Plush, textured |
| Reversibility | Double-sided | Single-sided |
| Weight | Lightweight | Heavy |
| Durability | High | Moderate |
Key Differences from Knotted Pile Rugs
Traditional pile rugs use vertical knots that create soft, dense surfaces. Kilims employ horizontal tension for flat results. This structural difference affects maintenance, cleaning, and longevity.
Tapestry-style weaving allows color changes mid-row for sharp geometric edges. Tightly packed threads prevent unraveling, making these pieces ideal for floor use. The technique’s efficiency lets creators produce intricate designs faster than knotting methods.
Sourcing Materials and Tools for Kilim Weaving
The foundation of every lasting textile lies in its raw components. Your choice of materials determines both durability and visual impact. Artisans prioritize natural elements that age gracefully while maintaining structural integrity.
Selecting High-Quality Wool, Cotton, and Silk
Wool remains the star performer for weft threads due to its flexibility and dye affinity. Look for long-staple fibers from mature sheep – these create smoother surfaces and tighter weaves. For warp threads, cotton provides unmatched tensile strength to anchor complex patterns.
Silk appears in ceremonial pieces as accent threads. Its luminous quality enhances specific motifs without compromising the textile's flat structure. Always test fiber elasticity by gently stretching strands – premium materials snap back quickly.
Importance of Natural Dyes and Traditional Tools
Plant-based dyes create colors that deepen over decades rather than fade. Madder root produces crimson tones, while walnut shells yield rich browns. Mineral additives like iron sulfate fix pigments permanently into wool fibers.
Essential tools mirror centuries-old designs. A vertical loom maintains consistent tension, while bone combs pack threads densely. Metal shears trim excess fibers without fraying edges. These time-tested implements ensure your creation meets historical standards.
Step-by-Step Guide: Preparing Your Loom and Warp Threads
Every masterpiece begins with a solid foundation. For textile artisans, this starts with transforming raw materials into a stable weaving surface. Proper preparation prevents uneven patterns and structural weaknesses that could unravel months of work.
You'll start by calculating warp thread requirements. Measure your desired length and multiply by 12 to determine threads per foot – complex patterns need tighter spacing. Cotton remains the top choice for vertical loom setups due to its resistance to stretching.
Setting Up the Vertical Loom and Attaching Warp
Secure your loom against a stable wall using heavy brackets. Begin threading from the bottom beam, alternating between top and bottom pegs. Maintain palm-width spacing between threads – too loose creates gaps, too tight risks breakage.
Use a tensioning tool to equalize pressure across all strands. Experienced weavers recommend the "pluck test": gently flick threads to hear matching pitches. Consistent sound means uniform tightness.
| Material | Stretch Factor | Ideal Projects |
|---|---|---|
| Cotton | 2% | Detailed patterns |
| Wool | 5% | Textured designs |
| Linen | 1.5% | Wall hangings |
Finish by tying double-knot fringes at both ends. These will become decorative elements in your final piece. Remember – your warp setup determines whether patterns lie flat or pucker. Take time to perfect this stage before introducing colorful wefts.
Creating Intricate Geometric Designs and Patterns
Patterns that command attention emerge from calculated color transitions and precise thread alignment. Master artisans view each textile as a canvas for storytelling through shapes and symbols. The interplay of angles and hues transforms simple threads into cultural narratives.

Cultural Symbols in Thread Form
Traditional motifs carry layered meanings shaped by regional histories. Hexagons might symbolize beehives representing community, while zigzags echo mountain ranges. Choose symbols reflecting your heritage or personal narrative for authentic storytelling.
Stylized animal figures often depict tribal legends. A scorpion could signify protection, while birds represent messengers. These elements turn functional pieces into heirlooms with embedded wisdom.
Mastering Structural Artistry
The slit-weave method creates crisp edges between color fields. When changing hues, leave vertical gaps rather than overlapping threads. This technique produces the iconic stepped effect that defines classic geometric designs.
| Slit Technique | Visual Impact | Durability |
|---|---|---|
| Traditional slit-weave | Sharp edges | High |
| Sewn slits | Softer lines | Moderate |
Balance slit lengths to prevent excessive gaps. Experienced creators limit openings to 1/4 inch for structural integrity. This approach maintains the textile's flat surface while showcasing bold patterns.
Color transitions require strategic planning. Map your palette using numbered threads or digital templates. Multiple bobbins help manage hue changes without tangling. Remember – precise execution elevates basic designs into museum-quality works.
Mastering Weft Insertion for a Perfect Flat Weave
Your fingers become dance partners with the threads, orchestrating patterns through precise movements. This stage determines whether your creation lies flat or buckles under uneven tension. Proper technique preserves surface integrity while locking colors into razor-sharp geometric formations.
Manual Dexterity Meets Mechanical Precision
Artisans typically pass weft threads manually between warps for maximum control. This method allows micro-adjustments when aligning complex patterns. Shuttle tools speed up the process but sacrifice tactile feedback critical for intricate designs.
| Feature | Hand Technique | Shuttle Method |
|---|---|---|
| Speed | Slow | Fast |
| Precision | High | Moderate |
| Tension Control | Adjustable per stitch | Consistent |
| Learning Curve | Steep | Gentle |
| Material Use | Efficient | Higher waste |
Beginners often start with shuttles for straightforward sections. As skills develop, manual weaving becomes preferable for detailed motifs. Your choice impacts both workflow and final appearance.
The beating comb's rhythm matters as much as thread placement. Strike downward with even pressure after each weft insertion. Proper compaction eliminates gaps between rows, creating that signature flat surface.
Maintain consistent pull on horizontal threads to fully conceal vertical warps. Too loose, and foundations show through. Too tight, and patterns distort. Traditional weaving practices recommend checking alignment every three inches with a ruler.
Expect trial runs before achieving professional results. Muscle memory develops through repeated motions – each row teaches your hands the language of threads. Patience here separates temporary projects from heirloom-quality pieces.
Finishing Touches: Trimming and Washing Your Kilim Rug
Your woven masterpiece reaches its final form through meticulous refinement. Sharp shears remove excess threads, creating crisp edges that frame geometric patterns. This trimming process smooths the surface, ensuring your rug lies flat without frayed distractions.
Cold water baths with white vinegar dissolve residual dyes gently. Avoid harsh scrubbing – let natural fibers relax while preserving color vibrancy. Proper washing softens wool strands, enhancing both look and tactile comfort.
Inspect every inch before declaring completion. Tighten loose ends using a crochet hook, maintaining structural integrity between warp threads. These details transform handmade pieces into heirloom-quality kilim rugs built for daily use.
Finished kilims become versatile additions to modern spaces. Their polished appearance conceals months of effort, revealing only flawless craftsmanship. With careful maintenance, your creation will withstand decades of foot traffic while telling its woven story.
FAQ
What distinguishes flat-weave Kilims from knotted pile rugs?
Kilim rugs use a flat-weave technique without pile, creating a thinner surface. Unlike knotted rugs, they rely on tightly interwoven warp and weft threads to form geometric designs. This makes them lightweight and reversible, ideal for floor coverings or wall hangings.
Why are natural dyes important in traditional Kilim weaving?
Natural dyes from plants, minerals, or insects ensure vibrant, long-lasting colors. They also preserve cultural authenticity, as seen in Turkish or Persian Kilims. Synthetic dyes can fade faster and lack the organic richness tied to regional heritage.
Can Kilims incorporate silk or cotton alongside wool?
Yes. While wool is common for durability, silk adds sheen for intricate motifs. Cotton strengthens warp threads. Blending materials allows weavers to balance texture, strength, and visual depth in patterns like tribal or floral motifs.
How do slit-weave techniques enhance geometric designs?
Slit-weave creates sharp edges between color blocks by leaving small gaps between weft threads. This method highlights bold shapes in Anatolian or Central Asian Kilims, ensuring patterns like diamonds or hexagons remain crisp and detailed.
What tools are essential for setting up a vertical loom?
A sturdy loom frame, warp beams, and heddles are critical. Warp threads must be evenly spaced and tensioned. Traditional tools like wooden beaters compact the weft, while shuttles speed up weaving for larger floor coverings.
Are Kilims suitable for high-traffic areas in homes?
Their flat weave makes them durable but less cushioned than pile rugs. Place them in moderate-traffic zones like living rooms or use as wall hangings. Regular rotation prevents uneven wear on geometric designs.
How do regional styles influence Kilim patterns?
Tribal motifs reflect local symbolism. For example, Kurdish Kilims feature elongated hexagons, while Persian designs use intricate medallions. Colors and motifs often signify cultural stories, making each piece a historical artifact.
What steps ensure longevity after finishing a Kilim?
Trim loose threads carefully and wash with mild soap to preserve dyes. Avoid direct sunlight to prevent fading. Store rolled, not folded, to maintain the flat-weave structure and prevent creases in the surface.