


Article: 5 Timeless Steps to Make a Knotted Rug
5 Timeless Steps to Make a Knotted Rug
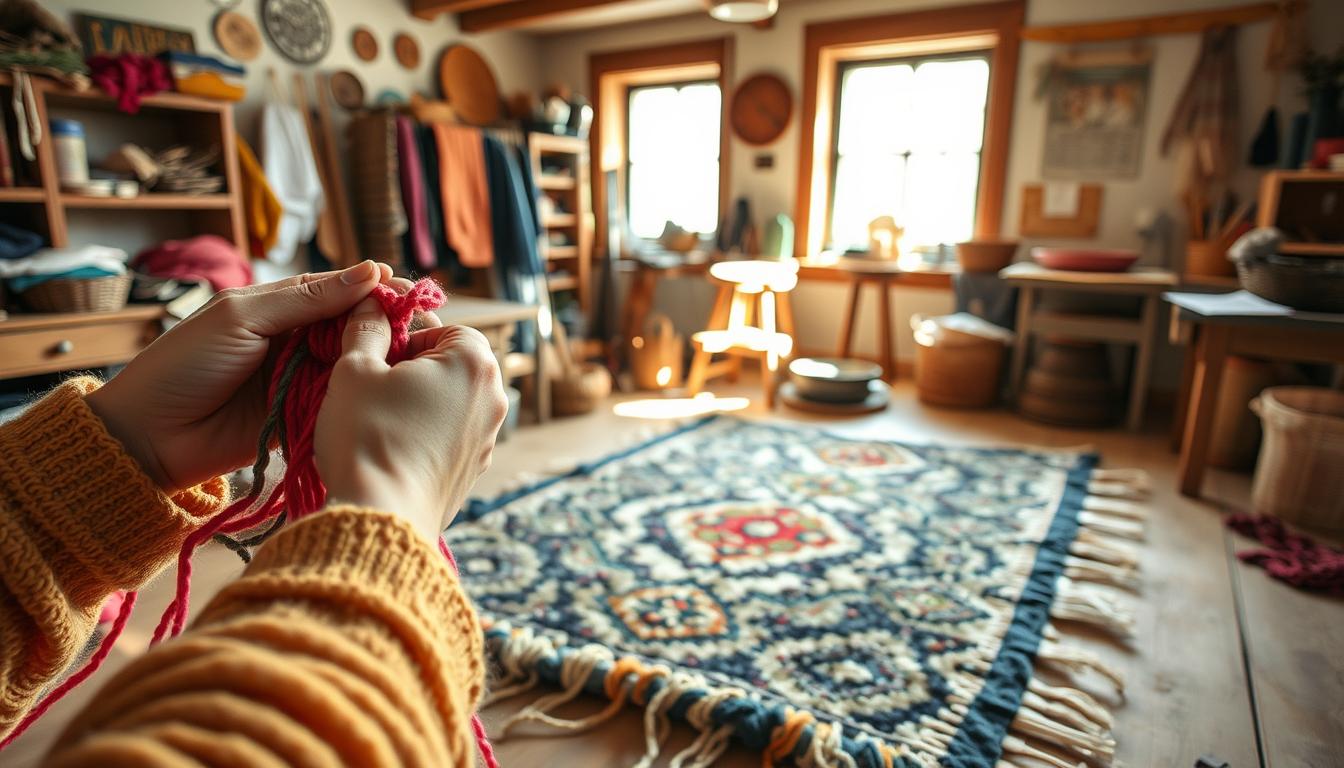
What if you could transform forgotten fabric scraps into a functional work of art using nothing but basic household items? The tradition of Amish rag rugs—often called toothbrush rugs—proves that intricate designs don’t require complex tools. For generations, crafters have turned worn-out textiles into durable floor coverings with just a needle, fabric strips, and patience.

These rugs earned their quirky name from early artisans who repurposed toothbrush handles into stitching tools. Today, the method remains refreshingly simple: fabric strips are looped and knotted using a blanket-like stitch. Beginners can expect to spend roughly 15 hours creating a 30-inch round piece, though the center-outward technique allows for endless size customization.
This guide reveals how recycled materials become stunning home décor through five straightforward stages. You’ll learn time-tested methods passed down through families, discover ideal fabrics for longevity, and master the rhythmic stitching pattern that defines these heirloom-quality creations.
Key Takeaways
- Create durable rugs using recycled fabrics like old clothing or bedding
- Follow five foundational steps suitable for all skill levels
- Understand the historical significance of Amish knot techniques
- Plan projects effectively with clear time estimates
- Build any size rug by working from the center outward
- Transform household waste into functional art
- Gather essential tools like fabric strips and a basic needle
Gathering Materials and Preparing Your Fabric
Your project's success begins with selecting quality materials. The right combination of textiles determines both durability and visual appeal. Focus on flexible cotton fabrics that withstand repeated knotting while maintaining softness.

Choosing the Right Fabric and Old Sheets
Lightweight cotton bedsheets reign supreme for crafting. Their tight weave creates sturdy strips that hold shape through hundreds of knots. Quilting cotton works beautifully, while worn t-shirts offer stretch for textured designs. Sort through old linens, prioritizing materials without thin spots or stains.
Cutting and Tearing Fabric Into Strips
Create uniform 1.5-inch strips using sharp scissors or a rotary cutter. For quick preparation, fold fabric selvage-to-selvage and tear along the grain. A 44-inch length balances workability with minimal joins.
Plan quantities carefully—a 17-inch rug needs 3 yards of cotton, expanding to 12 yards for 36-inch diameters. Mix solid colors with bold patterns for visual depth. Press strips flat before stitching to eliminate twists that disrupt tension.
How to Make Knotted Rug: Essential Techniques
Transforming fabric strips into art requires mastering two fundamental techniques. The Amish knot forms the foundation of every stitch, while clever strip joining ensures continuous weaving. Both methods demand precision but reward crafters with industrial-strength connections that outlast decades of use.
Forming the Amish Knot with Fabric Strips
Create the signature knot by folding a strip's end into a ½-inch slit. Feed a second strip through this opening, then loop its free end back through its own slit. Tighten gently until the mini necktie shape emerges. This self-locking design prevents unraveling while maintaining flexibility.

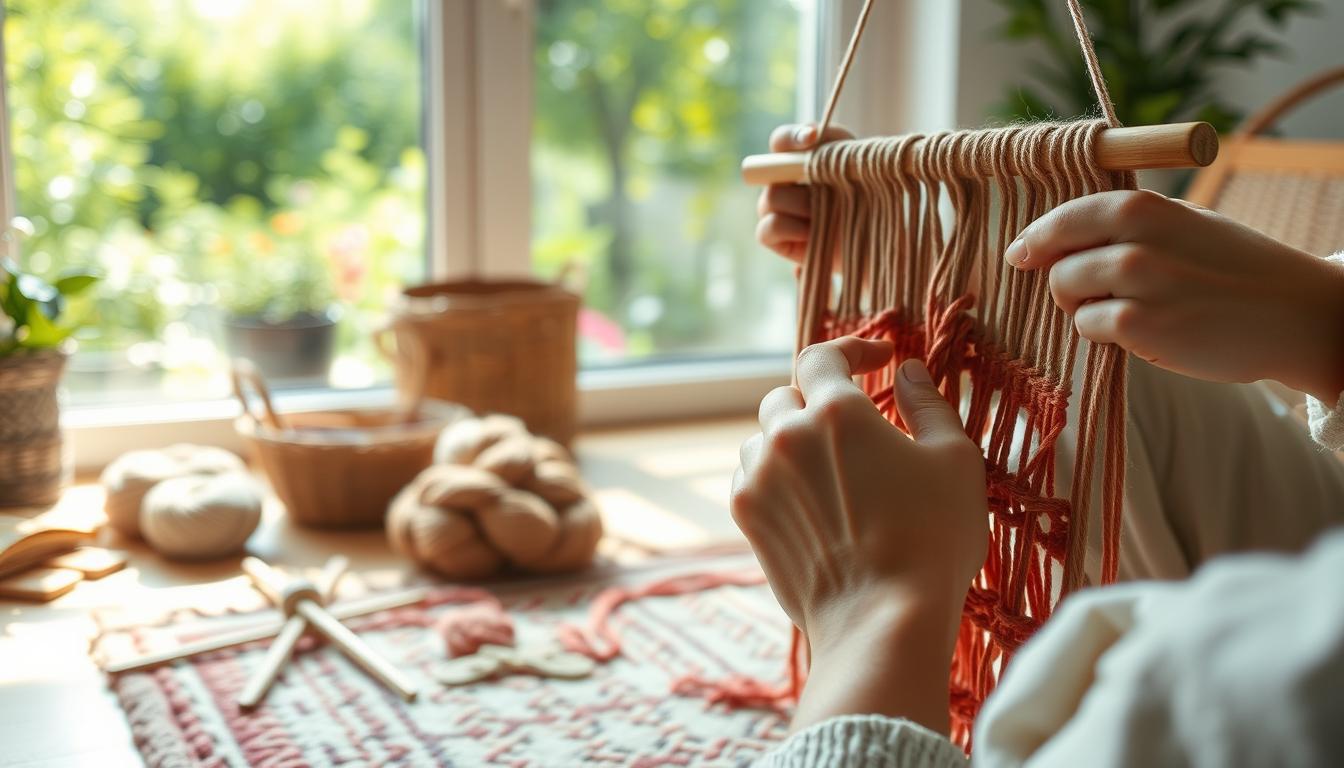
Joining Strips Without Sewing Using Simple Tools
Connect new strips by aligning their slitted ends. Push one end through the other's opening, then thread both tails through the knot's center. The no-sew method eliminates bulk while creating nearly invisible transitions between colors or patterns.
| Tool Type | Materials | Advantage |
|---|---|---|
| Homemade Needle | Wire + Masking Tape | Customizable size |
| Commercial Needle | Stainless Steel | Durable stitching |
| Improvised Joiner | Plastic Cord | Lightweight handling |
For homemade needles, bend 12-gauge wire into an oval shape. Wrap the joint with masking tape to prevent snagging. This DIY approach works perfectly for casual crafters, while serious artisans might invest in specialized rag rug needles.
Step-by-Step Process for Crafting Your Knotted Rug
The journey from fabric strips to finished piece starts with six precise knots at the core. These initial connections determine your project's structural integrity and circular shape. Proper spacing between foundation knots prevents uneven edges as the rag grows outward.
Starting at the Center and Working Outward
Arrange your first six knots in a tight hexagonal pattern. Thread strips through each loop using the blanket stitch method, pulling firmly enough to eliminate slack without warping the material. Complete three full circles around the center before advancing.
| Stage | Action | Purpose |
|---|---|---|
| Foundation | 6 center knots | Creates stable base |
| Expansion | Single loops per hole | Maintains flat surface |
| Adjustment | Double loops when needed | Prevents cupping |
| Finishing | Square knot tuck | Secures final edge |
Looping, Tension, and Incremental Increases
After the fifth circle, insert two strips into every third hole to accommodate the growing size. Alternate between single and double loops until the surface lies completely flat. Keep strips taut but flexible—over-tightening creates ripples.
Join new fabric pieces by threading fresh strips through existing slits. Weave ends through at least four previous loops for invisible transitions. Rotate the work frequently to ensure even tension across all sides.
Troubleshooting and Expert Tips for a Flawless Rug
Crafting a durable rag rug involves more than just knotting—mastering problem-solving techniques ensures your creation stays flat and functional. Even minor tension issues or material surprises can impact your project’s success. These expert strategies address challenges beginners often face.
Maintaining Even Tension for a Flat Surface
Consistent pressure prevents cupping or rippling. Rotate your work frequently, checking for flatness by laying the piece on a table. If edges curl upward, add extra loops every fifth stitch. For wavy sections, reduce increases by returning to single stitches.
Strips naturally fray during looping—keep scissors nearby for quick trims. When joining new fabric, thread ends through four existing loops to hide transitions. This maintains clean lines while accommodating natural wear.
Utilizing Tools like Rag Rug Needles and Masking Tape
Wrap homemade needles with masking tape to prevent fabric snags. Specialized rag rug needles streamline stitching, especially with thicker materials. Their large eyes accommodate multiple strips for complex color patterns.
Plan fabric quantities carefully—double initial estimates to avoid shortages. Store prepared strips in labeled bins by hue or texture. This organization simplifies pattern adjustments mid-project.
Conclusion
Every completed knot brings discarded fabrics closer to becoming cherished home accents. Through five foundational stages, you’ve gained skills to convert textile scraps into durable floor art. The time-tested process blends practicality with creativity—transforming what others discard into functional beauty.
Understanding the time required helps manage expectations. Each hour spent looping strips builds a piece meant for decades. Your first project lays the groundwork for experimenting with bold colors or intricate patterns in future creations.
Challenges like tension issues now have clear solutions. Adjustments to the center-out method ensure flat surfaces and clean edges. Rotate your work frequently, checking progress from every side as the rug expands.
This craft honors eco-friendly practices while preserving tradition. Your finished rag rug won’t just warm floors—it becomes a conversation starter about patient craftsmanship. Share the satisfaction of giving forgotten fabrics new purpose through every intentional stitch.
FAQ
What’s the best way to prepare fabric strips for a rag rug?
Tear or cut old sheets or cotton into 1-2 inch wide strips. Use scissors for precision or rip fabric along the grain for a frayed look. Keep lengths consistent for even knots.
Can I combine different colors or patterns in my design?
Yes! Mix fabric strips in contrasting colors or patterns to create unique designs. Layer strips before knotting to blend hues seamlessly.
How do I prevent loose ends from unraveling during the process?
Secure loose ends by tucking them under adjacent knots or using a dab of fabric glue. Trim excess with sharp scissors for a clean finish.
What tools simplify joining fabric strips without sewing?
A rag rug needle or toothbrush method works well. Thread strips through the needle’s eye or use the bristles to weave ends together tightly.
How do I maintain tension while forming Amish knots?
Keep consistent pressure by pulling each loop firmly. Use masking tape to anchor starting strips and adjust as you expand outward.
What’s the ideal size for a beginner-friendly knotted rug?
Start small—around 2x3 feet—to practice techniques. Increase dimensions gradually as you master looping and tension control.
Can I repurpose old clothing for this project?
Absolutely. Cotton t-shirts, denim, or flannel sheets are durable options. Pre-wash fabrics to prevent shrinkage and soften textures.