


5 Smart DIY Steps for a Large Rug
What if you could craft a showstopping floor piece that costs half the price of designer alternatives? Imagine transforming simple supplies like cotton piping and netting into a soft, cloud-like centerpiece tailored to your exact space. This isn’t just possible—it’s easier than you think.

One passionate crafter recently built a 5×8 masterpiece using basic materials. Their creation required 200 yards of piping but stayed under $350. The result? A durable, textured focal point that handles heavy foot traffic while feeling like a luxury purchase.
Not only does this approach save money, but it also lets you control every detail. Choose colors that pop against your walls or experiment with pile thickness. Want a circular shape for your reading nook? No problem. The method adapts to any dimensions or style preferences.
This guide breaks down the process into manageable stages. You’ll learn how to plan measurements, source quality fabrics, and assemble your design. While the project demands patience, it’s perfect for evenings spent relaxing with your favorite shows. Ready to turn your vision into something you can literally walk on?
Key Takeaways
- Create premium-looking floor decor for 60% less than retail prices
- Customize dimensions and textures to match your room’s needs
- Use durable materials like cotton piping for long-lasting results
- Complete the project over multiple relaxed sessions
- Achieve professional outcomes with basic crafting skills
Introduction to Your DIY Rug Adventure
Imagine stepping onto a plush, handmade creation that perfectly fits your home's aesthetic. Like many crafters, you might’ve faced sticker shock when browsing store options. One creator spent weeks hunting for affordable floor decor before realizing: “Why pay premium prices when I can build exactly what I need?”
This journey begins with simple materials and transforms them into a personalized statement piece. While the process requires evenings of focused work, the reward is a cloud-soft surface that molds to your space. You’ll discover how basic netting and piping become textural magic under your fingers.
Time investment varies, but breaking tasks into 90-minute sessions makes progress manageable. As one satisfied maker notes:
“Each knot tied felt like adding personality to my room.”
Whether you’re matching bold accent walls or crafting neutral foundations, this method adapts effortlessly.
Beyond cost savings, you gain control over every detail – from sizing to pile density. Friends might assume you splurged on a boutique find, but only you’ll know the secret: patient hands and vision can outshine any mass-produced option.
Project Overview and Inspiration
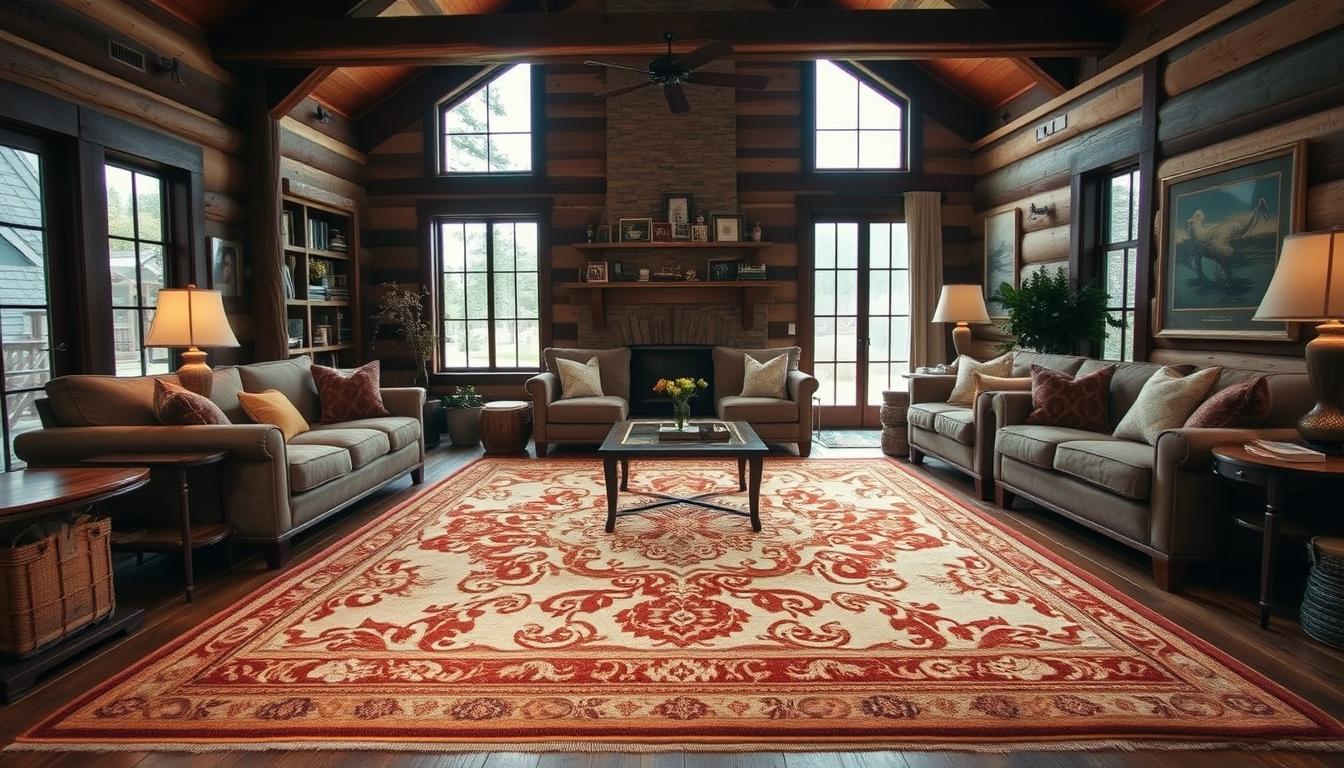
Transform any space with a floor covering that hugs your feet like morning mist. This technique adapts to kitchens, hallways, or living areas, creating cozy surfaces where cold tiles once ruled. Whether you need a 2-foot bath mat or an 8-foot living room centerpiece, the method scales effortlessly.
Store-bought options often force compromises. Too short. Wrong hue. Scratchy texture. One maker shared:
“After months of searching for a burnt orange runner, I finally made one that looks like autumn leaves.”
The cotton piping approach solves these frustrations while delivering cloud-like softness underfoot.
See how homemade creations outperform mass-produced alternatives:
| Feature | Handmade | Store-Bought |
|---|---|---|
| Custom Sizing | Yes | Limited |
| Color Options | Unlimited | Standard 8-12 |
| Cost per Sq Ft | $4.50 | $12+ |
| Texture Control | Adjustable | Fixed |
Choose yarns that whisper or shout – match existing decor or craft bold contrasts. Layer neutrals for serene bedrooms or mix vibrant tones for playrooms. The process becomes meditative, each knot adding personality to your floors.
As seasons change, refresh spaces without replacing entire pieces. Swap accent colors in border sections or add pom-pom details. Your creation evolves with your style, proving functional art belongs underfoot.
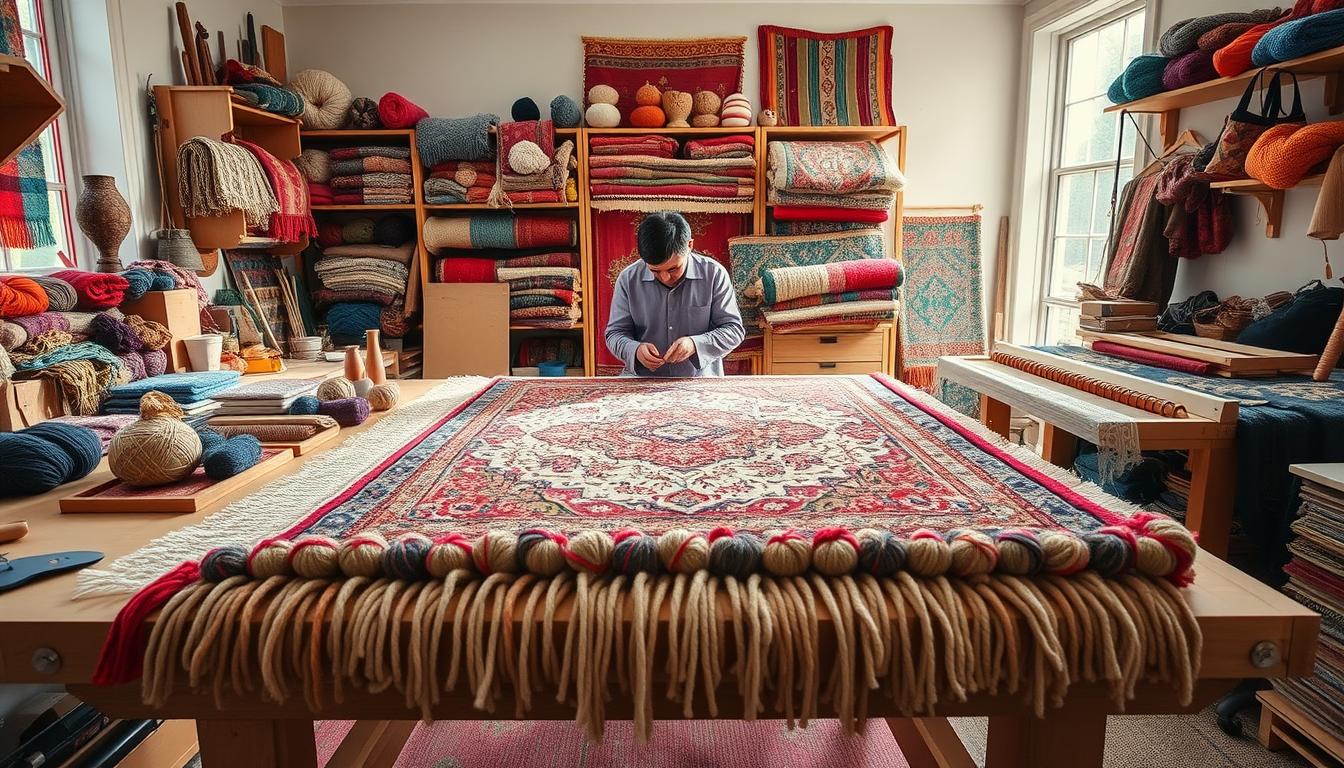
Essential Materials and Supplies
Your custom rug begins with two key elements: structure and softness. Multi-use netting forms the sturdy base that keeps patterns aligned, while cotton piping creates the plush surface you'll love walking on. Thicker piping (½" to 11/16") cuts material needs by 40% compared to skinny options.

Discovering Netting and Cotton Piping
The netting's grid pattern acts like a blueprint for your design. Choose ¼" holes - large enough for easy weaving but tight enough to prevent slipping. Cotton piping thickness changes everything:
| Piping Size | Yards Needed | Total Cost | Time Saved |
|---|---|---|---|
| ¼ inch | 340+ | $480 | Base |
| ½ inch | 200 | $300 | 5 hours |
| 11/16 inch | 180 | $270 | 8 hours |
A seasoned crafter shares:
"Switching to ½-inch piping let me finish my living room piece in three weekends instead of five."
Additional Tools and Budget-Friendly Tips
Gather these essentials:
- Sharp fabric scissors ($12-$18)
- Mini rubber bands (1000-pack)
- Metal ruler
Save money by buying piping coils from upholstery suppliers instead of craft stores. Check Joann Fabrics' app for 60% off coupons - some makers report spending under $250 for 5x8 materials. Make sure to measure your space twice before purchasing netting to avoid costly sizing errors.
Planning Your DIY Large Rug Design
Perfect floor decor starts with precise calculations and creative vision. Before cutting materials, map your space like a pro. Consider furniture placement and traffic patterns – these dictate your final dimensions.
Measuring Your Space and Determining Rug Size
Grab a tape measure and note your room's longest/widest points. For under-couch designs like the 5×8 example, leave 18-24" between furniture legs and edges. Standard netting widths require strategic planning:
| Rug Length | Netting Pieces Needed | Extra Width |
|---|---|---|
| 5 feet | 3 (8ft each) | 1 foot |
| 7 feet | 4 (8ft each) | 6 inches |
| 9 feet | 5 (8ft each) | 3 inches |
Make sure to account for trim areas. One designer shared:
"Cutting that extra foot first saved me hours of adjustments later."
Selecting Colors and Textures
Test swatches under morning and evening lights. North-facing rooms benefit from warm tones, while south-facing spaces handle cool hues. Durable darks work for entryways, soft neutrals suit bedrooms.
| Room | Suggested Colors | Texture Tip |
|---|---|---|
| Living Room | Earthy greens/blues | Medium pile |
| Bedroom | Muted graiges | Plush high-pile |
Balance bold statements with practical upkeep. A charcoal sectional owner chose dove-gray piping – hides crumbs while complementing leather accents.
Setting Up Your Creative Workspace
Your crafting area becomes a sanctuary where patience meets progress. Picture a well-lit corner in your home where materials stay within arm’s reach and Netflix queues keep you company. This setup transforms tedious tasks into therapeutic sessions.
Lighting matters more than you think. Position lamps to eliminate shadows on your work surface—angled fixtures reduce eye strain during evening sessions. One maker noted:
“A $20 clip light made my knots twice as precise.”
Organizing Tools and Materials
Group supplies by function. Keep scissors and rubber bands in separate containers near your dominant hand. Store cotton piping coils vertically in bins to prevent tangling. Label everything—it saves precious minutes during late-night work.
Use a folding table if floor space is limited. Lay netting sections on a non-slip mat to prevent shifting. Make sure your chair supports proper posture—cushioned seats with lumbar pillows help during three-hour marathons.
Seasoned crafters swear by these efficiency boosters:
- Wall-mounted pegboards for hanging tools
- Rolling carts with layered trays
- Magnetic strips for metal rulers
This preparation pays off. You’ll spend less time hunting for supplies and more time watching plot twists unfold. Before you know it, that sprawling floor piece emerges—one cozy evening at a time.
Step-by-Step: Cutting the Netting
Precision starts here. Lay your netting flat on a clean surface, using weights or books to hold corners taut. Measure twice: mark cutting lines with washable fabric chalk every 8 feet for standard projects. Sharp fabric scissors slice through the grid-like material smoothly—like cutting through butter with a hot knife.

| Final Width | Netting Pieces Needed | Total Extra Material |
|---|---|---|
| 4 feet | 2 | 6 inches |
| 6 feet | 3 | 1 foot |
| 8 feet | 4 | 18 inches |
For a 5×8 floor piece, three 8-foot sections create the base. Leave 1 foot of extra width—you’ll trim this later for crisp edges. One crafter advises:
“Cut wider than needed. Trimming beats patching gaps.”
Essential tools ensure success:
- Metal ruler for straight guidelines
- Non-slip mat to prevent shifting
- LED headlamp for shadow-free visibility
Align cut edges before joining sections. Ragged lines cause uneven weaving later. Fold excess material under the main body—this hidden flap strengthens seams during assembly. Your foundation determines everything: take time here, and the rest falls into place.
Step-by-Step: Preparing the Cotton Piping
Your floor piece's texture takes shape in this critical phase. While cutting hundreds of piping strips might seem tedious, this preparation determines whether your creation feels like a boutique find or a rushed craft. Consistency here separates amateur attempts from professional-grade results.
Rhythm Meets Precision
Grab your sharpest scissors and measure 4-inch segments using a metal ruler. Allow slight variations – up to ¼ inch – for organic charm. One maker compares it to handwriting:
“Perfectly identical pieces look machine-made. A bit of irregularity whispers ‘handcrafted with care.’”
Thicker piping (½" or 11/16") reduces cutting time by 40% compared to narrow options. See how sizing impacts your project:
| Piping Width | Pieces per Hour | Total Time Saved |
|---|---|---|
| ¼ inch | 85 | Base |
| ½ inch | 140 | 6 hours |
| 1 inch | 200 | 11 hours |
Texture Through Strategy
Short segments create low-profile surfaces ideal for high-traffic areas. Longer pieces (5-6 inches) add plushness perfect for bedrooms. Want subtle ombre effects? Sort cut pieces into color gradients before weaving.
Store pre-cut piping in labeled bins. This organization step pays dividends later when you’re mid-weave and need quick access. Most crafters complete this phase over 2-3 evenings while watching their favorite shows.
Step-by-Step: Weaving the Piping into the Netting
Transform scattered materials into a cohesive masterpiece through strategic weaving techniques. Begin by threading pre-cut cotton pieces through the netting grid, working row by row. Push each piece upward until 1 inch protrudes, creating uniform tufts across your surface.
Using Rubber Bands for Secure Knots
Secure each tuft with mini rubber bands for lasting hold. Twist bands twice around paired cotton ends, ensuring snugness without over-tightening. One crafter shared:
"Rubber bands stayed put through three years of vacuuming – no loose threads!"
| Feature | Rubber Bands | Elastic String |
|---|---|---|
| Application Speed | 12 sec/knot | 45 sec/knot |
| Knot Security | High | Very High |
| Adjustability | Easy | Difficult |
Creating a Fuzzy Pom-Pom Effect
Fluff tufts outward using your fingers or a fine-tooth comb. Rotate pieces clockwise while pulling gently – this separates cotton fibers for maximum volume. Alternate fluff directions between sections for organic texture.
For plush areas like bedroom floors, spend extra time teasing fibers upward. High-traffic zones benefit from tighter, denser arrangements. The method adapts to your needs: create cloud-soft nooks or durable pathways with the same materials.
Step-by-Step: Assembling Rug Pieces
Bring your creation together like solving a fabric puzzle. Lay adjacent netting sections edge-to-edge, matching grid holes precisely. Use binder clips every 6 inches to hold alignment – this prevents shifting while you work.
Weave cotton strips through both pieces simultaneously. Alternate between upper and lower layers to lock sections together. A seasoned maker explains:
"Treat the seam like a zipper – interlock fibers gradually for invisible joins."
| Alignment Method | Time per Foot | Seam Visibility |
|---|---|---|
| Binder Clips | 8 minutes | Low |
| Sewing Pins | 12 minutes | Moderate |
| Freehand | 15+ minutes | High |
Secure connections with rubber bands as in previous steps. Twist bands twice around paired ends from both netting pieces. This creates unified tufts that disguise the seam.
Fluff merged sections outward using a comb. Work in circular motions to blend textures. Focus on three key areas:
- Consistent tuft height across the join
- Matching color distribution
- Uniform fluff density
Projects with multiple sections benefit from working inward. Complete center joins first, then move toward edges. This method maintains tension and prevents puckering.
Tips for Securing Edges and Seamless Joining
Final touches turn functional crafts into gallery-worthy pieces. Sharp scissors become your secret weapon here, transforming raw edges into crisp lines that whisper professionalism. Let’s explore techniques that elevate handmade creations to boutique quality.
Trimming and Tidying Up for a Professional Look
Walk around your piece with fresh eyes. Identify tufts sticking out like unruly hairs. Snip these outliers at a 45-degree angle—this blends cuts naturally into the texture. Focus first on perimeter strands, creating uniform borders that frame your work.
| Tool | Speed | Precision | Best For |
|---|---|---|---|
| Fabric Scissors | Moderate | High | Detailed work |
| Rotary Cutter | Fast | Medium | Straight lines |
| Electric Trimmer | Very Fast | Low | Bulk removal |
One perfectionist crafter advises:
"Trim ¼ inch beyond your desired edge—it settles perfectly after fluffing."
Exploring Alternate Adhesive Methods
While rubber bands work well, consider these alternatives for tricky corners:
| Method | Drying Time | Bond Strength |
|---|---|---|
| Fabric Glue | 2 hours | Medium |
| Hot Glue | Instant | High |
| Double-Sided Tape | None | Low |
Test adhesives on scrap materials first. A mix of techniques often yields top results—use hot glue for high-stress areas and fabric glue for seamless joins. This hybrid approach saves time while maintaining durability.
Personalizing Your Rug with Unique Design Enhancements
Your floor creation becomes a canvas for self-expression. While neutral tones offer timeless appeal, strategic color combinations can transform rooms into vibrant showcases. Cotton piping’s versatility lets you mix shades like paints on an artist’s palette.
Incorporating Custom Colors and Patterns
Test dye lots under natural and artificial light before committing. North-facing spaces glow with warm terracottas, while south-facing areas pop with cool slate blues. Layer three related hues for subtle gradients – start with espresso brown, transition to camel, then cream.
Create focal points using these techniques:
- Weave contrasting strips along borders for frame-like effects
- Alternate two complementary shades every six rows
- Cluster darker tones where furniture will anchor the piece
One designer achieved depth by pairing charcoal and silver threads – their living room centerpiece shifts appearance with the sun’s angle. For seasonal flexibility, stitch removable accent sections using temporary knots.
Patterns emerge through deliberate placement. Try chevron stripes by angling strips at 45 degrees, or craft geometric shapes using color-blocked zones. Your project evolves as you work, becoming a reflection of personal style that standard store options can’t match.
FAQ
How long does it take to complete this project?
The time depends on the rug’s size and your experience. Smaller pieces may take 6–8 hours, while larger designs can span a weekend. Breaking tasks into stages helps manage progress.
Can I substitute materials if I don’t have netting?
Yes! Burlap or canvas can replace netting, but ensure the material has an open weave for easy piping insertion. Test durability if using non-traditional fabrics.
What’s the best way to pick colors that complement my room?
Match tones to existing furniture or walls. Neutral shades like beige or gray blend easily, while bold hues like navy or terracotta add contrast. Test swatches under your home’s lighting first.
Do I need a large workspace for assembly?
A clean, flat surface (like a garage floor or patio) works best. For bigger rugs, work in sections to avoid overwhelming the area. Protect floors with drop cloths.
How do I prevent edges from unraveling over time?
Secure knots with fabric glue or binding tape. For high-traffic areas, consider adding a non-slip backing or serging the perimeter for extra durability.
Can I add patterns after weaving the piping?
Absolutely! Use fabric paint or dye to create stripes, geometric shapes, or ombré effects. Apply designs before cutting piping for consistent results.
What’s the average cost for supplies?
Budget around $50–$150, depending on size. Cotton piping and netting are affordable, but textured yarns or premium adhesives may increase costs. Shop sales for bulk discounts.
