


Article: 6 Simple Steps to Make a Living Room Rug
6 Simple Steps to Make a Living Room Rug
What if you could craft a custom rug for your space without spending a fortune? Retail options often lack personality and cost thousands, leaving homeowners frustrated. But there’s a better way—transforming basic materials into a unique centerpiece that reflects your style.

Designing your own floor covering isn’t just about savings. It’s about pride in creation. Imagine stepping back to admire a 5x8 masterpiece you built from scratch. No special skills or tools are needed—just patience and creativity.
Retail stores rarely offer the exact size or color combinations you envision. That’s why more people are embracing DIY solutions. This guide breaks down the process into manageable steps, from material selection to final touches. You’ll learn techniques that blend simplicity with professional-looking results.
Key Takeaways
- Save hundreds by avoiding store-bought handmade rugs
- Experience pride in crafting a personalized 5x8 centerpiece
- Solve sizing and style challenges common in retail options
- Follow a clear, step-by-step process for guaranteed success
- No prior crafting experience or expensive tools required
Introduction: Embrace the DIY Rug Revolution
Why settle for mass-produced when your space deserves a personal touch? Store-bought options often force compromises—wrong sizes, clashing colors, or prices that sting. Crafting your own floor covering solves these frustrations while adding character money can’t buy.
Traditional shopping leaves many disappointed. Standard dimensions rarely fit unique layouts. Pre-made designs clash with existing décor. Cotton piping projects flip the script, letting you dictate every detail. Choose exact measurements for awkward spaces. Mix hues that harmonize with your walls or furniture.
The process demands patience but rewards with plush results. Imagine sinking toes into cloud-soft fibers you assembled. Unlike thin retail versions, handmade pieces offer luxurious thickness. Each knot becomes proof of creativity conquering limitations.
This movement isn’t just about saving cash—it’s artistic freedom. Want sunset orange stripes? Go for it. Need an odd-shaped piece for under the coffee table? No problem. Your vision guides the project from start to finish.
Join thousands transforming spaces through hands-on creation. The path to your ideal floor accent begins with scissors, materials, and bold imagination. No expertise required—just willingness to try something new.
Understanding Your Living Room Space
Great design starts with smart planning. Before cutting materials or choosing colors, analyze your space like a pro. Furniture arrangement and foot traffic patterns dictate success more than you might think.
Assessing Room Dimensions and Furniture Layout
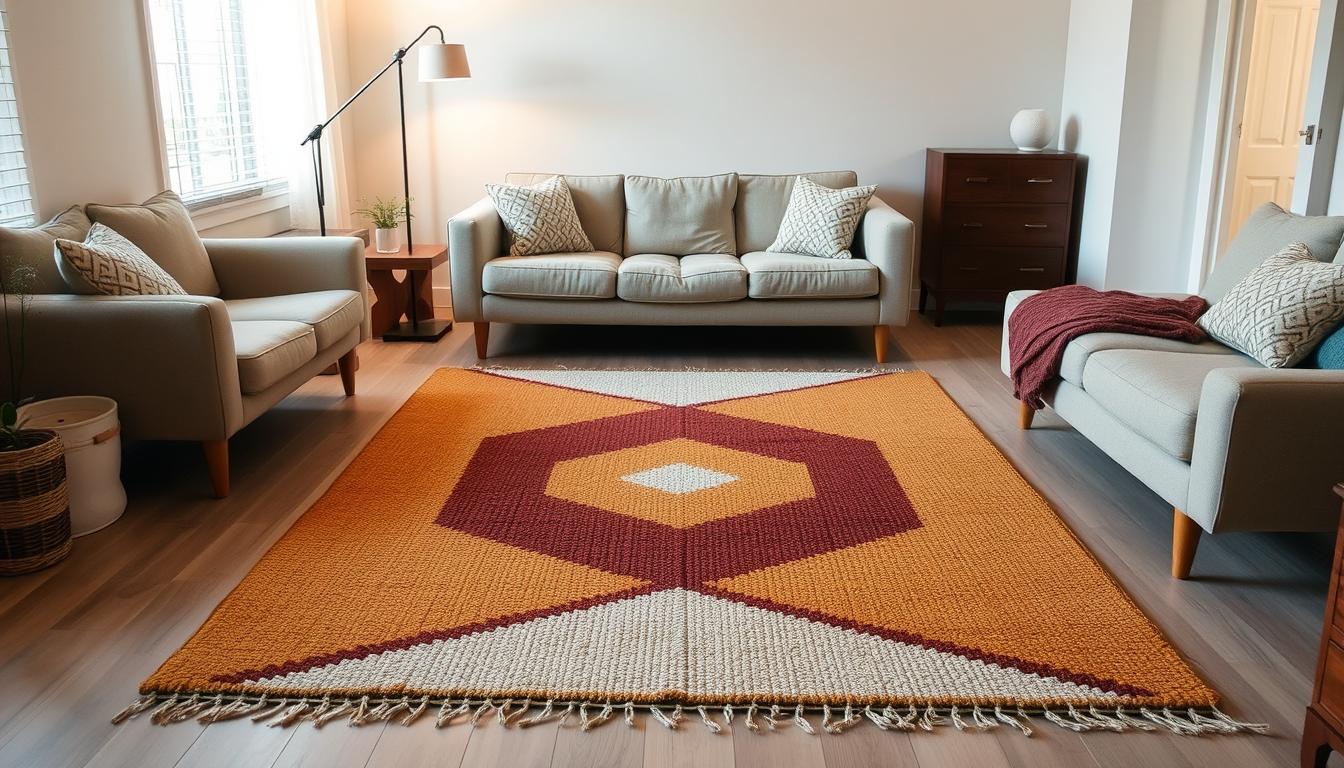
Grab your tape measure—but not for the floors. Focus on seating widths and table lengths instead. Sofas averaging 84-96 inches wide pair best with rugs extending 18-24 inches beyond their edges. This creates visual balance while anchoring your furniture group.
"A rug should frame your conversation area, not float like an island."
Consider door swings and high-traffic zones. Narrow walkways under 30 inches? Opt for smaller accent pieces rather than wall-to-wall coverage. Our in-depth guide to rug dimensions explains how to calculate clearance needs for different room types.
Visualizing Rug Placement and Impact
Test layouts using painter’s tape on the floor. Mark potential borders while leaving adequate walking space—typically 18 inches for compact areas, 36 inches for open-concept spaces. Observe how different shapes affect the room’s flow during daily activities.
| Rug Size | Ideal Room Size | Furniture Layout | Walkway Space |
|---|---|---|---|
| 8x10 ft | 12x15 ft | All legs on rug | 24-30 in |
| 9x12 ft | 15x20 ft | Front legs only | 30-36 in |
Architectural features matter too. Align edges with fireplace hearths or window seats for cohesive styling. Dark floors? Light-colored fibers prevent the space from feeling cavernous. The right placement transforms ordinary floors into intentional design statements.
Selecting Materials for Your Rug Creation
The foundation of any great floor accent lies in smart material choices. Thickness, texture, and durability determine both aesthetics and functionality. Let’s explore options that balance cost with creative potential.

Cotton Piping vs. Vinyl and Fabric Options
Cotton piping offers plush texture and comes in multiple diameters. The 1/2-inch and 11/16-inch sizes work best for most projects—thick enough for comfort but manageable during assembly. You’ll need 200+ yards for a standard 5x8 piece, costing $300-$350 total.
| Material | Thickness Options | Project Cost |
|---|---|---|
| Cotton Piping | 1/4" to 1+" | $300-$350 |
| Vinyl Remnants | 2mm-5mm | $80-$150 |
Vinyl flooring remnants paired with fabric provide a budget alternative. These materials create sleek, modern designs perfect for high-traffic zones. Home improvement stores often sell leftover stock at 60% off retail prices.
Budget-Friendly Sources and Supplies
JoAnn’s upholstery section stocks cotton piping in various colors. Amazon offers bulk discounts for larger projects—ideal if you’re crafting multiple pieces. For vinyl remnants:
- Check Lowe’s clearance racks weekly
- Ask flooring contractors for unused rolls
- Visit local fabric stores during seasonal sales
Mix materials for unique effects. Pair navy piping with gold vinyl borders, or weave fabric strips through cotton bases. Your color combinations become the ultimate personal touch.
How to make Living Room Rug
Discover the joy of creating a cozy, custom floor accent in just a few evenings. This method works for bathroom mats, kitchen runners, or bold 5x8 statement pieces. All you need are four basic supplies and a dash of creativity.
The process mirrors knitting’s rhythmic flow. Weave cotton piping through netting grids, securing each loop with rubber bands. These knots create plush pom-pom textures that feel luxurious underfoot. Unlike store-bought options, you control the density and color patterns.
| Project Type | Netting Size | Piping Needed | Time Investment |
|---|---|---|---|
| Bath Mat | 2x3 ft | 50 yards | 3-4 hours |
| Hallway Runner | 3x8 ft | 180 yards | 8-10 hours |
| Seating Area Rug | 5x8 ft | 300 yards | 15-20 hours |
Smaller projects become meditative nightly rituals. Work on a kitchen mat while streaming shows, or tackle larger designs in weekend bursts. The technique scales effortlessly—use the same steps whether crafting a 2x3 bath mat or 9x12 area rug.
Color choices let your personality shine. Mix piping hues to match existing décor or create bold contrasts. This approach solves the "wrong size rug" dilemma forever—custom dimensions fit awkward spaces perfectly.
Step-by-Step Planning for Your Rug Project
Precision transforms good projects into great ones. Proper preparation eliminates guesswork and ensures every cut aligns with your vision. Let’s map out your material needs like architects drafting blueprints.
Measuring and Cutting Materials Accurately
Start with basic math. For a 5x8 floor piece, multiply the width by netting dimensions. Standard 2-foot-wide mesh requires three 8-foot sections. Trim edges carefully to avoid gaps between joined panels.
| Rug Size | Netting Width | Panels Needed | Total Length |
|---|---|---|---|
| 4x6 ft | 2 ft | 2 | 12 ft |
| 5x8 ft | 2 ft | 3 | 24 ft |
| 8x10 ft | 2 ft | 5 | 50 ft |
Cut piping into 4-inch strands using fabric scissors. Slight variations (3.8-4.2 inches) add charming irregularities. Store pieces in labeled bins by color for easy access during assembly.
Creating an Organized Material List
Build your shopping list like a recipe. For medium-sized projects:
- 45 sq ft netting (10% extra for errors)
- 320 yards piping (minimum)
- 200 rubber bands
- Fabric marker + measuring tape
"Double your estimated piping needs – better overflowing than running short mid-project."
Track purchases in a spreadsheet with vendor details. This prevents last-minute store runs when supplies dwindle. Smart planning turns chaotic crafting into smooth creation.
Preparing Your Crafting Area
Transform an ordinary corner into a creative command center. Your workspace becomes the launchpad for textile artistry, blending function with inspiration. A well-planned crafting zone keeps supplies organized and creativity flowing.

Setting Up a Dedicated Workspace
Choose a flat surface like a dining table or foldable craft desk. Ensure ample space to spread netting panels without overlapping edges. Nearby shelves or rolling carts hold piping coils and tools within arm’s reach.
Lighting makes or breaks long sessions. Combine overhead fixtures with adjustable lamps. Opt for bulbs rated 4,000-5,000 Kelvin—bright enough to spot details without eye strain. Add a cushioned chair supporting lumbar curves for marathon weaving nights.
"Ergonomics matter more than aesthetics. Discomfort derails projects faster than tangled threads."
Store materials smartly:
| Container Type | Best For | Space Needed |
|---|---|---|
| Pegboard Wall | Scissors & measuring tapes | Vertical surfaces |
| Clear Bins | Color-sorted piping | Shelf or floor |
| Magnetic Trays | Rubber bands & pins | Worktable edges |
Leave projects undisturbed between sessions. Basements or spare bedrooms work best. No dedicated area? Use folding screens to section off living spaces temporarily.
Pair crafting with podcasts or favorite shows. Time flies when hands stay busy creating beauty. Nightly progress builds momentum—three episodes later, you’ll marvel at completed sections.
Crafting Techniques: Weaving and Assembling Your Rug
Transform loose materials into a cohesive masterpiece through methodical assembly. This phase blends precision with creative flow, turning individual strands into plush textures underfoot.
Weaving the Cotton Piping into Netting
Thread each 4-inch cotton piece through netting squares like stitching a giant tapestry. Position strands vertically, leaving equal spacing between them. Proper alignment ensures consistent density across your creation.
Pull upward gently until both ends meet above the mesh. Maintain tension to prevent sagging—snug fits create professional results. Repeat across the grid, working row by row for systematic progress.
Securing with Rubber Bands or String Alternatives
Twist small rubber bands around paired piping ends. Double-knot for extra security. This method offers speed and adjustability—perfect for first-timers.
| Method | Time per Sq Ft | Durability | Best For |
|---|---|---|---|
| Rubber Bands | 8-10 mins | 6-12 months | Quick projects |
| Elastic String | 15-20 mins | 2+ years | Heavy-use areas |
"Fluffing transforms flat strands into dimensional clouds—it’s where magic happens."
For permanent installations, wrap thin elastic string around bundles. Though time-intensive, this approach withstands frequent vacuuming. Twist clockwise while wrapping to lock fibers in place.
Finish each section by separating strands with your fingers. Fan outward to form pom-pom shapes. This step adds volume and hides securing mechanisms beautifully.
For those tackling large-scale textile projects, adjust techniques for wider layouts. Work in manageable zones to maintain consistency without overwhelm.
Understanding Rug Size and Layout Options
Proper dimensions turn functional floor coverings into design anchors. Measurements matter more than patterns when creating visual harmony. A well-proportioned piece connects furniture groupings while allowing effortless movement.
Determining Rug Dimensions for Your Room
Start with your sofa’s length—this measurement dictates minimum rug length. Extend the piece to match or exceed seating edges. For 84-inch couches, aim for 90-inch floor coverings. This prevents a "floating furniture" effect that disrupts spatial flow.
Add six inches to your sofa’s width when calculating coverage. Extra inches frame seating areas without crowding legs. Proportional balance makes rooms feel intentionally designed rather than haphazardly arranged.
| Room Type | Ideal Walkway Space | Minimum Rug Width |
|---|---|---|
| Compact | 18 inches | Sofa width +6" |
| Open Concept | 30-36 inches | Sofa width +12" |
"Scale transforms rooms. Too-small pieces look like afterthoughts, not foundations."
Walkways influence size choices dramatically. Allow 30 inches between furniture in spacious areas—18 inches suffices for cozy settings. Our rug dimensions guide explains how to adjust measurements for irregular layouts.
Contrary to popular belief, tiny rugs don’t maximize space. They create visual clutter by isolating seating zones. Full-length designs unify elements, making rooms appear larger through cohesive styling.
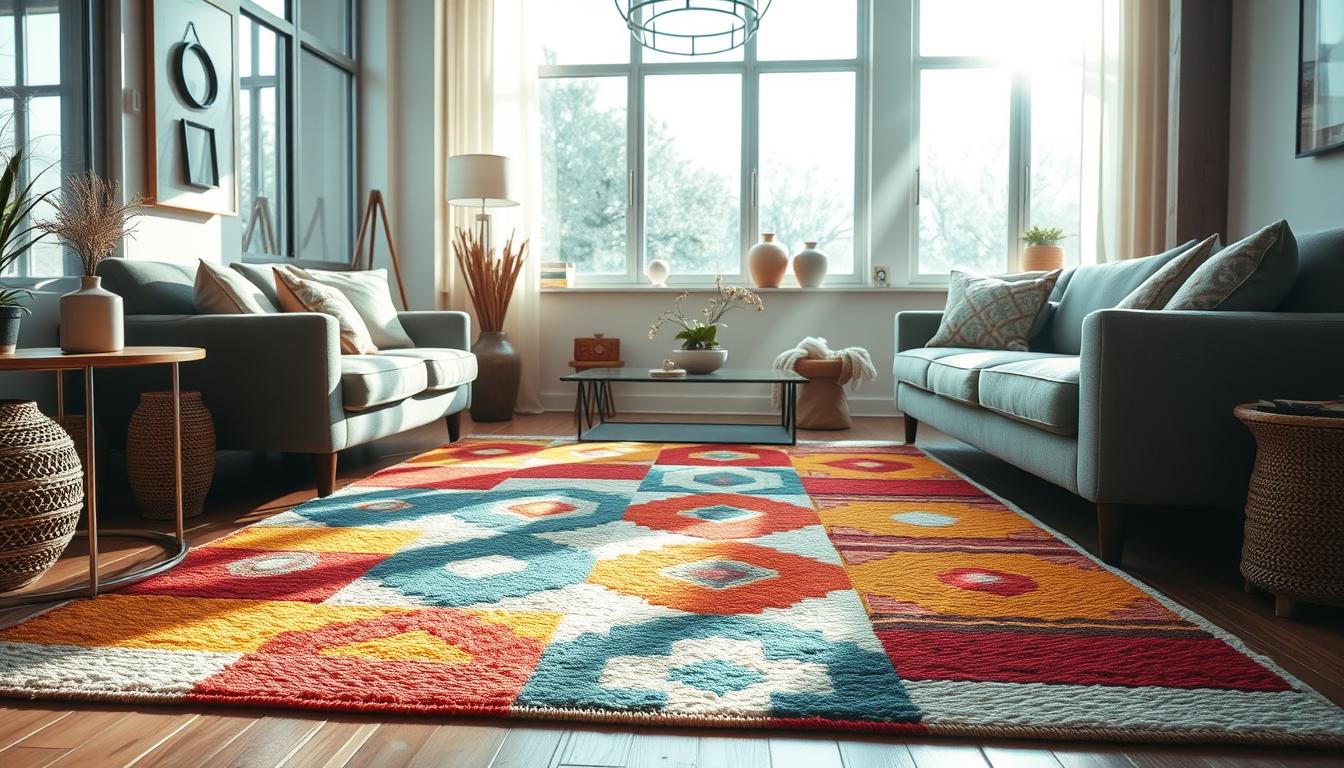
Color and Pattern Choices for a Stunning Look
Your floor becomes a canvas when colors and textures collide. Fabric stores overflow with options—soft neutrals, bold geometrics, earthy organic prints. This variety lets you design pieces that either anchor your space or become its vibrant focal point.
Explore our gallery of textured jute designs for inspiration. These examples show how patterns can elevate simple rooms into curated spaces.
Harmonizing with Existing Décor
Pull hues from throw pillows or artwork for seamless coordination. A navy-and-cream striped piece might echo coastal wall art. Earthy terracotta fibers could complement mid-century furniture legs.
Want contrast? Pair muted walls with jewel-toned accents. Emerald piping against charcoal netting creates drama in neutral rooms. Test swatches under different lighting before committing.
Pro tip: Limit patterns to 2-3 complementary scales. Large chevrons work with tiny polka dots, not competing geometrics. Solid borders frame busy centers beautifully.
Your creation becomes more than floor protection—it’s art underfoot. Every color choice reflects personal taste while solving design challenges retail options can’t touch.
FAQ
What’s the best way to measure for a custom area rug?
Start by mapping your furniture layout. Leave 18-24 inches of exposed floor around the edges for balanced proportions. Use painter’s tape to outline potential sizes before committing.
Can vinyl or fabric options match high-end styles?
Yes! Durable vinyl mimics leather textures, while patterned fabric adds depth. Brands like Joann Fabrics or Hobby Lobby offer affordable materials that elevate your design without overspending.
How do rubber bands help during rug assembly?
They temporarily secure cotton piping to netting while weaving. Replace them with discreet knots or fabric ties for a polished finish once the structure holds.
Should small rooms use bold patterns?
Scale patterns to your space. Compact areas benefit from subtle geometrics or tonal textures, while larger rooms handle intricate designs. Always test swatches under natural light first.
Why is a rug pad essential?
It prevents slipping, reduces wear, and adds cushioning. Choose eco-friendly felt or natural rubber pads—they’re safer for floors and improve longevity.
Can I mix multiple colors without clashing?
Limit your palette to 3-4 hues. Pull shades from existing décor, like throw pillows or wall art. Neutral bases with accent tones create harmony in busy spaces.
What’s the ideal workspace setup for rug crafting?
Use a large, flat surface like a dining table. Keep scissors, measuring tape, and supplies within reach. Lay down protective sheets to catch debris during cutting or weaving.