


Article: 6 Sleek Steps to Make a Runner Rug
6 Sleek Steps to Make a Runner Rug
What if your staircase could radiate timeless elegance without draining your savings? Imagine replacing outdated carpet with a custom design that rivals high-end interiors—like the striking transformation in Hilary Duff’s home featured by Better Homes and Gardens. This isn’t about splurging on rare vintage pieces but mastering a clever DIY approach anyone can tackle.

Creating a stair runner that wows involves blending multiple synthetic fiber rugs with vintage-inspired patterns. These affordable alternatives mimic luxurious textures while offering durability for high-traffic areas. The secret lies in strategic planning—from precise measurements to selecting cohesive colors—to achieve a seamless look that elevates your home’s aesthetic.
Why settle for generic flooring when you can craft a personalized statement? Our in-depth guide reveals expert tips for navigating common challenges, ensuring professional results even for first-time creators. Discover how mixing patterns and prioritizing practicality unlocks a cost-effective path to sophistication.
Key Takeaways
- Transform basic stairs into a design focal point using coordinated synthetic rugs
- Master measurement techniques for perfect pattern alignment
- Combine colors and textures strategically for vintage charm
- Learn budget-friendly alternatives to custom installations
- Address installation hurdles with proven solutions
- Enhance durability through material selection and maintenance
Gathering Materials and Necessary Tools
Proper preparation separates frustrating DIY attempts from stunning transformations. Before touching your staircase, assemble these specialized items to ensure smooth progress and lasting results.
Essential Materials for Your Project
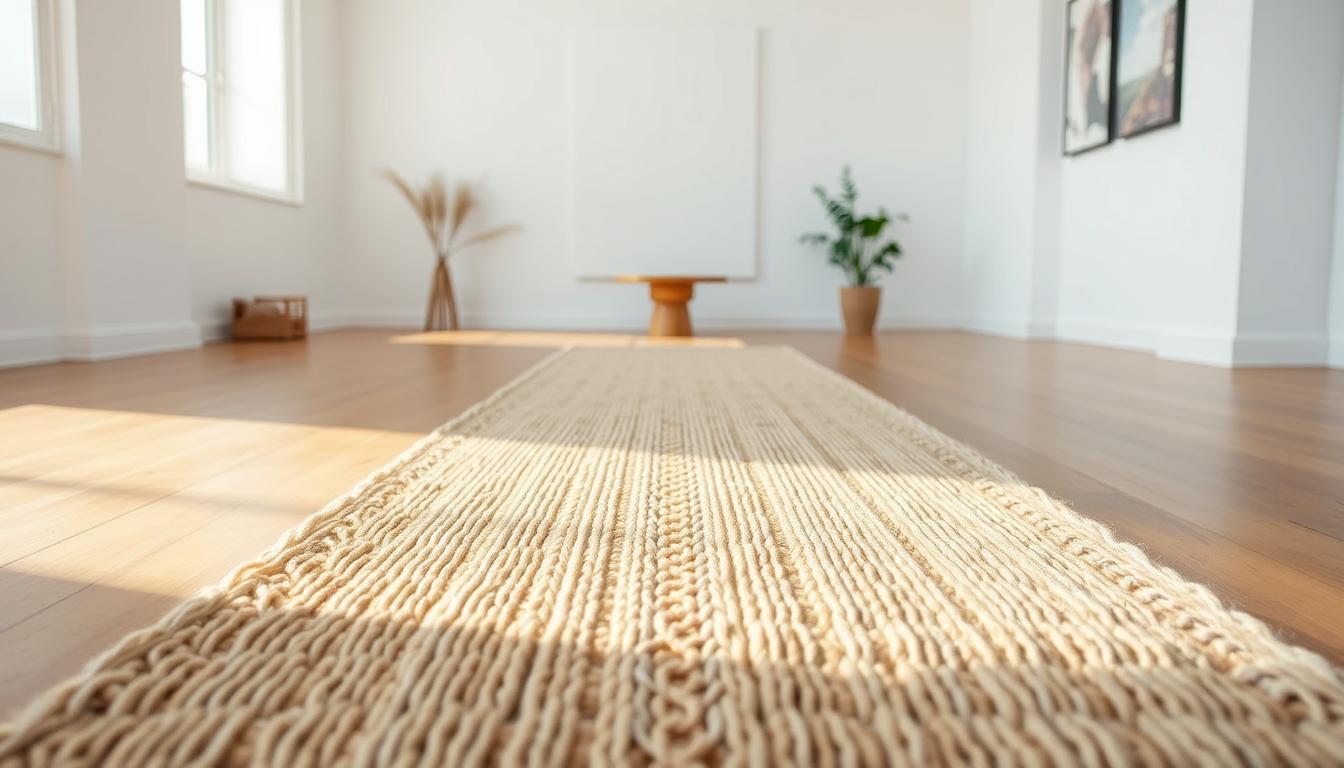
Double-sided carpet tape forms the backbone of your installation, gripping both stairs and fabric securely. Pair it with synthetic fiber rugs like the Loloi Loren series—their 27-inch width fits most staircases perfectly. Three coordinating patterns create visual depth while maintaining structural harmony.
Seam sealer and specialized tape prevent fraying at connection points. These materials work together to hide joints between rug sections, creating the illusion of a single continuous piece.
Recommended Tools and Equipment
A narrow crown staple gun drives fasteners efficiently without hand strain. Unlike bulkier models, its streamlined design lets you work comfortably in tight stairwells. Keep a utility knife nearby for trimming excess material—dull blades tear fibers instead of cutting cleanly.
| Item | Purpose | Examples |
|---|---|---|
| Adhesives | Secure rug to stairs | Carpet tape, seam sealer |
| Cutting Tools | Shape materials precisely | Utility knife, sharp scissors |
| Measurement Aids | Ensure proper alignment | Tape measure, painter's tape |
Optional items like flexible wood filler address uneven surfaces before installation. A carpet tack remover proves invaluable for adjusting misplaced sections without damaging materials.
Preparing Your Stairs for Runner Installation
A flawless installation starts with meticulous groundwork. Your staircase’s current condition directly impacts how well your new design adheres and endures over time. Dedicate effort here to avoid costly corrections later.

Step-by-Step Prep Work
Start by stripping existing carpet and underlay completely. Older installations often leave behind stubborn staples and gripper rods—use pliers and a pry bar for stubborn remnants. Wear gloves to protect hands from sharp debris during this phase.
Inspect each tread and riser for cracks or uneven surfaces. Flexible wood filler addresses minor imperfections, while deeper damage may require replacement boards. Let repairs cure fully before sanding edges smooth for painting.
Focus paint applications on visible stair perimeters rather than covered areas. This approach maintains functionality—you can still use steps during drying periods. Choose durable enamel paint for high-traffic zones near the bottom and top steps.
Proper spacing between materials prevents buckling. Leave a 1/8-inch gap between filler and stair edges to accommodate natural expansion. These details ensure your project withstands daily use while preserving aesthetic integrity.
Though time-intensive, thorough preparation creates a stable base for secure installation. Rushing this stage risks visible flaws or loose sections that compromise safety and visual appeal. Invest wisely now for lasting results.
How to Make Runner Rug: Detailed Installation Process
Accurate installation ensures your design functions as beautifully as it appears. Focus on three core actions: measuring twice, securing once, and perfecting connections between materials.
Measuring and Marking Your Staircase
Begin at the bottom tread riser with a flexible tape measure. Record vertical height from riser base to tread nose, adding 2 inches for overlap. Measure horizontal stair tread depth separately. Multiply combined dimensions by your total step count to determine required runner length.
Calculate side margins by subtracting your runner’s width from the stair tread width. Divide remaining space by two—this centers your design. Mark boundaries with painter’s tape across all steps before cutting materials.
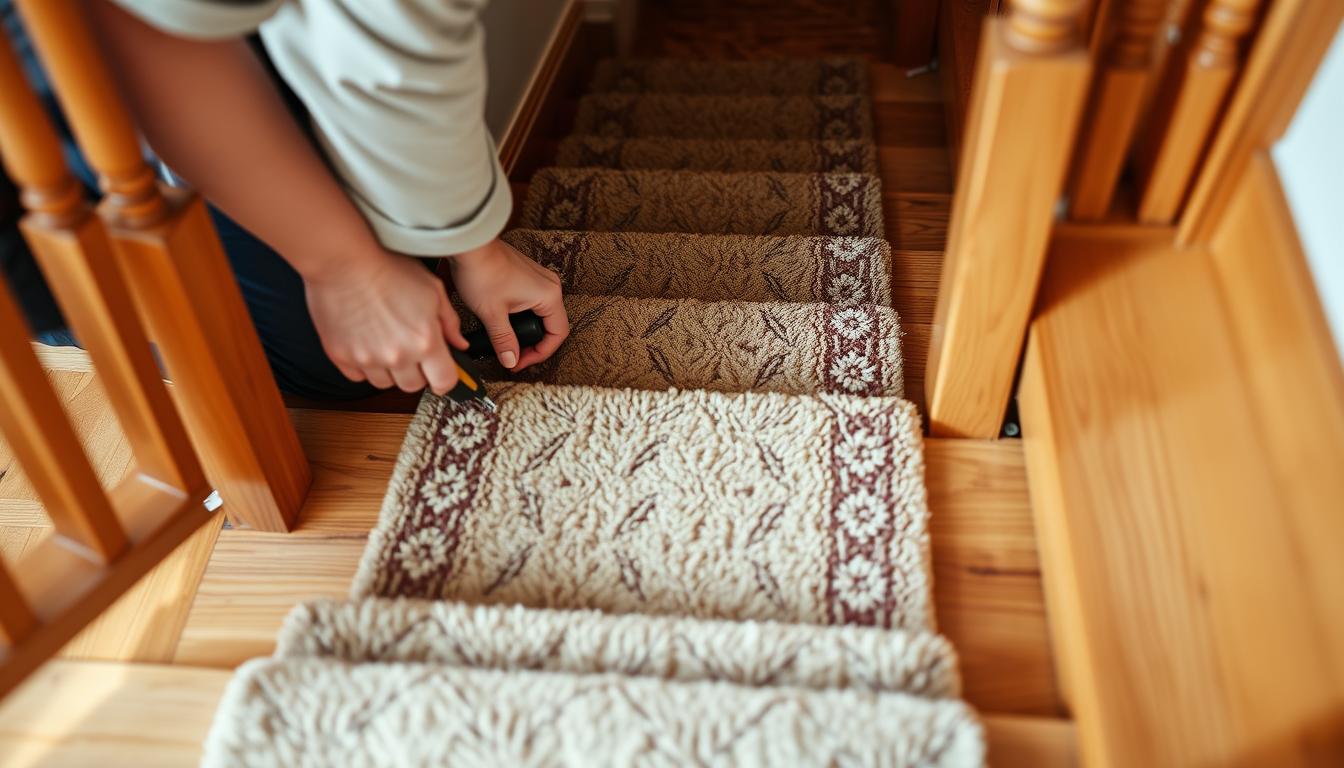
Stapling, Taping, and Seam Sealing Techniques
Position double-sided carpet tape along each tread’s centerline. Starting at the lowest step, press runner fabric onto adhesive while pulling upward. Secure the base of each riser with staples spaced 4 inches apart.
Hide joints under tread noses by aligning pattern repeats precisely. Apply seam sealer to raw edges before pressing sections together. Weight overnight with books for invisible connections. This method prevents fraying while maintaining diy stair project integrity.
- Anchor staples vertically at riser bases and horizontally under noses
- Maintain tension without overstretching synthetic fibers
- Test stability by walking upward before sealing seams
Achieving a Seamless Mix and Match Look
Crafting a staircase that tells a visual story begins with intentional pattern play. The magic lies in creating rhythm through alternating designs while maintaining cohesive color flow—a technique perfected in Hilary Duff’s stair transformation showcased by Better Homes & Gardens.

Aligning Patterns for Vintage Character
Choose three synthetic fiber rugs with shared color tones but distinct motifs. Loloi’s printed collections work beautifully here. Start each new pattern at alternating treads to mimic the organic feel of collected heirlooms. This creates depth without overwhelming the eye.
Hide seams under tread noses where shadows naturally fall. Use these transition points to shift between designs. As one interior designer notes:
"The best mix-and-match installations feel discovered, not manufactured."
| Pattern Type | Color Strategy | Placement Tip |
|---|---|---|
| Floral | Base palette | Start at landing |
| Geometric | Accent tones | Mid-stair transitions |
| Abstract | Bridge colors | Upper step clusters |
When working with different sizes, align dominant motifs vertically. This maintains visual continuity despite width variations. For perfect cohesion, explore our curated vintage-inspired collections designed specifically for layered installations.
Test layouts on flat ground first. Adjust pattern sequencing until the flow feels natural. The final look should whisper "carefully curated" rather than shout "perfectly matched."
DIY Stair Runner Techniques for Landings and Turns
Mastering transitions elevates your project from functional to professional. While straight staircases follow predictable patterns, landings and angled sections demand advanced planning. These areas become design focal points requiring tailored solutions.
Navigating Staircase Landings
Stop your current runner 2 inches under the landing’s nosing for clean transitions. Use identical patterns across landing surfaces to create visual breathing space. This technique prevents pattern overload while maintaining flow between levels.
Essential tools for landing success:
- Carpenter’s square for exact 90-degree cuts
- Thick cardboard sheets as cutting surfaces
- Seam tape with industrial-strength adhesive
Tips for Fitting Around Staircase Turns
Angled sections at bottom stairs require mock-ups before cutting. Fold material along turn lines to test fitment. Mark cutting lines with chalk while maintaining 1/8-inch clearance from walls.
Follow this sequence for crisp corners:
- Position uncut runner around turn
- Secure midpoint with temporary tape
- Cut excess material in gradual increments
- Seal edges before final adhesion
Overnight compression with weights ensures invisible seams. Place art books or concrete blocks on joined areas for 12 hours. This step proves critical for turns receiving heavy foot traffic.
Enhancing Runner Durability and Safety
Protecting your staircase's elegance starts at the edges. Apply carpet seam sealer every time you trim materials. This simple step prevents fraying that could ruin your hard work over time. For homes with pets, consider this pro tip: lightly burn trimmed edges with a lighter flame before sealing. The fused fibers resist curious claws better than tape alone.
Proper staple placement matters for safety and longevity. Position fasteners where they won’t snag socks or catch vacuum cleaners. A narrow crown staple gun works well, but pneumatic staplers provide stronger holds for high-traffic areas. Always test stability by walking barefoot across secured sections.
| Tool | Benefit | Best For |
|---|---|---|
| Seam sealer | Prevents unraveling | All installations |
| Butane lighter | Creates fused edges | Pet households |
| Pneumatic stapler | Maximum hold | Commercial spaces |
Pet owners should take extra precautions. One designer learned the hard way:
"Our cats turned loose threads into toys until we upgraded our sealing method."
Check seams monthly where paws frequently pass. A quick brush with clear nail polish reinforces weak spots.
For lasting results:
- Inspect edges seasonally
- Keep spare sealer for touch-ups
- Use rug pads under landing sections
These strategies ensure your creation stays secure and stylish. A little maintenance goes far in preserving both safety and visual appeal.
Creative Ideas and Variations for Runner Rugs
Your staircase becomes a canvas when exploring design possibilities. With endless combinations of textures and motifs, stair coverings evolve from functional elements to artistic statements. Balance practicality with personality using these innovative approaches.
Incorporating Vintage and Modern Styles
Synthetic nylon offers crisp pattern definition ideal for geometric designs, while wool’s natural fibers complement floral motifs. Mix eras by pairing low-pile modern rugs with distressed Persian-inspired prints. For coastal homes, sisal adds organic texture but requires frequent edge sealing to prevent fraying.
Unexpected material blends create depth. Layer a flatweave jute base under colorful kilim strips for tactile contrast. This technique works well in farmhouse-style entries or eclectic lofts. Explore material pairings in our living room design guide for adjacent spaces.
Customizing Sizes and Patterns
Standard 27-inch widths suit most stairs, but expanding to 36 inches makes narrow halls feel grander. Leave 5-inch margins on each side for balanced proportions. Repurpose broadloom carpet remnants into custom runners—simply bind edges with commercial-grade tape.
Budget-conscious projects thrive with strategic material swaps. One homeowner achieved luxury appeal using £34 B&Q rugs cut to size. Added cushioning from thin felt pads enhances comfort without compromising the streamlined profile.
FAQ
What materials are needed for a DIY stair runner project?
You’ll need a carpet or rug of your choice, carpet tape, a staple gun, heavy-duty staples, seam sealer (for patterned designs), and measuring tools. For added safety, consider non-slip padding or underlay.
How do you secure a runner to the stair tread without damaging it?
Use carpet tape along the edges and center of the tread for temporary holds. For a permanent fix, staple the rug to the tread riser near the back edge, ensuring staples don’t protrude. Always test materials first.
Can you install a runner on stairs with landings or turns?
Yes. For landings, measure the space and cut the rug to fit, securing it with tape or staples. When navigating turns, fold excess material neatly or make small relief cuts (avoiding fraying) to maintain a smooth transition.
How do you align patterns for a seamless look on stairs?
Start at the top stairs and align the pattern’s edge with the tread’s front. Use seam sealer to bind sections if needed. For vintage rugs, embrace slight mismatches for a charming, eclectic finish.
What’s the best way to prevent slips on a stair runner?
Add a non-slip underlay beneath the rug. Secure edges tightly with staples or tape, and trim excess fabric near the bottom stairs. Regularly check for loose sections and re-staple as needed.
Can you customize runner sizes for different staircase widths?
Absolutely. Measure your staircase’s width and trim the rug to leave 2-4 inches of exposed tread on each side. For narrow stairs, opt for thinner rugs or center the design for balance.
How long does a DIY stair runner installation take?
Depending on staircase size and complexity, it typically takes 3-6 hours. Prep work, like measuring and cutting, consumes the most time. Work methodically to avoid errors.
Are patterned rugs harder to install than solid-colored ones?
Patterns require extra attention to alignment, especially at seams. Use seam sealer to bind edges and double-check measurements before cutting. Solid colors hide minor imperfections more easily.