


Article: 5 Luxe Steps to Make a Sheepskin Rug
5 Luxe Steps to Make a Sheepskin Rug

Imagine transforming nature’s raw materials into luxurious home accents without boutique price tags. For generations, resourceful creators have turned humble sheepskins into heirloom-quality floor coverings using methods refined over decades. This isn’t about quick fixes – it’s about mastering a craft that rewards patience.
The journey begins with understanding why handmade rugs outperform mass-produced alternatives. You control every detail, from selecting premium hides to perfecting the finish. While factories prioritize speed, your focus stays on quality and durability.
Through trial and error, artisans have streamlined a five-stage process that guarantees success. These steps eliminate guesswork while preserving the wool’s natural softness. You’ll work with simple tools, transforming what some consider farm byproducts into stunning centerpieces.
Key Takeaways
- Master traditional techniques used for generations
- Convert raw materials into durable home accents
- Follow a refined method perfected over years
- Create premium pieces at minimal cost
- Develop skills for consistent, professional results
Introduction to Crafting Your Sheepskin Rug
Discarded hides hold hidden value waiting for creative hands. Many homesteaders view fresh sheepskins as byproducts, but these materials become plush floor coverings through careful transformation. This craft turns potential waste into lasting decor while honoring traditional methods.
An Overview of the Process
Seven phases convert raw materials into finished pieces. Each stage demands attention – from initial rinsing with cool water to final trimming. Proper timing ensures the wool retains its softness while the skin cures completely.
Temperature control proves critical during drying phases. Rushing this work risks shrinkage or uneven textures. Most projects require 3-4 weeks, allowing natural processes to strengthen fibers without harsh chemicals.
Benefits of Creating Your Own Rug
Handcrafted pieces outperform store-bought options in durability and customization. You choose every detail – fleece density, shape, and edge treatments. Unlike factory products, your rug maintains its integrity through years of use.
This approach saves money while reducing environmental impact. Upcycled sheepskins keep materials from landfills, aligning with eco-conscious values. The satisfaction of completing each step yourself adds intangible value to the finished piece.
Gathering Materials and Setting Up Your Workspace
Quality craftsmanship begins with proper preparation. Locate suppliers who handle fresh sheepskins correctly – many butchers discard these gems daily. Act quickly when acquiring hides, as delays risk spoilage.

Selecting High-Quality Sheepskins and Tools
Inspect each skin thoroughly before purchase. Look for intact edges and uniform wool density. Avoid pieces with discoloration or strong odors – these indicate aging issues.
Cooling proves vital before preservation. Lay hides flesh-side up on pallets for 6-24 hours, depending on humidity. Never stack warm skins, as trapped heat accelerates decay.
| Material/Tool | Purpose | Quantity | Notes |
|---|---|---|---|
| Fresh Sheepskins | Base material | 1-5 | Source within 24hrs of slaughter |
| Fine Salt | Preservation | 100lbs | $1.95 per 100lbs at US grocers |
| Fleshing Knife | Fat removal | 1 | Sharp curved blade recommended |
| Wire Brush | Cleaning | 1 | Stiff bristles work best |
| Stretching Frame | Drying | 1-2 | Use pallets for lamb skins |
Organize your workspace with separate zones for washing, salting, and drying. Ensure good airflow near curing areas. Keep salt containers sealed when not in use – moisture clumps granules.
Position frames near drainage points for wet operations. Protect drying spaces from direct sunlight using breathable cloth covers. This setup prevents shrinkage while allowing proper airflow.
how to make Sheepskin Rug: Understanding the Essentials
Transforming raw hides into lasting decor starts with smart material choices. Local slaughterhouses often discard untreated skins that hold immense potential. Connect with meat processors early – many happily give away pieces they’d otherwise trash.
Sourcing and Handling Raw Materials
Freshness determines your project’s success. Inspect each skin for uniform wool distribution and intact edges. Remove residual flesh within six hours using curved blades – delayed cleaning invites bacterial growth.
Create drainage channels by propping hides on wooden slats. This positioning lets fluids escape while air circulates. Rotate pieces every three hours during initial drying to prevent moisture buildup.
Key Equipment and Ingredients
Proper tools simplify complex tasks. A wire brush becomes your ally for removing debris, while pH-balanced solutions maintain wool’s natural oils. Always measure additives precisely – guessing alters chemical reactions.
| Tool/Ingredient | Function | Quantity | Usage Tip |
|---|---|---|---|
| Curved Fleshing Knife | Meat removal | 1 | Sharpen every 20 minutes |
| Coarse Salt | Moisture extraction | 2 lbs per skin | Apply in circular motions |
| Wire Brush | Fiber cleaning | 1 | Use diagonal strokes |
| Neatsfoot Oil | Conditioning | 8 oz | Warm before application |
| Plastic Tubs | Solution mixing | 3 | Label contents clearly |
Timing proves crucial when working with natural materials. Begin the curing process within four hours of acquiring skins. Monitor water temperatures during rinses – sudden changes shock fibers.
Store prepared hides in cool, dry spaces until treatment. Proper storage preserves elasticity, ensuring smooth progression through later stages. Remember – patience during preparation prevents problems down the line.
Cleaning and Curing the Sheepskin
Proper cleansing transforms raw hides into durable, soft masterpieces. This phase determines whether your project becomes a cherished heirloom or develops hidden flaws. Precision matters most when balancing thorough cleaning with wool preservation.
Initial Washing and Water Rinsing Techniques
Submerge the skin in cool water using a large container. Lift and lower it gently – aggressive motions mat fibers permanently. Repeat this motion 5-7 times, letting gravity pull debris downward.
Recruit a partner for wringing. Grasp opposite ends and twist slowly clockwise. This removes water without crushing delicate structures. Continue rinsing until liquid flows clear – typically 3-5 cycles.
Applying Salt for Proper Curing
Cover the entire flesh side with salt using a shaker bottle. Target ½" depth – enough to draw moisture without clumping. Pay extra attention to leg openings and neck areas where folds trap moisture.
Let the salt work for four days in a cool space. Brush off crystals using gloved hands once the skin feels dry to the touch. This completes the first preservation stage while maintaining natural flexibility.
Stretching, Drying, and Preventing Shrinkage
Preserving natural materials demands precision during the final curing stage. Proper tension prevents warping while maintaining the skin's original dimensions. Three proven techniques balance workspace limitations with optimal results.
Using Frames and Hanging Methods
The frame-nailing approach offers maximum control. Secure the skin to wooden boards using rust-resistant nails spaced 3 inches apart. This method works best for irregular shapes needing edge-to-edge tension.
Adjustable knots provide flexibility during drying. Use parachute cord to create a grid pattern across the frame. Tighten lines weekly as the cover contracts – this prevents tears while maintaining shape.
| Method | Advantages | Equipment |
|---|---|---|
| Nailed Frame | Precise shape retention | Wooden pallet, 50+ nails |
| Knotted System | Adjustable tension | Paracord, stakes |
| Gravity Hang | Minimal tools required | 2x4 lumber, hooks |
For gravity-assisted drying, attach timber strips to the skin's ends. Hang vertically in a dry area with airflow. Rotate weekly to ensure even curing.
Most projects require 14-21 days to fully harden. Test readiness by pressing the surface – properly cured leather won’t indent. Store finished pieces in climate-controlled spaces to maintain quality for years.
Check tension weekly. Loose areas need immediate adjustment to prevent permanent wrinkles. A bit of patience during this phase ensures your creation withstands daily use without losing its luxurious feel.
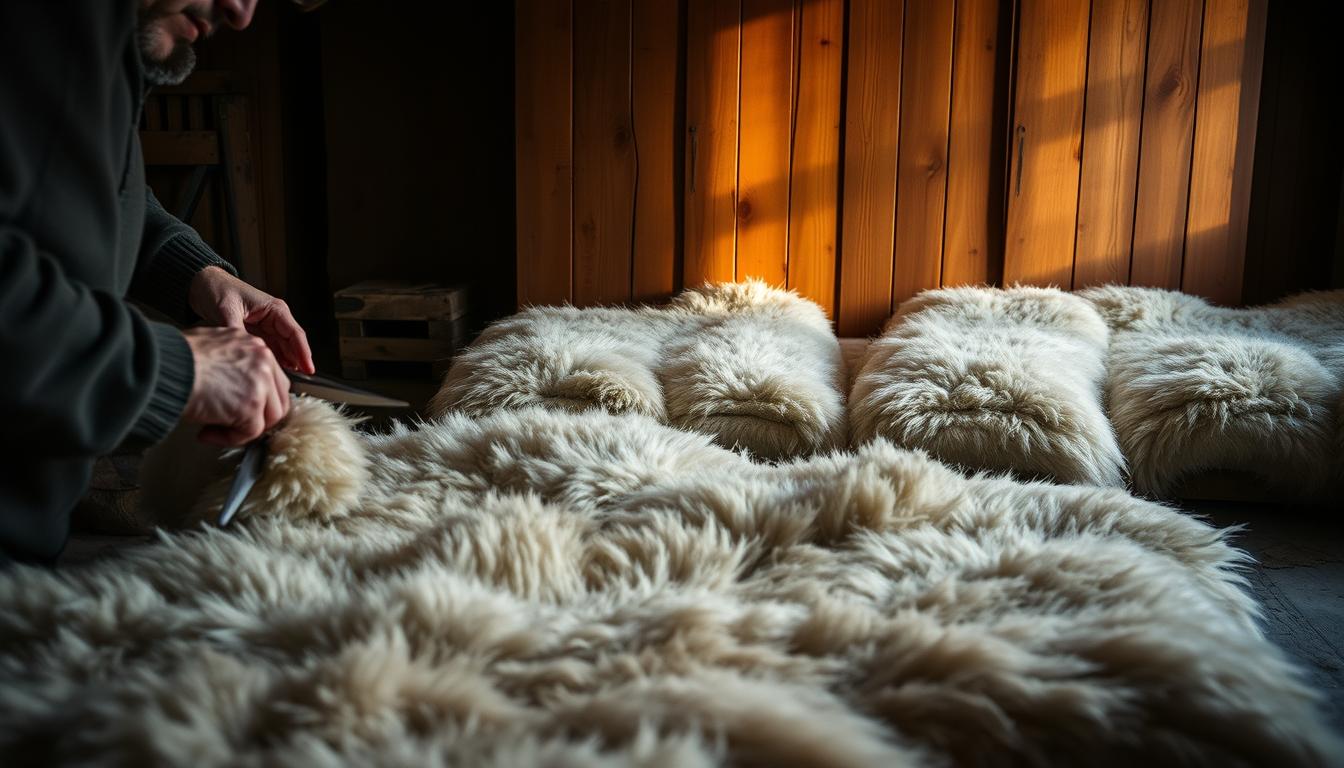
Removing Fat and Enhancing Fleece Quality
Refining natural materials requires strategic tool progression. Start by assessing the skin's condition – well-prepared hides might skip this phase entirely. Focus on areas where fat deposits cling stubbornly to the leather underside.

Tool Mastery for Optimal Results
Begin with manual wire brushes to loosen surface debris. Circular motions lift fibers while dislodging fat particles. Upgrade to power tools when tackling dense areas – drill attachments save hours of labor.
| Tool | Purpose | Best For |
|---|---|---|
| Stiff Wire Brush | Initial fat removal | Large surface areas |
| Rotary Drill Attachment | Deep cleaning | Stubborn deposits |
| Curved Knife | Precision scraping | Edge work |
| 220-Grit Sandpaper | Surface finishing | Final smoothing |
Multiple cleaning cycles often prove necessary. Test fleece quality by running fingers through the wool – satisfactory pieces feel uniformly soft. Repeat brushing until no residue transfers to your palms.
The magic happens when fibers regain their natural loft. Proper technique separates matted strands without causing breakage. Rotate the hide frequently to maintain consistent pressure across all sections.
Over months of practice, you'll develop efficient movements that preserve fleece integrity. Document which tools work best for different hide thicknesses. This knowledge becomes invaluable when handling rare or premium materials.
Treating and Softening the Rug Material
Natural conditioning transforms cured leather into supple material. This phase uses kitchen staples to restore flexibility while enhancing the fleece's natural luster. Proper technique here determines whether your creation feels stiff or luxuriously pliable.
Crafting the Conditioning Blend
Mix equal parts egg yolk, olive oil, and water in a bowl. Add a teaspoon of mild soap to emulsify the solution. Whisk until the texture resembles thin pancake batter – this ensures even coverage during application.
Apply the mixture thinly using a sponge or soft brush. Work from the center outward, ensuring every inch of the skin gets coated. Let each layer absorb completely before adding another – typically 45 minutes between coats.
Mechanical Softening Techniques
Flip your wire brush after applying the treatment. Use the back to massage the solution deeper into the fibers. Circular motions break down stiff areas while distributing natural oils evenly.
Repeat this process 8-10 times over three days. Each cycle includes:
1. Fresh treatment application
2. 30-minute absorption period
3. Brush massage session
4. Final fleece brushing
Test progress by folding a corner – properly softened skin bends without cracking. Adjust your technique if certain areas resist conditioning. A bit of extra attention ensures uniform softness across the entire surface.
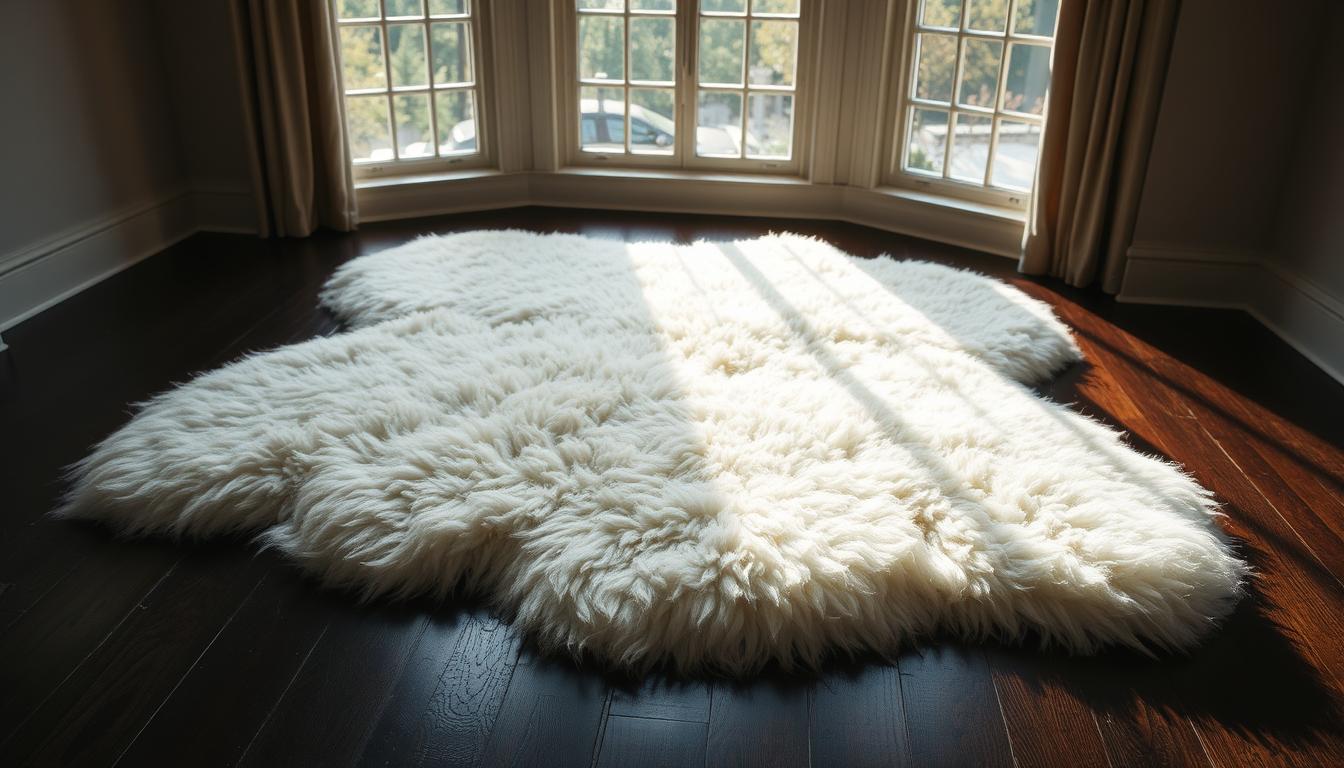
Cutting and Refinishing the Rug for a Luxe Look
Your cured material now transforms into a refined centerpiece through careful shaping. Precision at this stage elevates functional craftsmanship to artisanal elegance. Follow these steps to achieve crisp lines and polished surfaces worthy of designer spaces.
Marking and Cutting to Desired Shapes
Trace your vision onto the skin using chalk or a fabric pencil. For symmetrical designs, fold the material lengthwise and mark half the pattern. This mirroring technique ensures balanced proportions. Consider creative rug shaping techniques like rounded corners or organic curves for modern flair.
Use sharp fabric scissors for clean cuts. Test blades on scrap areas first – dull tools fray edges. Work slowly, letting the weight of the shears do the cutting. Rotate the piece frequently to maintain control over intricate sections.
Final Touches on Edges and Texture
Inspect the perimeter for uneven strands. Trim stray fleece fibers with grooming shears, angling blades downward. This creates a tapered edge that resists matting. Brush the entire surface to restore loft and identify any missed spots.
For added durability, apply a thin layer of leather conditioner along cut edges. This prevents cracking while maintaining flexibility. Your finished piece now combines structural integrity with tactile luxury, ready to grace floors for years.
FAQ
What’s the best way to remove vegetable matter from raw fleece?
Use a wire brush to gently comb through the wool, working in layers. For stubborn debris, rinse the fleece multiple times in cold water and pick out remaining bits by hand.
Can you reuse salt during the curing process?
No—salt absorbs moisture and fat from the sheepskin. Replace it after each application to ensure proper curing and avoid bacterial growth.
How do you prevent shrinkage during drying?
Stretch the skin tightly on a frame or hang it evenly. Avoid direct heat, and brush the wool periodically with a wire brush to maintain its texture and loft.
Why use egg and soap in the treatment mixture?
The combination of egg yolk, mild dish soap, and oil helps break down residual fat while softening the fibers. Apply it twice, working it into the skin side for flexibility.
How long does it take to fully cure a sheepskin rug?
Depending on humidity, curing can take 2–4 days. Check for pliability—properly cured skins feel supple and dry to the touch without stiffness.
What’s the safest way to trim edges after cutting?
Use sharp fabric scissors and trim in small sections. For a polished finish, lightly brush the edges with a wire brush to blend the wool fibers seamlessly.
Can you process lamb pelts the same as adult sheepskins?
Yes, but lamb pelts are thinner. Handle them gently during washing and stretching to avoid tearing. Reduce salt amounts slightly to prevent over-drying.
How do you test if rinse water is clean enough?
After multiple rinses, the water should run clear with no soap residue. Squeeze the wool—if it feels gritty, repeat the rinse process a couple more times.