


Article: 7 Creative Steps to Make a Woven Rug
7 Creative Steps to Make a Woven Rug

Imagine stepping out of the bath onto a surface that massages your feet while adding artisan charm to your space. This isn’t a luxury catalog item – it’s what happens when you transform forgotten fabrics into something extraordinary. Those old linens buried in your closet? They’re about to become your favorite home accessory.
Handcrafted floor coverings offer three times the absorbency of store-bought versions, according to textile experts. Their unique texture comes from layered fabric strips that grip moisture better than flat surfaces. Perfect for bathrooms, these creations turn wet floors from hazards into moments of tactile pleasure.
You don’t need expensive tools or years of experience. Our method adapts to what you have – a simple frame loom or just your hands for braiding. The rhythm of weaving becomes its own reward, merging practicality with creative flow. Each completed row builds something lasting from what others might discard.
Key Takeaways
- Transform fabric scraps into durable, spa-like bathroom mats
- Choose between loom-based or braided techniques based on skill level
- Natural linen provides superior water absorption and foot comfort
- Reduce waste while creating custom home decor
- Weaving’s repetitive motions promote mindfulness and focus
- Handmade pieces outlast mass-produced alternatives
Materials and Tools Required for Your Woven Rug Project
Every great creation begins with quality supplies. Your material choices directly impact the rug’s texture, durability, and ease of crafting. Natural fibers like cotton and linen outperform synthetics, absorbing spills while resisting mildew – perfect for high-moisture areas.
Selecting the Best Fabric Strips and Leftover Materials
Old bedsheets offer structured weaving potential, while t-shirts create stretchy, pliable fabric strips. A queen-sized sheet yields enough 1-inch-wide pieces for a 2x3 ft floor covering. For varied textures, mix materials through our hand-dyed wool options or repurpose denim jeans.
Hand-torn scrap fabric adds rustic charm without precise measurements. Wider strips (up to 3 inches) work for braided designs, while slender 0.7cm pieces suit detailed loom patterns. Pre-wash materials to prevent shrinkage and color bleeding.
Essential Tools: Looms, Scissors, Dyeing Kits, and More
A wooden loom with adjustable warping bars handles larger projects, though cardboard alternatives work for beginners. Sharp scissors or rotary cutters ensure clean edges, reducing fraying during weaving. Tapestry needles weave ends seamlessly into finished sections.
Plant-based dyes like alder cones transform plain linen into rich earth tones. For tension-free assembly, use strong cotton warp thread and durable yarn for braid connections. Most tools cost under $20, making this an accessible craft.
Preparation: Getting Your Fabric and Loom Ready
Before your first thread meets the loom, preparation determines whether you'll fight your materials or dance with them. This phase transforms random scraps into intentional design elements. Proper setup prevents frustration and ensures your efforts result in a functional piece that withstands daily use.
Warping Your Loom Effectively
Thread each notch with a single warp thread, using only half the heddle bar's grooves. This creates a stable foundation without overcrowding. Test tension by plucking threads – they should produce a consistent musical note when properly tightened.
Beginners often skip sampling, but weaving 4" test squares reveals crucial insights. Try three combinations:
- Medium-weight fabric strips with loose warp
- Thick strips under high tension
- Mixed widths with alternating threads
These experiments prevent wasted materials and teach howfabricbehaves under different conditions.
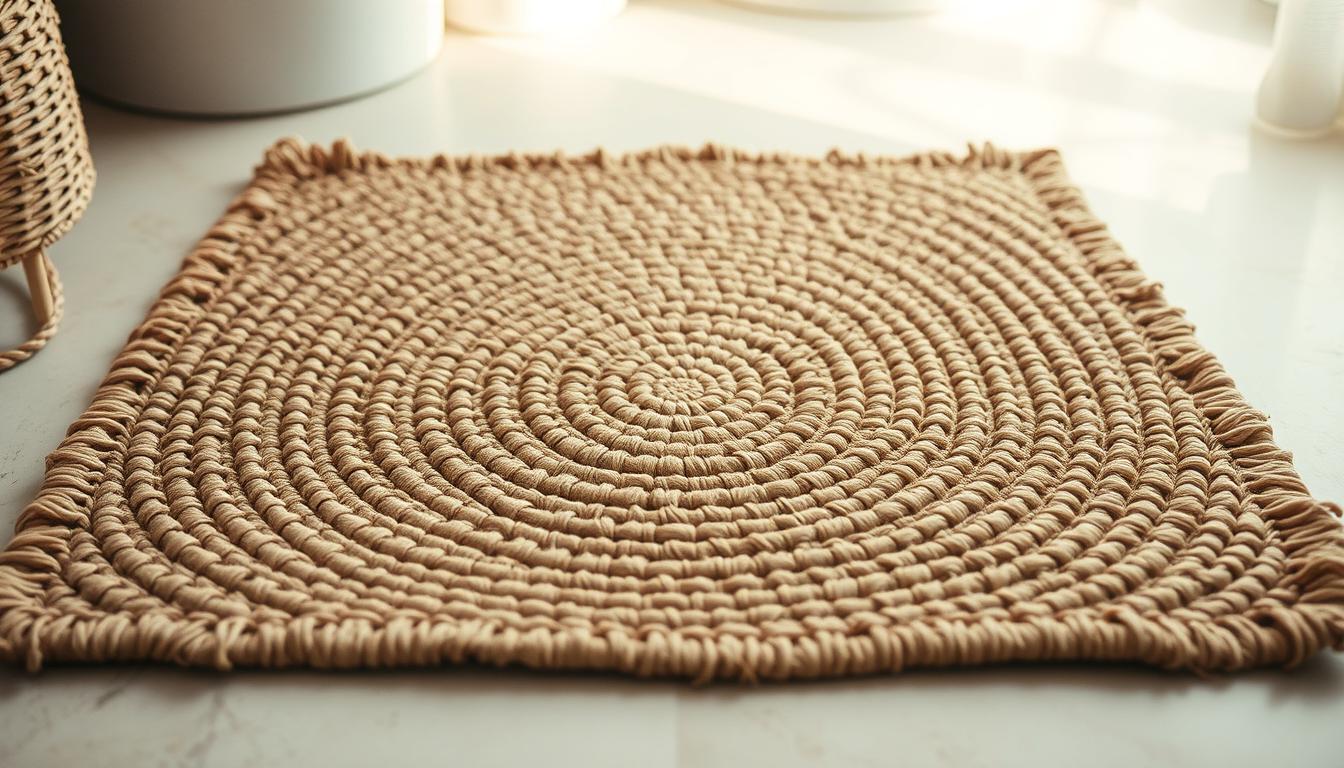
Creating Uniform Fabric Strips for Optimal Weaving
Cut materials lengthwise using pinking shears to minimize fraying. While consistency matters, allow 1/8" width variations for organic texture. Slide cardboard pieces under initial rows to maintain elevation as you work.
Store prepared strips in separate containers by color or thickness. This organization speeds up the weaving process later. Remember: edges matter more than perfect measurements – uneven sides disappear when beaten down during construction.
How to Make Woven Rug: Step-by-Step Weaving Process
The true magic begins when your prepared materials meet purposeful motion. This phase transforms separate elements into an interconnected whole through deliberate, meditative actions. Success lies in balancing structural integrity with creative flow.
Establishing the Base and Securing the Warp
Slide stiff cardboard between every other vertical warp thread. This simple barrier keeps early rows from slipping while you build momentum. Weave four foundation passes using your warp material, locking the base through repetition.
Secure knots at both ends create tension-resistant anchors. Test stability by gently tugging crosswise – proper setup resists movement while allowing slight give. These initial steps determine whether your creation lies flat or develops waves.
Executing the Over-and-Under Weaving Technique
Lift alternate threads using the heddle bar, creating diamond-shaped openings. Pass fabric strips through these spaces, alternating direction each row. This fundamental pattern interlocks materials into a cohesive surface.
Maintain even pressure as you work – too loose creates gaps, too tight warps the shape. Check alignment every three rows by running fingers across the surface. Minor adjustments now prevent major corrections later.
Develop a rhythm: lift, pass, beat down. The weaving process becomes almost automatic once muscle memory forms. Each completed inch brings tangible progress, rewarding patience with visible results.
Connecting Fabric Strips and Managing Weave Tension
The rhythm of weaving falters when materials run short – unless you master seamless transitions. Proper strip connections maintain structural integrity while preserving visual flow. This phase determines whether your creation feels handmade or homemade.

Techniques for Seamlessly Joining New Strips
When a fabric strip nears its end, prepare the new strip by aligning both ends together. Fold 1/2" of each tip backward and make parallel cuts to create matching strip holes. Slide the fresh piece under the existing material, interlocking eyelets like puzzle pieces.
| Method | Bulk Factor | Time Required | Success Rate |
|---|---|---|---|
| Eyelet Connection | Low | 45 seconds | 98% |
| Traditional Knot | High | 20 seconds | 72% |
| Overlap Weave | Medium | 30 seconds | 85% |
Pull the end new strip through both openings until tension locks the join. This creates a flat connection stronger than the original fabric. Test by tugging gently – proper alignment resists separation without visible bulk.
Preventing Loose Ends and Bulky Knots
Plan strip transitions before reaching the last 6 inches. Stagger connections across different warp threads to distribute thickness. For braided designs, connect ends diagonally rather than stacking multiple joins in one area.
Trim excess material flush with the weave surface using sharp scissors. Apply fabric glue to raw edges if needed, but let the mechanical bond of interlocked strip holes do most of the work. Your finished piece should lie completely flat without raised bumps.
Creative Tips to Customize Your Woven Rag Rug
Your floor covering becomes a canvas for self-expression when you embrace intentional design choices. Personalization transforms basic fabric strips into conversation-starting home accents that reflect your unique style.
Color Alchemy With Natural Materials
Create earthy gradients using alder cones – simmer fabric in their water for 45 minutes to unlock terracotta hues. Add iron-rich water during rinsing for deeper espresso tones. This natural approach ensures no two rag rugs share identical color patterns.
"The beauty lies in imperfect transitions – let dyes bleed slightly where fabric edges meet for organic depth."
| Dye Material | Color Result | Fade Resistance |
|---|---|---|
| Alder Cones | Warm Amber | High |
| Black Walnut | Chocolate Brown | Medium |
| Avocado Pits | Blush Pink | Low |
Mix fabric types strategically. Pair our hand-dyed wool with linen strips for contrast. The wool's springiness creates cushioned ridges, while flat-woven linen offers smooth walking surfaces.
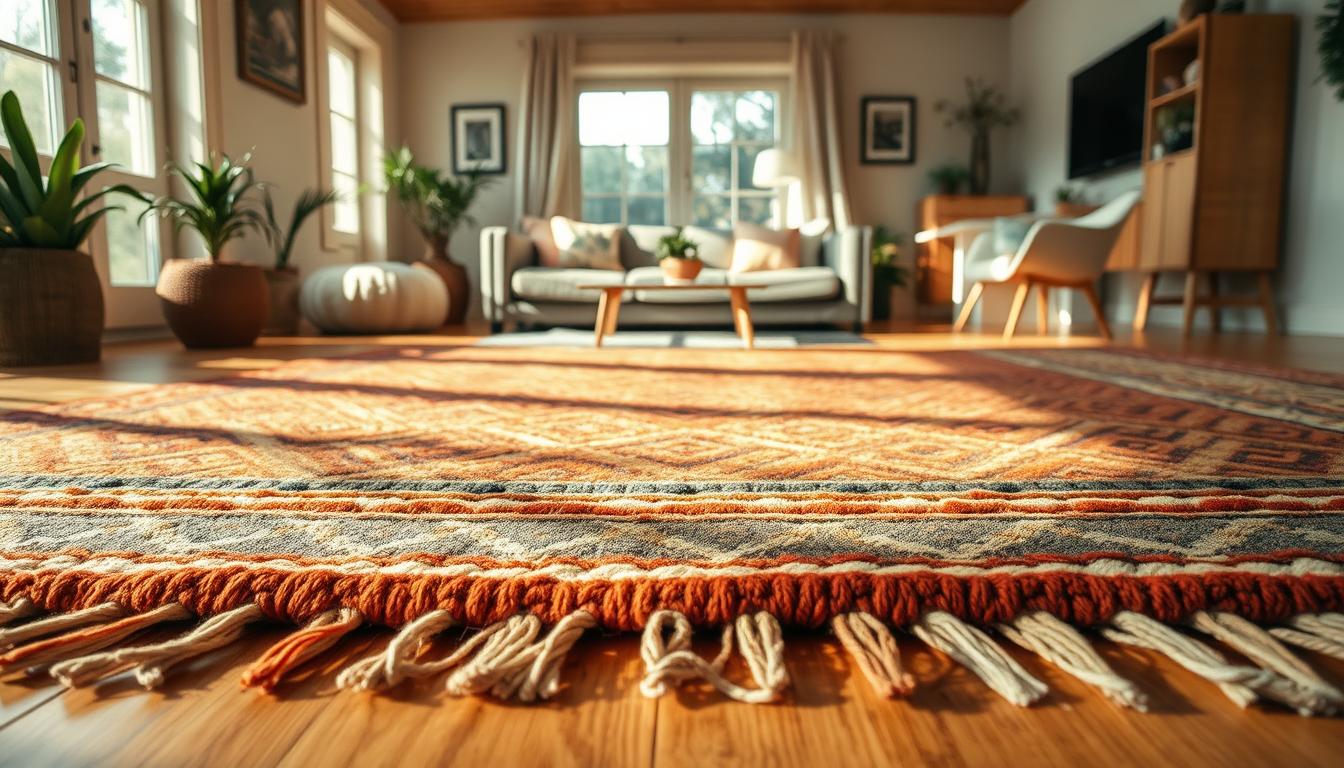
Finish edges with braided borders for rustic charm. For modern spaces, tuck raw ends under the final row. These finishing touches elevate your rugs from functional mats to art pieces.
Troubleshooting, Finishing, and Aftercare

The final stages transform your project from a collection of materials to a lasting household staple. Proper finishing techniques ensure your creation withstands daily use while maintaining its artistic appeal. Attention here separates temporary crafts from heirloom-quality pieces.
Tips for Beating Down the Fabric for a Sturdy Weave
Press fabric strips tightly using a fork’s tines or a weaving comb. Alternate between vertical and diagonal motions to lock threads in place. This compression creates a dense surface that supports feet without sagging.
Check density by sliding a needle between rows – it should meet resistance after 1 inch. For braided designs, use a rubber mallet to flatten connections without damaging fibers.
Maintaining Tension and Securing Edge Details
Guide wandering warp threads back with a pen barrel. Leave 2" extra material on each side before trimming. This buffer prevents unraveling when moving the piece off the loom.
| Edge Type | Tool | Time Needed |
|---|---|---|
| Fringe | Sharp scissors | 8 minutes |
| Bound | Upholstery needle | 25 minutes |
| Braided | Linen thread | 15 minutes |
Connect braided sections by threading loops with waxed linen cord. A 175-foot braid forms a 29-inch circle – measure as you work to maintain proportions.
Preserve your rug’s beauty through our proper maintenance routines. Rotate it quarterly and vacuum gently to prevent matting. Spot clean with cold water to maintain color integrity.
Conclusion
Crafting transforms forgotten fabrics into treasures underfoot. Your finished piece combines practicality with personality – linen strips absorb spills while textured layers massage tired feet. Minimal trimming ensures clean edges that lie flat naturally.
Braided designs excel in high-traffic areas, their interlocked structure resisting unraveling. Repurposed sheets become durable surfaces that outlast store-bought alternatives. Each pass of the needle secures your story into the fibers.
This project proves sustainability and style coexist. Custom color blends and fabric mixes turn scraps into conversation starters. Rotate your creation quarterly to maintain its shape and vibrancy.
Step onto your handcrafted surface knowing you’ve given new life to materials. The rhythm of weaving leaves behind more than floor coverings – it imprints patience and creativity into everyday moments.
FAQ
What fabric works best for braided rag rugs?
Cotton, linen, or old bedsheets are ideal because they’re durable and easy to fold into uniform strips. Avoid stretchy materials—they warp tension and create uneven edges.
How do you connect fabric strips without bulky knots?
Overlap ends by 1–2 inches and sew them with a tight whipstitch. For no-sew methods, cut a small slit (strip hole) in both ends and loop them together for seamless joins.
Why does my woven rug curl at the edges?
Uneven tension or inconsistent strip widths cause curling. Use a ruler to cut precise strips and pull each weave firmly against the warp threads to maintain flat edges.
Can I use a DIY loom for large rag rugs?
Yes! Adjust a simple frame loom by adding extra nails or pegs to accommodate wider projects. For circular rugs, try a hula hoop as a budget-friendly alternative.
How do I wash a handmade fabric strip rug?
Spot-clean with mild soap and cold water. For deeper cleaning, machine-wash on gentle cycle in a mesh bag, then air-dry flat to prevent fraying or shrinkage.
What’s the fastest way to prep fabric strips?
Fold bedsheets or cotton fabric into 2-inch-wide strips, then tear along the grain. Use pinking shears to cut edges—this reduces fraying and speeds up prep time.
How do I fix loose threads in the weave?
Secure loose ends with a tapestry needle and matching thread. Weave the tail back into adjacent strips or tie discreet knots close to the base for hidden fixes.